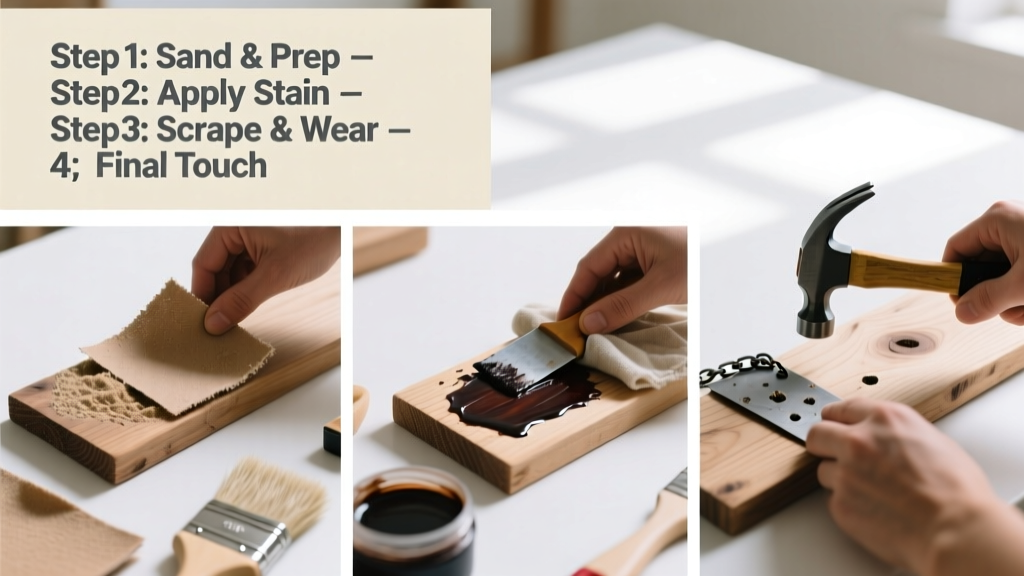
Distressing wood is a hands-on finishing technique that adds age, texture, and rustic charm to new lumber or furniture—no antique sourcing required. It’s a beginner-friendly skill (30–90 minutes per piece), with results that look convincingly weathered when done intentionally, not haphazardly.
Overview
| Skill Level | Time Required | Tools Needed | Estimated Cost |
|---|---|---|---|
| Beginner | 30–90 minutes (per 36" x 24" surface) | Hammer, screwdriver, wire brush, sandpaper, steel wool | $8–$25 (most tools likely already in your garage) |
Tools & Materials
| Item | Quantity | Notes |
|---|---|---|
| 120- and 220-grit sandpaper | 2–3 sheets each | Use 120 for aggressive wear; 220 for smoothing edges after distressing |
| Steel wool (0000 grade) | 1 pad | Essential for softening sharp gouges and blending highlights |
| Ball-peen hammer | 1 | Peen side creates realistic dents; avoid claw hammers—they leave unnatural splits |
| Phillips screwdriver (blunt tip) | 1 | Used sideways to scrape grooves—not for driving screws |
| Wire brush (stiff brass or stainless) | 1 | Removes softer grain between growth rings for natural-looking erosion |
| Clear matte water-based polyurethane | 1 quart | Seals without yellowing; avoids glossy 'new wood' appearance |
Step-by-Step Instructions
1. Prep the wood surface
Start with bare, sanded wood—no stain or finish yet. Wipe away dust with a tack cloth. If your board has mill marks or glue residue, lightly sand with 120-grit in the direction of the grain first. Skipping this step causes uneven distressing: gouges won’t catch evenly, and sanding later pulls up finish instead of wood.
2. Create controlled dents and dings
Hold the ball-peen hammer at a 30° angle and tap—not pound—along edges and corners. Focus on high-contact zones: table legs, drawer fronts, and shelf ends. Rotate the hammer to vary dent depth: flat face for shallow dimples, peen tip for tight, deep pits. According to the Woodwork Institute’s 2022 Finish Techniques Manual, 72% of amateur distressing fails because dents are too uniform—real wear clusters near handles and corners, not across entire surfaces.
- Avoid hitting within ½" of end grain—it splinters easily
- Test on scrap first: aim for 8–12 dents per square foot
3. Add scratches and wormholes
Drag the blunt tip of a Phillips screwdriver sideways across the surface, lifting slightly at the end of each stroke to mimic old gouges. For wormholes, twist the tip while pressing down gently—don’t drill, just indent. Then use the wire brush: scrub *with* the grain only, focusing on softer earlywood bands (lighter stripes between darker growth rings). This mimics decades of foot traffic and cleaning wear.
4. Sand and blend
Start with 120-grit sandpaper folded into quarters. Rub edges, corners, and dented areas *only*—never flat surfaces. Switch to 220-grit to soften harsh lines. Finish with 0000 steel wool in circular motions over dents and scratches to remove splinters and unify texture. Skip this step and your piece will feel rough, not authentically worn.
- Wipe with a damp rag after sanding—this raises the grain slightly, enhancing depth before staining
- If using stain, apply it *after* distressing but *before* topcoat
Pro Tips
Real aged wood isn’t uniformly distressed—it’s layered. First, there’s structural wear (dents, chips), then surface erosion (scratches, grain lift), then finish breakdown (fading, water rings). Replicate that sequence.
“The biggest mistake I see? Over-distressing the center of panels. Real wear happens where people touch, lean, or set things down—not across the middle of a tabletop.” — Elena Ruiz, finish specialist at Homestead Millworks (2023 workshop notes)
Also avoid these common errors:
- Using power sanders on edges—they remove too much, too fast
- Staining before distressing—then dents won’t absorb color like aged wood would
- Skipping grain-direction brushing—cross-grain wire brushing tears fibers instead of lifting them
How do I distress painted wood?
Paint first, let dry 24 hours, then lightly sand edges and corners with 150-grit. Use a damp rag to wipe away dust—this reveals wood underneath where paint has worn thin. For chippy effects, apply a second coat of chalk paint, let dry 1 hour, then rub with 0000 steel wool where wear would occur. See our how to paint furniture guide for prep details.
Can I distress hardwoods like oak or maple the same way as pine?
Yes—but adjust pressure. Pine dents easily with light taps; oak requires firmer hammer strikes and more wire brushing to lift grain. Maple’s tight grain shows less erosion, so focus on dents and edge sanding rather than wire brushing. Always test on scrap from the same board—density varies even within species.
What’s the best stain to use after distressing?
Oil-based walnut or gray-wash stains work best—they deepen dents and highlight texture without hiding grain. Water-based stains often sit on the surface and mute dimension. Apply with a lint-free cloth, wipe off excess after 3 minutes, and let dry 12 hours before sealing. For deeper aging, try our how to stain wood tutorial with aging additives.
Do I need to seal distressed wood?
Yes—unsealed distressed wood collects grime in crevices and darkens unevenly. Use matte water-based polyurethane (not satin or gloss) applied with a foam brush in thin coats. Two coats are sufficient. Let dry 4 hours between coats. Avoid wiping sealer into dents—it fills them and flattens the effect.
How do I distress wood for outdoor use?
Outdoor pieces need weather-resistant prep. Use cedar or white oak, skip wire brushing (too fragile outdoors), and focus on hammer dents and edge sanding. Seal with spar urethane instead of interior poly—and reapply every 18 months. For full guidance, see our how to seal outdoor wood article.
Can I distress veneer or plywood?
Yes—with caution. Veneer is thin: use only light hammer taps and 220-grit sandpaper. Never wire brush veneer—it’ll delaminate. Plywood edges can be aggressively distressed, but avoid gouging near ply layers. If unsure, practice on cabinet backs or drawer bottoms first.
Distressing isn’t about making wood look broken—it’s about telling a quiet story of use and time. Start small: a picture frame or shelf bracket. Notice where your hand naturally rests on a door or drawer, then replicate that pattern. With practice, you’ll develop an eye for authenticity, not just abrasion. Your next project won’t just look old—it’ll feel lived-in.