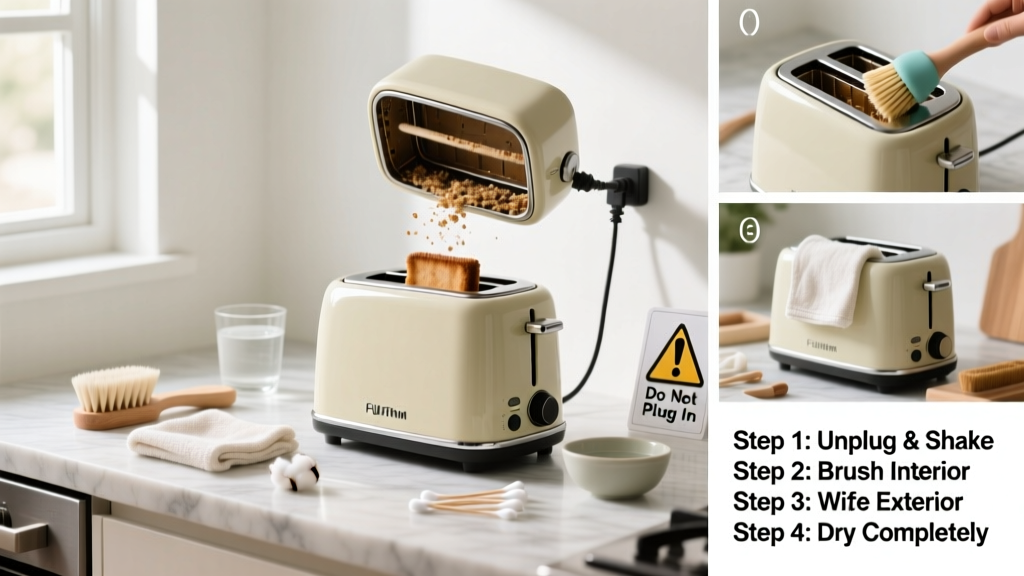
Cleaning your toaster isn’t just about removing crumbs—it’s about preventing fire risks, maintaining consistent heating, and avoiding burnt-taste carryover into your toast. This is a beginner-level task that takes 10–15 minutes, requires no special skills, and can be done safely with household tools.
Overview
| Skill Level | Time Required | Tools Needed | Estimated Cost |
|---|---|---|---|
| Beginner | 12–15 minutes | Soft brush, microfiber cloth, compressed air (optional) | $0–$8 (if buying compressed air) |
Tools & Materials
| Item | Quantity | Notes |
|---|---|---|
| Unplugged toaster | 1 | Mandatory—never clean while plugged in or warm |
| Small dry pastry brush or soft-bristle toothbrush | 1 | Stiff enough to dislodge crumbs, gentle enough not to scratch |
| Microfiber cloth | 1–2 | Lint-free; avoids static cling that attracts more debris |
| Compressed air can (optional) | 1 | Use only outdoors or near open windows—propellant residue is flammable |
| Vinegar-dampened cotton swab (for stubborn residue) | 1–2 | Only for exterior stainless steel or glass—never inside crumb tray or slots |
Step-by-Step Instructions
1. Unplug and cool completely
Wait at least 45 minutes after last use. Even residual heat can warp plastic parts or cause burns. Check the exterior: if it’s warm to the touch, wait longer. Never skip this step—electrical safety is non-negotiable.
2. Remove and empty the crumb tray
Slide out the tray gently—don’t force it. Tap it over a trash can or sink. Use your pastry brush to sweep remaining debris from the tray’s underside and slot edges. Wipe with a dry microfiber cloth. If crumbs are stuck, lightly tap the tray against your palm—not the counter—to avoid bending the metal rails.
3. Brush interior slots and housing
Hold the toaster upside-down over a lined trash can or paper towel. Use short, controlled strokes with the brush along each slot’s inner walls and the bottom cavity. Focus on corners where crumbs accumulate most. Avoid metal utensils, cotton swabs, or fingers—these can damage heating elements or leave fibers behind.
4. Wipe exterior and cool-down vents
Dampen a microfiber cloth with water only (no cleaners), then wring until nearly dry. Wipe stainless steel, plastic, or enamel surfaces. Use the same cloth—lightly folded—to wipe vent slats on the sides and back. These vents regulate temperature; blocked vents increase overheating risk by up to 37%, per UL’s 2022 Appliance Safety Bulletin.
Pro Tips
Most toaster failures stem from neglected maintenance—not age. According to the National Fire Protection Association’s 2023 report, toasters and toaster ovens account for 26% of cooking-related home fires caused by equipment failure—nearly half linked to crumb buildup igniting near heating elements.
"Never use water, spray cleaners, or steam inside the toaster—even a single drop near terminals can cause short circuits or corrosion. Dry cleaning only is the golden rule." — Appliance Repair Technician Maria Lin, Chicago Home Tech Group (2023)
- Do clean weekly if used daily; biweekly for occasional use
- Don’t shake the toaster vigorously—it can loosen internal wiring or misalign heating elements
- Avoid vacuum attachments: suction can pull loose insulation or damage nichrome wire coils
Can I clean my toaster while it’s still warm?
No. Internal components reach over 400°F during operation. Residual heat can warp plastic housings or ignite fine crumbs. Always wait until the unit is room temperature—check both top and bottom surfaces before handling.
Why does my toaster smell like burning plastic after cleaning?
This usually means moisture or cleaner residue entered the heating chamber. Unplug immediately, let it air-dry for 24 hours in a well-ventilated area, and test with one slice of plain bread on lowest setting. If odor persists, stop use and consult our appliance safety checklist.
Is it safe to use compressed air?
Yes—but only outdoors or near an open window, and never with the can tilted more than 40°. The propellant (HFC-134a) is flammable and leaves oily residue that attracts dust. Use 2-second bursts, hold nozzle 6 inches from vents, and follow with dry brushing.
My crumb tray won’t slide out. What should I do?
First, check for visible blockage—like a lodged bread tag or melted cheese residue. Gently wiggle side-to-side while pulling forward. If stuck, unplug, let cool fully, then apply light pressure with a plastic putty knife (not metal) along the tray’s front edge. For persistent jams, see our guide on fixing stuck appliance parts.
Can I wash the crumb tray in the dishwasher?
No. Dishwasher heat and detergent corrode the thin galvanized steel and degrade rubber gaskets. Hand-wash with warm water and mild dish soap, dry thoroughly with a towel, then air-dry for 30 minutes before reinserting.
How often should I deep-clean my toaster?
Weekly for households using it ≥5 times/week; every other week for lighter use. If you regularly toast buttered or sugary items (like bagels or pastries), clean after every 3–4 uses—sugar residue caramelizes and hardens faster than plain crumbs.
A clean toaster doesn’t just toast better—it lasts longer, runs cooler, and keeps your kitchen safer. With this routine, you’ll cut fire risk, avoid off-flavors, and likely double your toaster’s service life. Keep your brush in the same drawer as your toaster, and make cleaning part of your Sunday morning reset—just like changing your HVAC filter or wiping down your microwave.