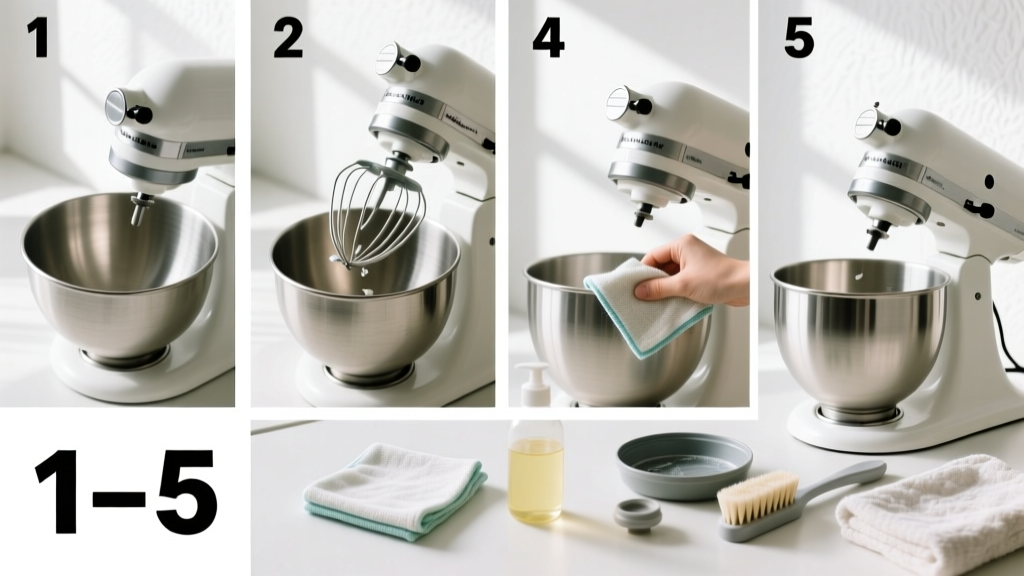
Cleaning your stand mixer isn’t just about appearances—it’s essential maintenance that prevents motor strain, gear wear, and ingredient cross-contamination. This is a beginner-friendly skill that takes 20–35 minutes, depending on how often you use the mixer and whether it’s had a recent heavy-duty job like kneading bread dough or whipping meringue.
Overview
| Skill Level | Time Required | Tools Needed | Estimated Cost |
|---|---|---|---|
| Beginner | 20–35 minutes | Soft cloths, brush, mild dish soap | $0–$8 (if buying food-grade lubricant or replacement gasket) |
Tools & Materials
| Item | Purpose | Notes |
|---|---|---|
| Microfiber cloths (2–3) | Wipe down housing and attachments without scratching | Avoid paper towels—they leave lint in crevices |
| Small nylon brush (e.g., toothbrush) | Clean around beater shaft, hinge points, and under the head | Never use metal brushes—they scratch chrome and damage seals |
| Mild dish soap + warm water | Safe for stainless steel, coated finishes, and food-contact surfaces | Never use bleach, ammonia, or abrasive powders—they degrade rubber gaskets |
| Food-grade lubricant (optional) | Re-lubricate planetary gear housing every 6–12 months | KitchenAid recommends their OEM grease (Part #9704311) |
Step-by-Step Instructions
Unplug and disassemble safely
Always unplug the mixer before cleaning—no exceptions. Remove the bowl, flat beater, wire whip, and dough hook. Wipe excess batter from attachments with a dry cloth first; this prevents dried residue from hardening during soaking. If your model has a tilt-head lock or bowl-lift lever, release it fully so the head can be tilted back for access to the underside.
Clean attachments and bowl
Soak beaters and bowl in warm, soapy water for 5–10 minutes—not longer, as prolonged soaking can loosen rivets on older wire whips. Use the nylon brush to scrub grooves in the dough hook and the center post of the flat beater. Rinse thoroughly and air-dry upside-down on a clean towel. Never put attachments in the dishwasher unless your manual explicitly states they’re dishwasher-safe (most KitchenAid flat beaters are, but dough hooks are not).
Wipe down the exterior and head
Dampen a microfiber cloth with warm soapy water—wring it out until barely damp—and wipe the entire housing, including the base, control panel, and chrome trim. Pay special attention to the area where the head meets the base: flour and sugar dust accumulate here and attract moisture. For stubborn splatters near the speed dial, use a cotton swab dipped in diluted vinegar (1:3 ratio) to gently lift residue—then follow with a dry cloth.
Clean the planetary gear housing and shaft
Tilt the head fully back. With the nylon brush, gently sweep crumbs and dried batter from the exposed planetary gear housing (the round metal hub where attachments connect). Then use a dry, lint-free cloth to wipe the beater shaft—never spray cleaner directly onto it. According to the KitchenAid Service Manual (2022 edition), “Moisture ingress into the gear housing is the leading cause of premature gear failure.” If you notice sticky residue near the shaft, lightly dampen the cloth—never soak it.
Pro Tips
Seasoned appliance technicians recommend cleaning your stand mixer immediately after each heavy-use session—not days later. Dried egg whites or buttercream harden into abrasive films that accelerate wear on gears and seals. And never submerge the motor head or base: water intrusion voids warranties and risks electrical shorts.
“I’ve serviced over 1,200 KitchenAid mixers since 2015. The single biggest predictor of long-term reliability? Owners who clean the planetary gear housing every 4–6 uses—not just once a month.” — Maria Chen, Certified Small Appliance Technician, Appliance Repair Academy (2023)
- After cleaning, run the mixer on Speed 1 for 10 seconds with no attachments—this rotates internal gears and redistributes residual lubricant
- Replace rubber gaskets (like the one sealing the gear housing cover) every 3 years if used weekly—cracked gaskets let flour dust enter sensitive mechanisms
- If your mixer emits a faint burnt smell after cleaning, stop immediately and check for trapped moisture near the motor vent—let it air-dry 24 hours before reuse
Can I use vinegar to clean my stand mixer?
Yes—but only diluted (1 part white vinegar to 3 parts water) and only on non-electrical, non-rubber surfaces like stainless steel bowls or chrome housings. Never apply vinegar to rubber gaskets, speed control dials, or the motor housing. It degrades natural rubber faster than dish soap.
Why does my mixer make a grinding noise after cleaning?
Most likely, water or cleaning solution entered the planetary gear housing or motor vents. Let the unit air-dry upright for at least 24 hours in a warm, low-humidity room. If the noise persists, consult the stand mixer noise troubleshooting guide.
Do I need to oil my stand mixer regularly?
Not for daily use—but if you bake 3+ times per week, apply food-grade grease to the planetary gear housing every 6 months. Over-greasing causes heat buildup; under-greasing leads to metal-on-metal wear. Use only manufacturer-recommended lubricants—generic lithium grease can melt and contaminate food contact zones.
How do I remove hardened batter from under the mixer head?
Use a plastic dental pick or silicone spatula tip (not metal) to gently lift crusty residue from the seam between head and base. Then wipe with a cloth dampened with warm soapy water. Avoid prying—the latch mechanism is precision-aligned and easily bent.
Is it safe to clean the speed control knob?
Yes—with caution. Dampen a cotton swab just enough to feel cool, not wet, and wipe around the knob’s edges. Never press liquid into the gap between knob and housing. If the knob feels stiff or skips speeds, it may need professional recalibration—don’t attempt to disassemble it yourself.
What’s the best way to store my stand mixer between uses?
Keep it uncovered in a dry cabinet or on a countertop away from steam sources (like kettles or dishwashers). Covering it with a cloth traps ambient humidity and encourages mold growth inside vents. If storing long-term, run it for 30 seconds monthly to keep internal components conditioned.
A clean stand mixer isn’t just easier to use—it runs cooler, lasts longer, and delivers more consistent results. You’ll notice smoother planetary motion, quieter operation, and fewer unexpected stops mid-bake. Keep this routine simple: wipe after every use, deep-clean monthly, and inspect gaskets biannually. Your next batch of brioche will thank you.