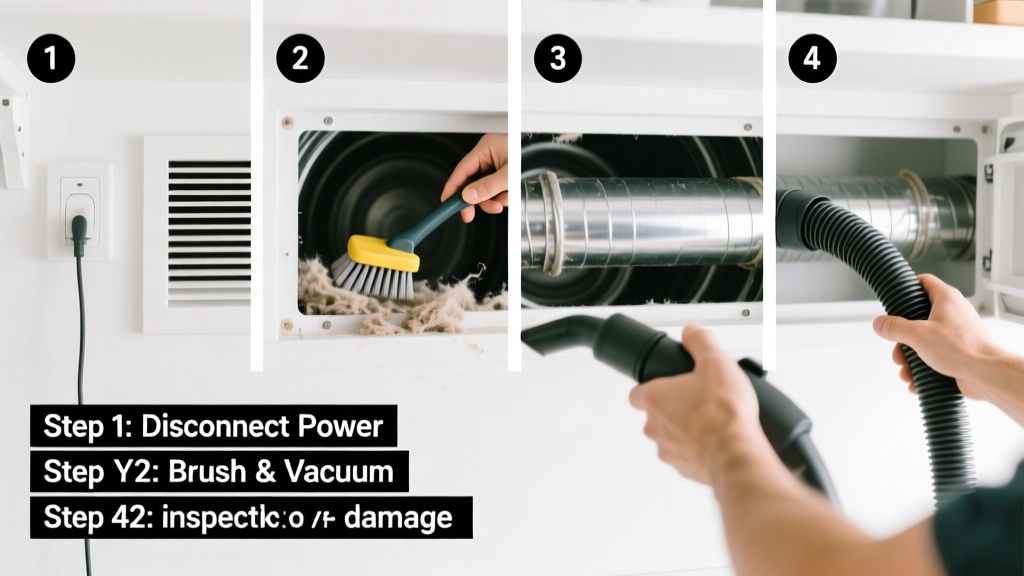
Cleaning your dryer duct is a straightforward home maintenance skill that reduces fire risk, cuts drying time, and lowers energy bills. It’s rated beginner-friendly, takes 45–75 minutes depending on duct length and accessibility, and requires no professional certification—just focus and the right tools.
Overview
| Skill Level | Time Required | Tools Needed | Estimated Cost |
|---|---|---|---|
| Beginner | 45–75 minutes | Vacuum, brush kit, screwdriver, gloves | $0–$35 (most homeowners already own key tools) |
Tools & Materials
| Item | Quantity | Notes |
|---|---|---|
| Long-reach dryer vent brush (6–10 ft flexible rod) | 1 set | Must fit 4-inch round ducts; avoid stiff wire brushes that scratch aluminum |
| Shop vacuum with hose extension & crevice tool | 1 | Regular vacuums lack suction for lint deep in ducts; shop vacs pull 80+ CFM (Consumer Reports, 2022) |
| Flathead or Phillips screwdriver | 1 | For removing dryer back panel and exterior vent cover |
| Nitrile gloves & N95 mask | 1 pair + 1 | Lint dust carries mold spores and allergens—OSHA recommends respiratory protection for enclosed duct work |
| Flashlight or headlamp | 1 | Essential for inspecting bends and wall cavities |
Step-by-Step Instructions
1. Unplug the dryer and shut off gas (if applicable)
Never skip this. Electric dryers draw 240V; gas models pose ignition risks if lint ignites near the burner. Pull the unit away from the wall—leave 6–12 inches of clearance. Place folded towels under front feet to prevent floor scratches during repositioning.
2. Remove the dryer’s rear access panel
Most dryers have 2–4 screws along the top edge of the back panel. Use your screwdriver to remove them carefully—don’t force stripped screws. Set screws aside in a small dish. Once open, you’ll see the duct connection point: a flexible aluminum or rigid metal transition duct clamped to the dryer outlet.
3. Disconnect and inspect the transition duct
Loosen the foil or worm-drive clamp securing the duct to the dryer outlet. Gently pull the duct free—watch for brittle sections or kinks. Lay it flat and vacuum both ends with your shop vac. If it’s accordion-style plastic or damaged, replace it with rigid or semi-rigid metal duct. According to the U.S. Fire Administration, flexible plastic ducts are responsible for 21% of dryer-related fires (NFPA 2023 report).
4. Vacuum the interior duct path
Insert the shop vac hose directly into the wall duct opening behind the dryer. Seal gaps around the hose with a towel to maximize suction. Run for 2–3 minutes, then pull back and empty the canister. Repeat until no more lint blows out. Then switch to the long-reach brush: feed it slowly into the duct, rotating clockwise as you push. Withdraw slowly while continuing rotation—this scrapes lint from sidewalls. Do not force past resistance; stop and vacuum again if needed.
5. Clean the exterior vent hood
Go outside and locate your dryer vent termination. Remove the vent cover—usually held by two screws or friction-fit. Clear bird nests, paint overspray, or crushed screen mesh. Vacuum the interior of the vent pipe up to 18 inches deep. Check that the flapper opens freely and closes fully; replace if warped or stuck.
6. Reassemble and test
Reattach the transition duct with a new foil or stainless steel clamp—tighten just enough to seal, not crush. Replace the back panel and all screws. Push the dryer back, ensuring the duct isn’t pinched or bent more than 45°. Plug in (or reconnect gas), run a 10-minute timed cycle on air-fluff, and verify warm air exits the outdoor vent within 90 seconds.
Pro Tips
Lint buildup isn’t just about airflow—it’s a leading cause of residential structure fires. The U.S. Consumer Product Safety Commission estimates 15,970 clothes dryer fires occurred annually between 2018–2022, with 92% linked to poor duct maintenance.
"If your dryer takes more than 45 minutes to dry a normal load—or the exterior vent feels cool during operation—you’ve already got a restriction. Don’t wait for visible lint; test airflow quarterly." — Ken Huggins, HVAC Technician & NFPA Certified Fire Inspector since 1998
- Never use leaf blowers or compressed air—they pack lint deeper and risk damaging duct joints
- Replace plastic or foil transition ducts every 5 years, even if they look fine
- Mark your calendar: clean every 6 months if you dry 5+ loads/week; once yearly for lighter use
Why does my dryer take so long to dry clothes?
Restricted airflow from lint-clogged ducts forces the heating element to cycle longer and less efficiently. A clean duct typically improves drying time by 25–40%, per Energy Star’s 2023 appliance performance benchmarks. Check for kinks first—then clean.
Can I clean the duct without moving the dryer?
You can vacuum the exterior vent and use a brush from the outside, but you’ll miss 60–70% of the lint—especially the dense clumps where the transition duct meets the wall. Moving the dryer is non-negotiable for a full clean.
Is it safe to use bleach or vinegar in the duct?
No. Chemical cleaners degrade aluminum ducts, corrode clamps, and leave residues that attract more lint. Heat and moisture from the dryer will volatilize any cleaner, potentially releasing fumes into your laundry room. Stick to mechanical removal only.
How do I know if my duct is too long or has too many bends?
The International Residential Code limits dryer ducts to 25 feet total length—subtract 5 feet for every 45° bend and 10 feet for every 90° bend. Measure your actual path, not wall distance. If you exceed the adjusted max, consider installing an inline booster fan or rerouting with rigid metal ducts.
Should I hire a professional instead?
Yes—if your duct runs through attic or crawl space, includes multiple wall penetrations, or you can’t access the exterior vent. Professionals use borescopes and powered rotary brushes. Expect $125–$220 (HomeAdvisor 2024 national average). But for standard basement or first-floor setups, DIY saves $150+ per clean.
What’s the difference between rigid and flexible duct?
Rigid metal ducts (aluminum or galvanized steel) have smooth interiors, resist crushing, and meet fire code in most jurisdictions. Flexible ducts—especially plastic or thin foil—are prone to sagging, trapping lint, and failing under heat. Rigid ducts last 20+ years; flexible lasts 5–8.
Keeping your dryer duct clean isn’t about perfection—it’s about consistency. One thorough cleaning now prevents costly repairs, extends appliance life, and protects your home. Pair this habit with regular lint trap cleaning after every load, and you’ve eliminated the two biggest failure points in your dryer system.