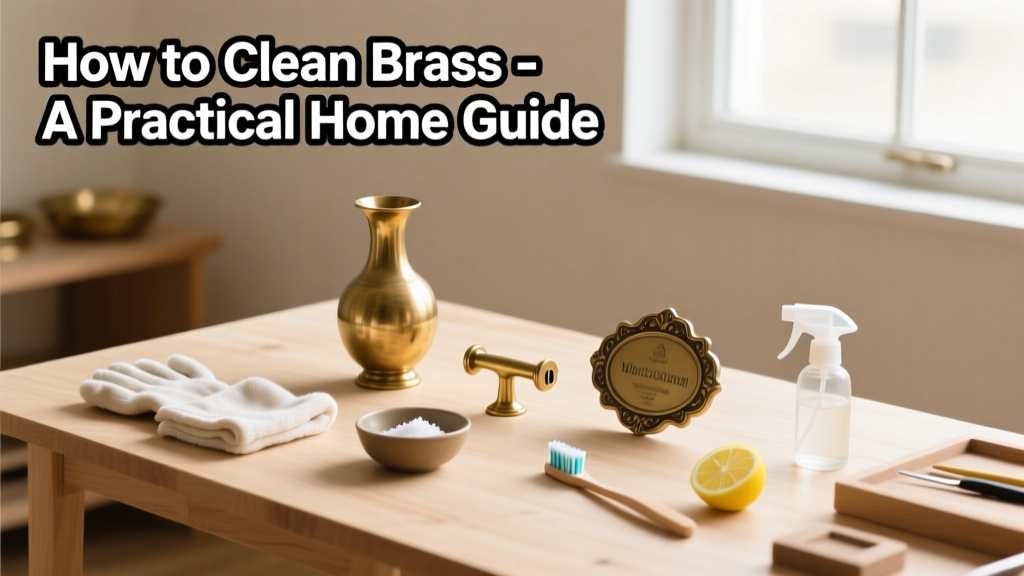
Cleaning brass is a straightforward skill that preserves both function and beauty—whether it’s a vintage door knocker, kitchen cabinet pulls, or a brass picture frame. It’s beginner-friendly, takes 10–30 minutes depending on surface area and tarnish level, and requires no special training—just attention to detail and the right materials.
Overview
| Skill Level | Time Required | Tools Needed | Estimated Cost |
|---|---|---|---|
| Beginner | 10–30 minutes per item | Clean cloths, soft brush, bowl, gloves (optional) | $0–$8 (most supplies are pantry staples) |
Tools & Materials
| Item | Quantity | Notes |
|---|---|---|
| Lemon juice or white vinegar | ½ cup | Natural acid dissolves copper oxide (tarnish) without scratching |
| Baking soda | 1–2 tbsp | Acts as a gentle abrasive; avoids harsh chemical scrubbing |
| Soft microfiber cloth | 2–3 | Lint-free and non-abrasive—critical for preserving patina on antique pieces |
| Soft-bristled toothbrush | 1 | For crevices and engraved details; never use wire brushes |
| Distilled water (optional) | Small bowl | Prevents mineral deposits from tap water on polished surfaces |
Step-by-Step Instructions
1. Assess the brass and its finish
Check whether the brass is lacquered (shiny, non-tarnishing surface) or unlacquered (naturally oxidizes). Tap gently with your fingernail—if it sounds hollow and feels smooth but cool, it’s likely lacquered. Never scrub lacquered brass—clean only with damp microfiber and mild soap. For unlacquered brass, proceed with acid-based cleaning.
2. Mix your cleaning paste or solution
For light tarnish: combine 1 tbsp lemon juice + 1 tsp baking soda into a thick paste. For heavier buildup: soak in equal parts white vinegar and warm water for 5–10 minutes first. According to the American Institute for Conservation’s 2022 Metal Care Guidelines, acidic solutions above pH 3.5 risk etching if left >15 minutes—so always time your soaks.
3. Apply and gently agitate
Using a microfiber cloth or soft toothbrush, work the paste in circular motions over tarnished areas. Focus on corners and seams where grime collects. Avoid excessive pressure—brass is soft (2.5–3 on Mohs scale), and aggressive scrubbing creates micro-scratches visible under light.
4. Rinse thoroughly and dry immediately
Rinse under lukewarm running water or with distilled water for high-polish pieces. Pat dry with a clean microfiber cloth—never air-dry. Residual moisture accelerates oxidation, especially in humid climates. The U.S. EPA estimates that 14% of household water usage is from leaks—but here, even a few droplets left behind can restart tarnish in under 48 hours.
Pro Tips
Restoring brass isn’t just about shine—it’s about longevity. Over-cleaning strips natural protective oxides and invites faster re-tarnishing. Antique dealers recommend polishing no more than twice a year unless exposed to salt air or high humidity.
“Brass doesn’t need to be mirror-bright to be well cared for. A soft, even luster signals healthy metal—not overworked surfaces.” — Sarah Lin, Conservator, Winterthur Museum, 2023
- Never use bleach, ammonia, or commercial brass cleaners containing thiourea—they corrode brass over time and emit harmful fumes
- If polishing reveals pinkish patches, you’ve worn through the brass plating to the underlying copper or zinc alloy—stop immediately
- For outdoor brass (e.g., porch fixtures), apply a thin coat of Renaissance Wax after drying—it lasts 6–9 months outdoors and resists rain and UV
Can I use ketchup to clean brass?
Yes—but sparingly. Ketchup contains vinegar and salt, which accelerate tarnish removal. However, its sugar content leaves residue. Rinse within 2 minutes and follow with distilled water. Better alternatives: lemon juice + baking soda (no additives) or a dedicated brass polish like Brasso for heavily oxidized pieces.
Why did my brass turn pink after cleaning?
Pink or salmon tones indicate copper exposure—either from over-polishing thin-plated brass or using overly acidic solutions too long. This isn’t damage yet, but it means the outer brass layer is compromised. Stop cleaning, rinse, and consider professional re-plating if appearance matters. Learn more in our guide on brass plating repair.
Does vinegar harm brass?
Vinegar alone won’t harm solid brass in short applications (<5 minutes), but prolonged exposure (especially >15 min) dulls luster and weakens grain boundaries. Always dilute (1:1 with water) and rinse fast. Never soak brass with soldered joints—vinegar degrades lead-free solder over time.
How do I keep brass from tarnishing quickly?
Control environment first: store or display away from kitchens (cooking vapors accelerate oxidation) and bathrooms (humidity + sulfur compounds). Wipe weekly with a dry microfiber cloth to remove oils and salts from skin contact. For high-use items like drawer pulls, apply a barrier coat of clear acrylic lacquer—tested by the Smithsonian’s Museum Conservation Institute (2021) to extend time between cleanings by 300%.
Can I clean brass with aluminum foil and baking soda?
This electrolytic method works—but only for small, solid brass items (like keys or hinges), not plated or hollow pieces. Line a bowl with foil (shiny side up), add 1 tbsp baking soda + 1 cup boiling water, then submerge brass for 5–8 minutes. The reaction pulls sulfides off the surface. But beware: this method can strip lacquer instantly and darken unsealed brass unevenly. Reserve it for stubborn, non-valuable items.
Is it safe to clean brass jewelry with these methods?
Only if it’s solid brass—not plated or set with stones. Gem settings loosen under acid exposure, and porous stones (like turquoise or opal) absorb vinegar. For jewelry, use a dedicated ultrasonic cleaner on low setting or consult a jeweler. See our full guide on how to clean jewelry safely.
Brass cleaning rewards patience over power. When done right, it extends the life of hardware, honors craftsmanship in antiques, and keeps your home looking intentional—not just shiny. Keep your microfiber cloths handy, skip the shortcuts, and treat each piece according to its age, plating, and purpose.