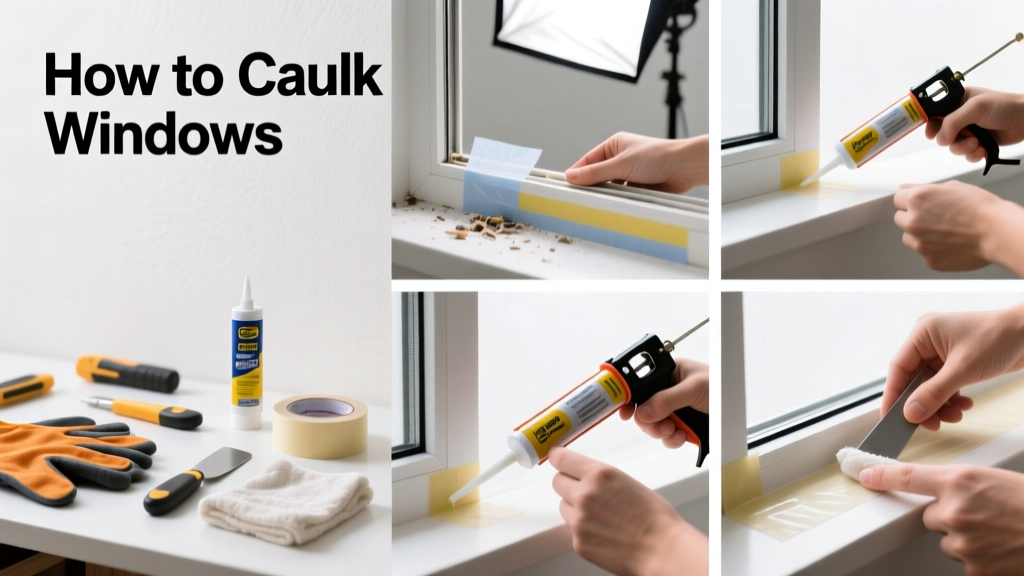
Caulking windows is a foundational home maintenance skill that seals gaps around frames to block air leaks, moisture, and pests. It’s beginner-friendly (30–90 minutes per window), requires no special certification, and delivers measurable energy savings—U.S. DOE estimates proper caulking can reduce heating/cooling costs by up to 20% in leaky homes.
Overview
| Skill Level | Time Required | Tools Needed | Estimated Cost |
|---|---|---|---|
| Beginner | 30–90 min per window | Caulk gun, utility knife, stiff brush, painter’s tape | $8–$15 (per tube + supplies) |
Tools & Materials
| Item | Quantity | Notes |
|---|---|---|
| 100% silicone or siliconized acrylic latex caulk | 1 tube (10 oz) | Avoid pure acrylic—it shrinks and cracks outdoors; silicone lasts 20+ years but isn’t paintable. For painted trim, use siliconized acrylic (e.g., DAP Alex Plus). |
| Caulk gun (ratcheting preferred) | 1 | Ratcheting guns give smoother, more consistent pressure—critical for clean beads. |
| Painter’s tape (1.5" or 2") | 1 roll | Blue or green low-tack tape prevents smearing and gives sharp edges. |
| Stiff nylon brush or old toothbrush | 1 | Removes dust and chalky residue without scratching vinyl or wood. |
| Isopropyl alcohol (70%+) and lint-free rags | 1 bottle | Essential for cleaning cured caulk residue before re-caulking—water won’t cut it. |
Step-by-Step Instructions
1. Inspect and Prep the Joint
Start on a dry, mild day (40–90°F). Remove loose, cracked, or peeling caulk using a utility knife—slice along both edges, then lift out with needle-nose pliers. Don’t gouge the frame. Brush away dust and debris with a stiff brush. Wipe the joint with isopropyl alcohol on a rag to remove oils and grime. Let dry completely—wet surfaces cause adhesion failure.
2. Apply Painter’s Tape
Run tape 1/8" away from each side of the gap—never directly over the crack. This creates clean lines and prevents caulk from sticking to adjacent surfaces. Press firmly along the entire length, especially corners where tape lifts easily.
3. Load and Cut the Caulk Tube
Snip the nozzle tip at a 45° angle. Start small: cut just 1/8" off. You can always cut more—but you can’t glue it back on. Pierce the inner seal with a nail or the metal rod on your caulk gun.
4. Apply the Bead and Tool It Smooth
Hold the caulk gun at a 45° angle, applying steady pressure while moving steadily along the joint. Aim for a uniform 1/4" bead that fully fills the gap and slightly overfills the surface. Immediately smooth with a damp finger or caulk tool—don’t wait. Wipe excess with a damp rag. Remove tape within 5 minutes while caulk is still wet.
Pro Tips
Seasoned contractors emphasize timing and material selection above all else. According to the National Association of Home Builders’ Residential Construction Performance Guidelines (2022), “Over 68% of failed exterior caulk jobs trace back to improper surface prep or using interior-grade caulk outdoors.”
“Caulk isn’t glue—it’s a flexible sealant. If you’re bridging gaps wider than 1/4", compressible backer rod must go in first. Otherwise, the caulk will tear under thermal expansion.” — Elena Ruiz, Building Envelope Specialist, IBHS, 2023
- Never caulk weep holes on vinyl or aluminum windows—they drain condensation. Block them, and you’ll get rot or mold inside the frame.
- Don’t caulk the bottom horizontal sill outside—water needs to escape. Focus only on vertical seams and top horizontal joints.
- Re-caulk every 5 years on south-facing windows (UV degrades caulk faster) and every 7–10 years elsewhere.
What type of caulk should I use for wood windows?
Use siliconized acrylic latex caulk—it bonds well to porous wood, paints cleanly, and handles seasonal swelling. Avoid pure silicone: it doesn’t adhere reliably to bare, untreated wood and can’t be painted.
Can I caulk over old caulk?
Only if the existing caulk is fully adhered, flexible, and clean. Peel back a corner—if it lifts easily or crumbles, remove it all. The U.S. EPA estimates that 30% of DIY caulk failures happen because people skip full removal.
Why did my caulk crack after two weeks?
Most likely causes: applying in direct sun (causes skinning before curing), using too thin a bead (shrinks unevenly), or skipping backer rod in gaps >1/4" wide. Also check if you used interior-only caulk outside—it lacks UV stabilizers.
Do I need to caulk both interior and exterior window joints?
Exterior caulking is essential for weatherproofing. Interior caulking helps with drafts but is secondary—focus there only if you see visible gaps near interior trim or feel cold air at night. For deeper air sealing, pair caulk with weatherstripping and low-expansion foam at the rough opening.
How do I fix a messy caulk line?
Wipe immediately with a damp microfiber cloth. If it’s dried, carefully slice away the ridge with a utility knife held flat against the surface—don’t dig into the frame. Reapply fresh caulk over the cleaned joint. For stubborn residue, use mineral spirits on vinyl or wood (test first), or isopropyl alcohol on metal.
Can I caulk in cold weather?
Most acrylic and siliconized acrylic caulks require minimum 40°F during application AND for 24 hours after. Silicone caulk tolerates down to 0°F but cures slower. Never apply if rain is expected within 12 hours—most caulks need at least 4 hours to skin over.
With clean tools, the right caulk, and attention to detail, you’ll achieve pro-level seals that last years—not months. Done correctly, this simple task pays for itself in lower energy bills and fewer window-related surprises come winter. For ongoing maintenance, add window caulking to your spring and fall home maintenance checklist.