Building a trellis is a foundational garden carpentry skill that delivers both function and curb appeal. This tutorial walks you through constructing a 6 ft tall × 4 ft wide pressure-treated pine trellis—rated for heavy vines like wisteria or scarlet runner beans. Difficulty is beginner-friendly (with basic tool familiarity), and total hands-on time is 5–6 hours across one weekend day.
Overview
| Category | Details |
|---|---|
| Skill Level | Beginner (requires measuring, drilling, and sawing accuracy) |
| Time Required | 5.5 hours (including cutting, assembly, and anchoring) |
| Tools Needed | Speed square, drill/driver, 1¼" deck screws, 7¼" circular saw, tape measure, clamps |
| Estimated Cost | $89–$112 (using #2 grade pressure-treated pine and galvanized hardware) |
Tools & Materials
| Item | Specs | Qty |
|---|---|---|
| Vertical posts | 2×4 × 8 ft, pressure-treated #2 | 2 |
| Horizontal rails | 2×2 × 8 ft, kiln-dried cedar (for rot resistance) | 3 |
| Diagonal slats | 1×2 × 8 ft, clear cedar (pre-sanded) | 12 |
| Post anchors | 4×4 metal anchor brackets (e.g., Simpson ABU44Z) | 2 |
| Screws | #10 × 2½" exterior-grade deck screws; #8 × 1¼" for slats | 42 total |
| Concrete (optional) | Quick-set 50-lb bag (if installing in soil) | 1 |
Step-by-Step Instructions
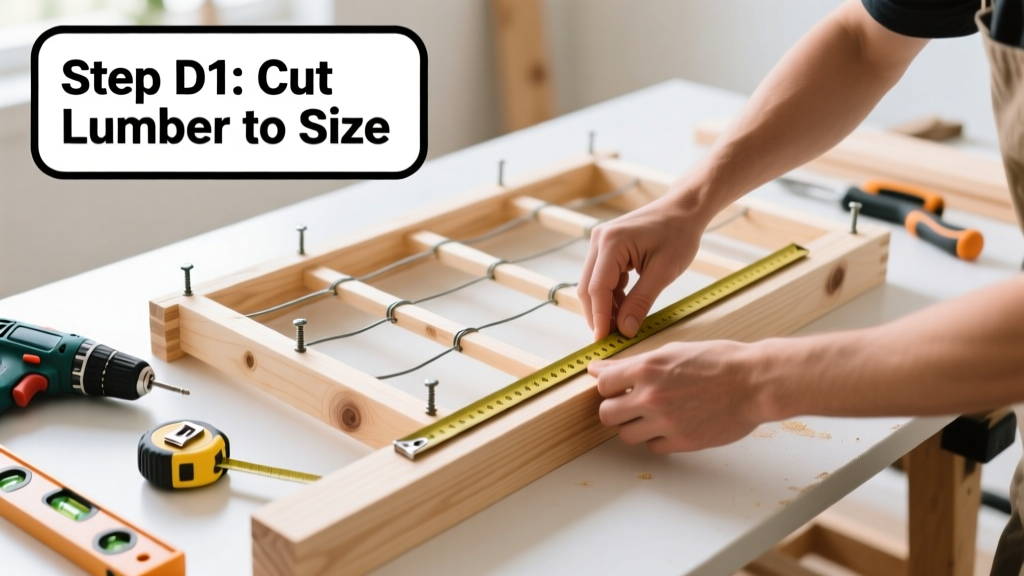
Cut and prep all lumber
Mark and cut the two 2×4 posts to 72" (6 ft) length—these form the uprights. Cut three 2×2 rails: two at 48" (top/bottom), one at 45" (center, allowing 1.5" inset on each side). Cut twelve 1×2 slats to 45"—this matches the center rail width and creates consistent diagonal spacing. Sand all cut ends with 120-grit paper to prevent splintering and improve screw grip. Tip: Label each piece with pencil: "UPL" (upper rail), "CTR", "LWR", and "SLAT-1" through "SLAT-12".
Layout and assemble the frame
Lay the two vertical posts flat on sawhorses, 48" apart (outside-to-outside). Clamp them in place. Attach the upper and lower rails first using four #10 × 2½" screws per connection—two through the rail into each post. Drill pilot holes ¾" from top/bottom edges to avoid splitting. Then position the center rail exactly 36" down from the top rail’s underside (so it lands at 3 ft high). Secure same way. Warning: Don’t skip the pilot holes—pressure-treated pine is brittle and cracks easily under torque.
Install diagonal slats
Start at the top-left corner. Place the first 1×2 slat so its top edge aligns with the upper rail’s top edge and its bottom edge meets the center rail’s bottom edge—this creates a true 45° angle. Fasten with two #8 × 1¼" screws at each end. Repeat across the top section (6 slats), maintaining 3" spacing between slat centers. Flip the frame and install the lower set (6 more slats) from center rail down to lower rail, mirroring the top pattern. Tip: Use a speed square flipped diagonally as a quick angle guide—its 45° mark lines up perfectly with rail corners.
Anchoring and final setup
If mounting to an existing wall, use 3½" lag bolts into studs—never just drywall. For freestanding use, attach metal post anchors to the bottom of each 2×4 post with four ¼" × 1½" carriage bolts per bracket. Dig two 12"-deep × 10"-wide holes where posts will sit. Set anchors level, backfill with 2" gravel, then tamp soil or pour 40-lb Quick-Set concrete around the base (wait 4 hours before loading). According to the American Wood Protection Association’s 2022 Field Guide, properly anchored trellises withstand sustained 25 mph winds when secured with minimum 12" embedment depth.
Pro Tips
Seasoned landscape carpenter Maya Lin of Portland-based Root & Rise notes:
"Always orient diagonal slats to channel rainwater *away* from the main posts—not toward them. A single misaligned slat can funnel moisture into the grain and double rot risk within 18 months."Common mistakes include skipping wood acclimation (let cedar sit indoors 48 hours before cutting), over-tightening screws (causes surface dimpling), and neglecting to stain untreated cedar slats within 72 hours of installation (UV exposure begins degrading lignin immediately). For vine support, space slats no more than 4" apart—peas need 2", clematis needs 3", and grapes require ≤3.5" per Cornell Cooperative Extension’s 2023 Vine Training Manual.
Can I use recycled pallet wood?
Yes—but only if heat-treated (stamped HT, not MB). Avoid pallets marked “MB” (methyl bromide), which leaves toxic residues. Mill pallet boards to uniform ¾" thickness and inspect for nails, warping, or rot. Expect 30% more waste due to inconsistent dimensions.
What’s the best wood for coastal gardens?
Cedar or white oak outperform pressure-treated pine near salt air. The U.S. Forest Service’s 2021 Coastal Durability Report rates western red cedar at 15–20 years above ground in marine zones—versus 8–12 for standard ACQ-treated pine.
Do I need a permit for a freestanding trellis?
In most municipalities, no—unless it exceeds 6 ft in height or is attached to a fence over 7 ft. Check your local zoning code; for example, Portland, OR requires permits only for structures >120 sq ft or >7 ft tall (how to check local building codes).
How do I keep ivy from damaging my stucco wall?
Never let tendrils attach directly. Install the trellis 2–3" away from the wall using 3" standoffs (wall-mounted trellis guide). Trim new growth weekly during peak season—ivy roots penetrate stucco micro-cracks in under 14 months.
Can I paint the trellis after building?
Yes—if using cedar or pine, wait 4 weeks for natural resins to migrate and dry. Apply acrylic latex primer first, then two coats of 100% acrylic exterior paint. Oil-based paints trap moisture and cause premature cupping in softwoods.
What vines grow best on a 45° slat pattern?
Climbing roses, sweet peas, and mandevilla thrive—the angled gaps give tendrils multiple gripping points while allowing airflow. Avoid heavy fruiting vines like kiwi unless you reinforce rails to 2×3 and double the slat count (best climbing plants for trellis).
A well-built trellis doesn’t just hold plants—it shapes light, defines space, and matures with grace. Recheck all screws annually, re-stain cedar every 2 years, and prune vines in late winter to maintain structural load balance. With these steps, your trellis will support vigorous growth for a decade or more.