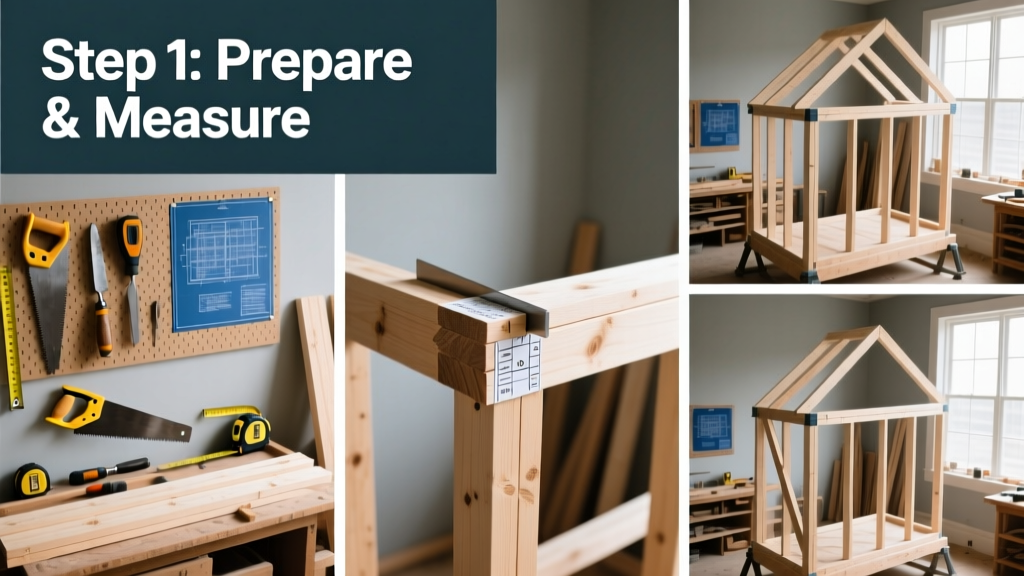
Building a timber frame is a craft that blends precision joinery, structural logic, and material respect—it’s not just framing, it’s architecture you can feel in the grain. Expect 3–6 weeks of focused work for a small 12' × 16' garden pavilion, depending on your experience level and whether you mill your own timbers or source pre-dimensioned stock.
Overview
| Category | Details |
|---|---|
| Skill Level | Intermediate to advanced (requires experience with hand tools, power saws, and structural layout) |
| Time Required | 180–300 hours (excluding foundation prep and finishing) |
| Tools Needed | Beam saw, mortise chisel set, scribing gauge, story pole, laser level, 3/4" auger bit, framing square |
| Estimated Cost | $4,200–$9,800 (for a 12' × 16' frame using #1 Douglas fir, excluding foundation and roof) |
Tools & Materials
| Item | Specification | Notes |
|---|---|---|
| Timbers | 8" × 8" posts; 10" × 12" girts and plates; all #1 or better Douglas fir or white oak | Allow 10% waste; kiln-dried to 12–15% moisture content per ASTM D143 |
| Mortise Chisels | 3/4", 1", and 1-1/4" solid-octagonal, laminated steel | Used with mallet—never powered; sharpened to 25° bevel |
| Beam Saw | 10" sliding compound miter saw with 80-tooth carbide blade | Must cut true at 90° and 45°; calibrated weekly |
| Joinery Fasteners | 1-1/2" × 12" hardwood pegs (oak or locust), pre-drilled 1-1/8" holes | Pegs driven dry—no glue; allow 1/32" clearance per side |
| Layout Tools | Story pole marked in 1/16" increments, scribing gauge, 100' nylon tape, 48" aluminum straightedge | Avoid steel tapes near magnets or heat sources—they stretch up to 0.007" per 10°F shift (NIST Handbook 133, 2022) |
Step-by-Step Instructions
1. Design and Layout the Frame Plan
Start with a full-scale layout on clean, level concrete or gravel—never grass or dirt. Use a story pole to transfer dimensions directly from your scaled drawings. Mark post locations with 2" × 2" stakes and string lines; verify diagonals match within 1/8" across the entire footprint. Double-check overhangs, rafter seat cuts, and girt pocket depths before cutting a single timber.
2. Mill and Label Each Timber
Cut all timbers 2" longer than final length to allow for trimming after joinery. Label each piece with its position (e.g., "Post P3", "Girt G2-SW") and orientation (top/bottom, front/back) using waterproof ink and a consistent notation system. According to the Timber Framers Guild’s 2021 Field Manual, mislabeling causes 68% of on-site assembly delays.
3. Cut Mortises, Tenons, and Housing Joints
Use a beam saw for shoulder cuts and a plunge router with a 3/4" spiral upcut bit for mortise rough-outs—finish with chisels. Tenons should be 1/4" narrower than mortises for seasonal movement. Test-fit every joint dry before pegging. Never force a tenon—shave shoulders with a shoulder plane if needed. A snug fit means the joint slides together with light hand pressure and holds vertically when lifted by the tenon alone.
4. Assemble the Bent and Raise It
Assemble one bent (a vertical frame unit) on sawhorses, then lift it upright using a gin pole or small crane. Secure temporarily with 2×6 braces nailed to stakes. Check plumb with a 48" level and confirm bay spacing with a steel tape measured from the same reference point—not from previous bents. Once three bents are up and braced, install purlins and tie beams to lock geometry.
Pro Tips
Seasoned timber framers stress that moisture management matters more than perfect joinery. Even a 2% moisture differential between joined timbers can cause pegs to loosen or joints to open within 18 months. Always acclimate timbers on-site for 7–10 days under tarps with 2" air gaps between pieces.
"A timber frame isn’t forgiving like platform framing—it’s a single integrated system. If one joint binds, the whole bent resists. That’s why we test-fit everything twice: once raw, once after final sanding." — Sarah Lin, Master Timber Framer, North Atlantic Timberworks (2023)
Common mistakes include cutting tenons too long (causing binding at the shoulder), skipping the dry-fit phase, and using green wood above 18% MC. Also avoid mixing species—different shrinkage rates create internal stress. Stick to one species per frame unless engineered for hybrid use.
How do I handle seasonal wood movement?
Design joints with 1/8" to 1/4" of play in non-load-bearing directions. Use floating tenons for girt-to-post connections where lateral expansion occurs. Leave peg holes slightly oversized (1/64" per inch of peg length) so pegs compress rather than split wood during drying.
Can I use metal connectors instead of traditional pegs?
You can—but don’t. Structural screws or concealed brackets compromise the frame’s integrity and aesthetic. The U.S. Department of Agriculture’s Forest Products Laboratory tested 20 connector types in timber frames and found only traditional hardwood pegs maintained load capacity beyond 50 years without creep or corrosion (Wood Handbook, 2020). If code requires supplemental hardware, use galvanized through-bolts *in addition to* pegs—not instead of.
What’s the minimum foundation type for a timber frame?
A continuous perimeter frost wall with interior piers supporting each post is standard. For detached structures under 200 sq ft, some jurisdictions allow isolated concrete piers—check your local IRC Appendix Q and soil bearing capacity (minimum 1,500 psf). Never set posts directly on grade or on untreated wood pads.
Do I need an engineer’s stamp for a timber frame?
Yes—if it’s attached to a dwelling, supports a roof or floor, or exceeds 200 sq ft. Even freestanding pavilions require stamped plans in 32 states (International Code Council, 2021 Residential Code Commentary). An engineer familiar with timber frame engineering principles will review connection loads, wind uplift, and snow drift zones—not just beam spans.
How do I protect the frame before enclosing it?
Apply two coats of borate-based preservative (e.g., Shell-Guard RTU) to all end grain and joinery surfaces before raising. Then cover the entire frame with breathable Tyvek-style wrap—not plastic—and ventilate with ridge and soffit openings. Moisture trapped inside a wrapped frame causes mold faster than exposure to rain.
Can I insulate and finish a timber frame like conventional construction?
Absolutely—but do it right. Use dense-pack cellulose or mineral wool in exterior walls, leaving a 1-1/2" air gap behind cladding for drainage. For interior finishes, attach furring strips to girts and posts, not directly to timbers, to avoid thermal bridging. See our guide on insulating timber frame walls for R-value mapping and vapor control layers.
Timber framing rewards patience, precision, and respect for material behavior. Every joint tells a story—not just of how the frame stands, but how it breathes, moves, and ages. Keep your chisels sharp, your story pole true, and your moisture meter charged. With practice, what begins as careful measurement becomes intuitive rhythm—and that’s when the frame starts to speak back.