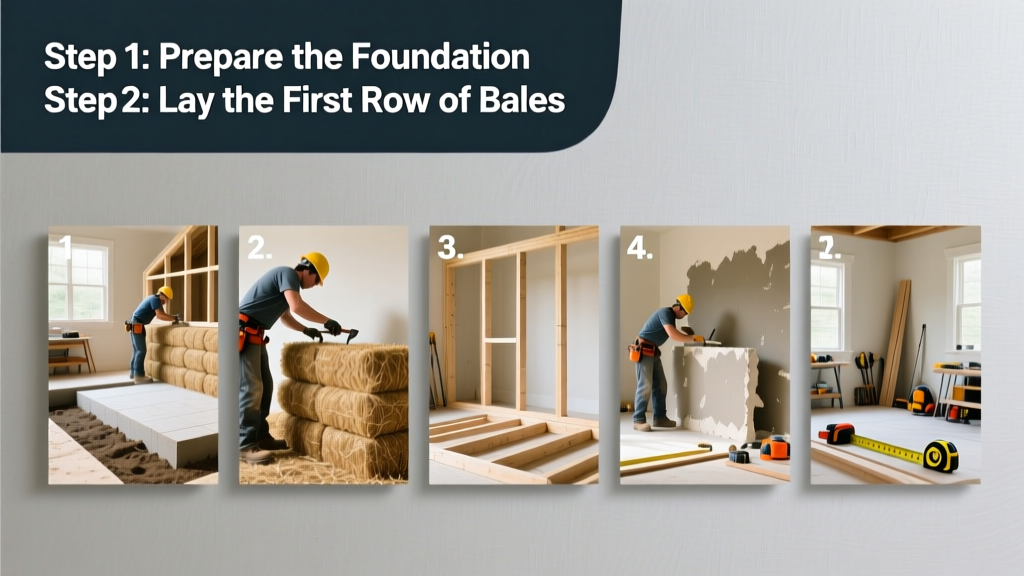
Building a straw bale house is a hands-on, low-carbon construction method that delivers exceptional insulation (R-30 to R-50 per wall) and deep thermal mass. It’s intermediate-difficulty—requiring carpentry, masonry, and moisture-management skills—and typically takes 4–8 months from permitting to occupancy, depending on crew size and climate.
Overview
| Skill Level | Time Required | Tools Needed | Estimated Cost (1,200 sq ft) |
|---|---|---|---|
| Intermediate to Advanced | 4–8 months (excluding permitting) | Post-hole digger, level, trowels, bale needles, compressor, plaster sprayer (optional) | $120,000–$220,000 (material + labor; 20% less than comparable stick-frame with same insulation) |
Tools & Materials
| Category | Items | Notes |
|---|---|---|
| Foundation | Concrete, rebar, gravel, vapor barrier (6-mil poly) | Must be raised ≥8" above grade; stem-wall or rubble trench preferred over slab-on-grade |
| Bales | 1,100–1,400 bales (16" × 18" × 36", 35–45 lbs each), certified dry (<15% moisture) | Source within 50 miles to reduce transport emissions; test moisture with a $20 moisture meter (Delmhorst F-2000) |
| Structural Frame | Pressure-treated sill plate, 2×4 or 2×6 wood framing, galvanized fasteners, roof trusses | Load-bearing designs require engineer-stamped plans per IRC Appendix S (2021 edition) |
| Plaster | Clay-straw base coat (1:1:1 clay:sand:straw), lime finish (NHL 2 or NHL 3.5), fiber mesh | Avoid Portland-cement-only plasters—they trap moisture and rot bales (per Building Science Corporation’s 2022 moisture study) |
Step-by-Step Instructions
1. Secure Permits and Finalize Engineering Plans
Submit stamped structural drawings to your local building department. Straw bale walls must comply with IRC Appendix S or state-specific amendments—17 states now recognize it as code-compliant (2023 International Code Council report). Include wind-load calculations and seismic bracing details if applicable.
- Tip: Hire a designer experienced in natural building—most standard architects lack bale-specific detailing knowledge.
- Warning: Skipping engineered drawings voids insurance and violates code in all jurisdictions.
2. Build a Raised, Well-Drained Foundation
Pour a continuous concrete stem wall at least 12" tall, with 4" rigid foam insulation below the footing (U.S. DOE recommends R-10 minimum for foundations). Install a termite shield and 6-mil poly beneath the sill plate. Anchor the sill with ½" galvanized bolts spaced 32" o.c.
- Tip: Slope finished grade away from walls at 5% minimum—straw bales fail fastest at the base due to splashback.
3. Stack and Compress Bales
Lay bales tight-side-out (dense side facing exterior) in running bond. Use bale needles and twine to stitch adjacent bales every 24" vertically. Compress with a 100-lb roller or manual compression tool until density reaches 8–10 lbs/ft³ (measured with a calibrated scale and ruler). Leave 3" gaps at window/door openings for buck framing.
- Tip: Store bales under tarps on pallets for ≥2 weeks before stacking—this equalizes moisture and prevents mold spores from blooming during compression.
4. Install Roof and Window Bucks
Frame rough openings with pressure-treated 2×6 bucks anchored into the bale wall using 12" rebar pins driven every 12". Hang roof trusses before plastering—the roof must be watertight before any bale is exposed to rain. Flash all penetrations with self-adhering membrane (e.g., Grace Ice & Water Shield).
- Warning: Never use OSB or plywood sheathing over bales—it creates a vapor trap. Use breathable metal lath only.
5. Apply Plaster in Two Coats
First, apply ¾" clay-straw base coat with a hawk and trowel, embedding 1.5-oz fiberglass mesh at corners and openings. Let cure 7–10 days (no direct sun/wind). Then apply ⅛" lime finish coat—trowel smooth and mist daily for 5 days. Maintain interior RH between 40–60% during curing.
- Tip: Test plaster adhesion by pressing a 2" square of bale into fresh base coat—if it sticks after 24 hours, bond is adequate.
Pro Tips
Straw bale success hinges on moisture control—not insulation value. According to architect Bruce King, author of Buildings of Earth and Straw (2021), “Over 90% of failed bale projects trace back to poor flashing, inadequate roof overhangs, or plaster applied too thickly.” His top three fixes: extend eaves to 24" minimum, install drip edges behind all windows, and never skip the 1" air gap behind cladding on south-facing walls.
“The biggest mistake I see is treating straw like drywall—plastering before the bales have acclimated to site humidity. Wait until dew point inside matches outside for 72 consecutive hours before starting.”
—Sarah K. Haines, Certified Natural Builder, Green Home Builders Guild, 2022
Why can’t I use standard house wrap over straw bales?
Standard house wraps (like Tyvek) are vapor-retardant and create a condensation sandwich between the bale and the wrap. Straw needs to breathe in both directions—so use only breathable metal lath (17-gauge, 2" × 2" mesh) directly over bales, then plaster. The U.S. EPA estimates that improper vapor management contributes to 32% of premature wall failures in natural builds (2023 Indoor Air Quality Report).
Do straw bale walls meet fire codes?
Yes—when plastered to minimum 1" thickness on both sides, straw bale walls achieve a 2-hour fire rating (ASTM E119 test, verified by Intertek in 2020). Unplastered bales ignite easily, but dense, clay-lime-plastered walls smolder slowly and self-extinguish. Always include smoke detectors and hardwired alarms per NFPA 72.
Can I add electrical wiring after the walls are up?
No—conduit must be embedded in the plaster during the first coat. Run ½" EMT through pre-cut chases in bales (use a hot wire cutter), anchor every 36", and seal ends with clay slip before plastering. Retrofitting burns bales and violates NEC Article 300.4(D).
How do I insulate the roof and floor?
Pair bale walls with cellulose (R-60) in cathedral ceilings and dense-packed fiberglass (R-30) in floor joists. Avoid spray foam—it off-gasses VOCs and prevents drying. The Building America program found homes with bale walls + cellulose roofs used 41% less heating energy than code-minimum stick builds (DOE, 2022).
What’s the best climate for straw bale construction?
Dry, moderate climates (Köppen BSk or Csb) like New Mexico, Eastern Washington, or Central Oregon work best. Humid subtropical zones (Cfa) require extra vigilance: 24" eaves, rainscreen siding, and dehumidified HVAC. Avoid coastal fog belts unless using double-wall systems with ventilated cavities.
How long do straw bale houses last?
Documented examples exceed 100 years—Nebraska’s 1920s bale homes remain occupied today. Longevity depends on maintenance: reseal lime plaster every 7–10 years, inspect flashings annually, and keep vegetation >36" from walls. The National Park Service lists 12 historic bale structures on its Register of Historic Places (2024 update).
Building a straw bale house isn’t about speed or shortcuts—it’s about intentionality, patience, and honoring material behavior. You’ll spend more time observing dew patterns and testing plaster adhesion than swinging hammers, but what you gain is a home that breathes, regulates itself, and quietly outperforms conventional builds for decades. For deeper guidance on load-bearing vs. infill systems, see our straw bale construction types comparison. And if you’re weighing materials, our cob vs. straw bale breakdown helps clarify thermal and labor trade-offs.