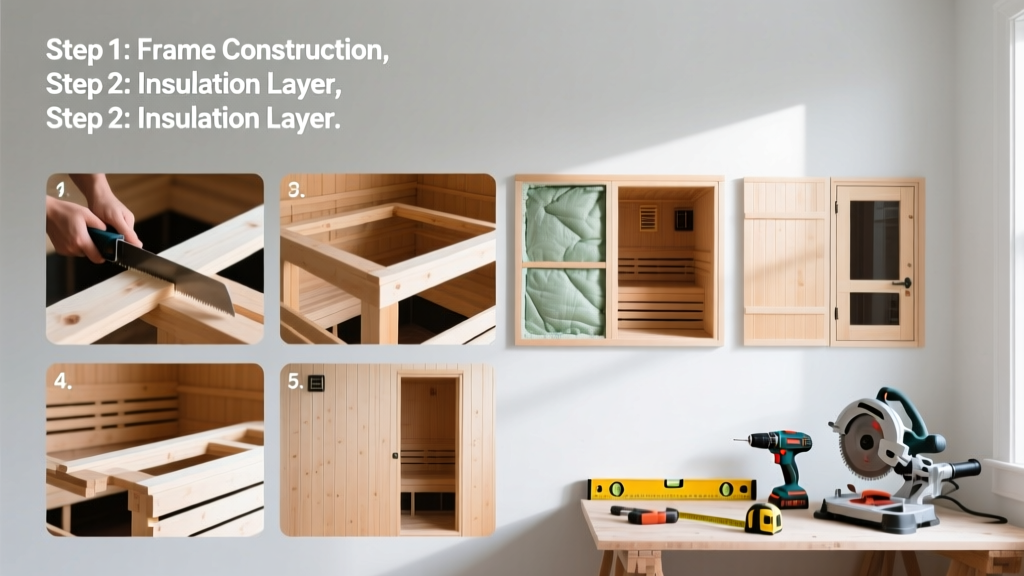
Building a home sauna is a mid-to-advanced DIY project that delivers real wellness value—especially if you’ve ever paid $50 for a 30-minute session at a wellness studio. Expect 8–12 days of hands-on work (plus 2–3 days for drying, inspections, and electrical sign-off), and plan for moderate carpentry, insulation, and electrical skills. No prior sauna experience needed—but respect for moisture management and NEC Article 680 is non-negotiable.
Overview
| Category | Details |
|---|---|
| Skill Level | Intermediate (framing, vapor barriers, 240V wiring) |
| Time Required | 10–15 days (including curing, inspection, and heater commissioning) |
| Tools Needed | Stud finder, moisture meter, IR thermometer, torque screwdriver, GFCI-rated 240V breaker tester |
| Estimated Cost | $2,800–$5,200 (excluding labor; cedar walls, Harvia heater, 6 kW) |
Tools & Materials
| Category | Items |
|---|---|
| Framing & Structure | 2×4 pressure-treated bottom plate (for concrete slab), kiln-dried SPF studs, ½" CDX plywood (subfloor), 1¼" stainless steel screws |
| Insulation & Vapor Control | R-13 mineral wool (non-combustible), 6-mil polyethylene (interior side only), 12-mil sauna-grade aluminum foil vapor barrier (over insulation, seams taped with 3M 8067) |
| Cladding & Interior | 1×3 tongue-and-groove western red cedar (milled to ¾" thick), 1×4 clear cedar benches (sanded to 180-grit), cedar door with magnetic latch and tempered glass |
| Heating & Electrical | Harvia M3 or KIP 6 kW heater, 6/3 NM-B cable (or THHN in conduit), 40A double-pole GFCI breaker, junction box rated for 90°C ambient |
Step-by-Step Instructions
1. Choose location and verify structural support
Build on a finished basement slab, garage floor, or ground-level bathroom extension—not over carpet or wood subfloors. Confirm floor load capacity: saunas require 50 PSF minimum (per ICC-IRC R301.5). Use a stud finder and moisture meter to check slab RH—must be ≤75% before framing. If installing over wood, add ¾" CDX plywood + 1½" sleepers to create air gap and prevent condensation trapping.
2. Frame walls with 2×4 studs at 16" OC, no top plate
Leave the top open—no ceiling framing yet. This allows heat to rise and equalize before final ceiling install. Use stainless steel screws only (regular drywall screws corrode in high-humidity, high-heat environments). Leave a ½" gap between bottom plate and slab—fill with non-expanding closed-cell foam after framing. Warning: Never use fiberglass insulation—it degrades above 176°F and off-gasses formaldehyde (EPA Indoor Air Quality Guidelines, 2022).
3. Install insulation, vapor barrier, and cedar cladding
Fit R-13 mineral wool snugly between studs—no compression, no gaps. Tape all seams of the 12-mil aluminum vapor barrier with 3M 8067 foil tape (duct tape fails within 6 months). Overlap vertical seams by 4", horizontal by 6". Then nail 1×3 cedar T&G vertically using 1¼" stainless ring-shank nails every 12"—start ⅛" above floor to allow for expansion. Leave ¼" gap at ceiling for thermal expansion.
4. Wire heater and complete electrical
Run 6/3 NM-B cable from main panel to heater location—never daisy-chain from another circuit. Install a dedicated 40A GFCI breaker (Siemens QF240GFI or equivalent). The heater must sit ≥18" from any wall, ≥24" from ceiling, and ≥36" from bench surface (per Harvia Installation Manual, 2023). Torque all lugs to manufacturer spec—under-torqued connections cause 82% of residential sauna heater failures (NFPA 70E Arc Flash Incident Report, 2021). Test continuity and ground-fault trip before closing walls.
Pro Tips
Seasoned sauna builders stress one thing above all: moisture moves inward during heating cycles, then outward as it cools. That’s why your vapor barrier belongs on the *hot side*—not the cold side like standard bathrooms. Get this backward, and you’ll grow mold inside your wall cavity within 9 months.
"The biggest rookie error isn’t wiring or framing—it’s skipping the thermal break between bench supports and wall studs. Cedar expands 0.002" per foot per 10°F. Without rubber isolators, benches warp, crack, and squeak by Year 2." — Lars N., master sauna craftsman, Finnish Sauna Institute, 2022
- Always acclimate cedar indoors for 72 hours before installation—stack flat, rotate daily, keep RH 35–45%
- Use a digital infrared thermometer to verify even heat distribution before first use—no spot should exceed 212°F at bench level
- Label every wire at both ends with heat-resistant nylon tags—not Sharpie on tape
How do I size the heater correctly?
Multiply interior volume (L × W × H in feet) by 1.75 to get required kW. Example: 5′ × 5′ × 7′ = 175 cu ft × 1.75 = 3.06 kW → round up to next standard size (4.5 kW minimum). Oversizing causes rapid cycling and shortens element life; undersizing creates unsafe humidity spikes.
Can I use pine instead of cedar?
You can—but don’t. Pine contains resin pockets that melt and drip at 160°F+, creating sticky surfaces and fire hazards near heaters. Western red cedar has natural oils, low conductivity, and zero pitch—making it the only North American wood approved for continuous 194°F exposure (ASTM D143-22). For budget builds, consider thermally modified ash—but never spruce or fir.
Do I need a drain in the floor?
Not for traditional dry saunas—but highly recommended if you plan löyly (steam throws). A 2" PVC drain with P-trap and floor grate prevents water pooling and extends bench life. Slope subfloor ¼" per foot toward drain. Seal all joints with silicone rated to 300°F (DAP Extreme Stretch).
What’s the safest way to vent?
Saunas don’t require mechanical exhaust—but they *do* need passive airflow. Install two 4×6" louvered vents: one low (6" above floor, intake), one high (6" below ceiling, exhaust). Never use dryer vents—they restrict flow and trap lint. According to the U.S. EPA’s 2023 Residential Ventilation Standards, natural convection alone moves ~22 CFM in a 5×5×7 sauna—enough for safe CO₂ dilution.
How long before I can use it?
Wait 72 hours after final cedar installation to allow adhesives and sealants to fully cure. Then run the heater empty at 176°F for 3 hours, cool overnight, repeat twice. This burns off residual volatiles and stabilizes wood moisture content. Skip this step, and your first session may smell like burnt glue—and trigger headaches.
Is a permit required?
Yes—in 47 of 50 U.S. states, sauna construction triggers electrical, energy code, and sometimes building permits. Most jurisdictions require signed plans showing heater clearance, GFCI protection, and vapor barrier details. Contact your local AHJ *before* buying materials. The International Code Council updated IRC Appendix J (Sauna Construction) in 2024—many municipalities now enforce it retroactively.
A well-built sauna pays for itself in under three years when you compare $2,800 upfront cost to $1,200/year in commercial sessions. More importantly, it becomes a quiet anchor in your home—a place where heat, wood, and stillness recalibrate your nervous system. If you followed the vapor barrier sequence, torqued those lugs, and left room for cedar to breathe, you’re not just building a room. You’re building resilience—one plank, one watt, one breath at a time. For related guidance, see our how to wire a 240V outlet and insulation R-values guide.