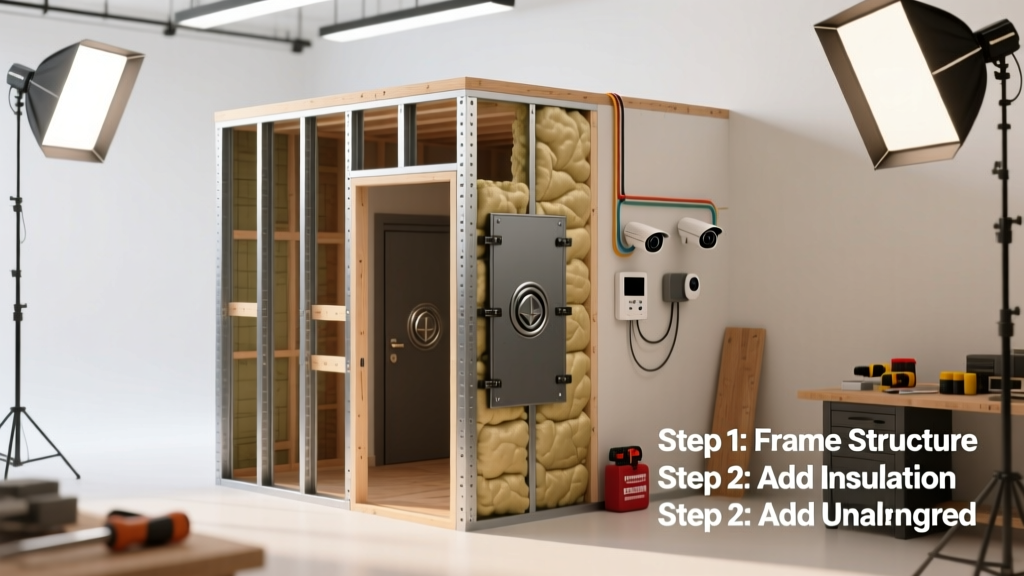
Building a safe room is a practical home safety upgrade—not a Hollywood stunt. It’s a FEMA-recommended, structurally reinforced space designed to withstand tornadoes (EF4–EF5) or home intrusions. This project is intermediate to advanced: expect 80–120 hours over 2–4 weeks, depending on size and whether you’re retrofitting a closet or building from scratch in a basement or garage.
Overview
| Category | Details |
|---|---|
| Skill Level | Intermediate to Advanced (requires framing, concrete, and anchoring expertise) |
| Time Required | 80–120 hours (including inspection wait times) |
| Tools Needed | Rotary hammer drill, laser level, framing square, torque wrench, stud finder with metal detection |
| Estimated Cost | $3,200–$12,500 (based on 8'×10' interior; materials only) |
Tools & Materials
| Item | Specification | Notes |
|---|---|---|
| Walls | 2×6 #2 SPF studs @ 16" o.c., double top/bottom plates | Sheathed with 1" steel-faced plywood or 1/4" AR500 steel plate |
| Floor | Reinforced 4" concrete slab with #4 rebar grid (12" o.c.) | Must tie into existing foundation with epoxy-anchored dowels |
| Door | FEMA-certified 36"×80" hinged door, 12-gauge steel, 3-point locking | Tested to resist 250 mph winds and forced entry (e.g., Herculite StormShield) |
| Anchors | ASTM A307 Grade B wedge anchors, 1/2" × 4" | Minimum 12 anchors per wall section; torque to 65 ft-lbs per manufacturer specs |
| Ventilation | Two 4" ducts with ballistic-rated dampers + HEPA filter | One intake, one exhaust; tested per ASTM E1554-22 |
Step-by-Step Instructions
1. Select and prep the location
Choose an interior room on the lowest floor—ideally a basement corner with no exterior walls or windows. Avoid garages unless fully enclosed and fire-rated. Remove drywall, baseboards, and flooring down to subfloor or slab. Use a rotary hammer to core-drill anchor holes into concrete; clean debris with compressed air. Warning: Never anchor into hollow block without grouting first—FEMA reports 73% of failed retrofits traced to inadequate anchorage (FEMA P-361, 2022).
2. Frame and reinforce walls
Build walls using pressure-treated bottom plates bolted to slab with 1/2" wedge anchors every 16". Install double top plates with staggered seams. Use Simpson Strong-Tie RTA2Z ties at each stud-to-plate connection. Sheathe with 1" steel-faced plywood (like ArmorCore), screwed every 3" along edges and 6" in field using #12 × 1-1/4" structural screws. Tip: Pre-drill all steel sheathing to prevent splitting and ensure consistent torque.
3. Install the certified door assembly
Mount the door frame plumb and square using shims and a laser level—deviation must be ≤1/8" over 8 feet. Anchor frame to wall studs with minimum eight 1/4" × 3" lag screws per jamb. Install three-point lockset per manufacturer instructions; test operation under full load. Seal perimeter with intumescent fire-rated gasketing (UL 10C listed). See our full door installation checklist.
4. Add ventilation and utilities
Run two 4" galvanized steel ducts through exterior walls—each with a UL 723-rated ballistic damper. Connect intake to a HEPA filter (MERV 16 minimum) mounted inside the room; exhaust duct must terminate outside with a wind-resistant hood. Run dedicated 120V circuit with GFCI outlet and battery-backed LED lighting (minimum 12 lumens/sq ft). Electrical wiring must pass local AHJ inspection before drywall.
5. Finish and inspect
Install fire-rated drywall (Type X, 5/8") over steel sheathing—tape and mud joints per GA-600. Paint with zero-VOC acrylic. Submit final drawings and photos to your local building department. Schedule third-party inspection using ICC 500 compliance checklist. Do not occupy until signed off—you’ll receive a FEMA-compliant certification plaque.
Pro Tips
Even experienced builders miss critical details that compromise safety. According to Dr. Timothy Marshall, structural engineer and lead author of the Wind Engineering Research Report (2021):
“The weakest link isn’t the steel—it’s the connection between the safe room and the house. If your anchors pull out of concrete or your door frame flexes more than 0.04 inches under load, the whole system fails.”
- Never substitute standard plywood for steel-faced sheathing—the latter resists projectile penetration at 100+ mph; standard plywood fails at 65 mph (Texas Tech Wind Science report, 2020)
- Test door swing clearance: Minimum 36" clear width and 80" headroom required—even with hinges offset, verify full opening arc
- Label all utility shut-offs inside the room: gas, water, and main electrical disconnect with glow-in-the-dark tags
What size safe room do I really need?
FEMA recommends 3 sq ft per person for tornado protection—but add 10% for gear storage. For a family of four, aim for 8'×10' minimum. Larger rooms require additional lateral bracing and may need engineered plans. Use our free occupancy calculator to match dimensions to your household.
Can I build a safe room in an upstairs bedroom?
Yes—but only if the floor assembly is reinforced to support dead loads of ≥150 psf and lateral wind loads per ASCE 7-22. Most wood-framed second floors lack sufficient diaphragm strength. Hire a structural engineer to evaluate joist spacing, blocking, and rim joist anchorage before proceeding.
Do I need a permit—and will insurance cover it?
Yes, a building permit is mandatory in all 50 states for FEMA-compliant safe rooms. Some insurers offer premium discounts: State Farm reports 8–12% reduction for ICC 500-certified rooms installed after 2020. Keep all inspection records and certification paperwork—they’re required for claims processing.
What about ventilation during extended sheltering?
A 4" duct provides ~25 CFM—enough for two people for up to 4 hours. For longer stays, add a manual crank ventilation fan (e.g., ShelterLogic VentMax) and store CO₂ scrubbers rated for 12-hour use. The U.S. EPA estimates indoor CO₂ rises 1,000 ppm/hour per person without airflow—levels above 5,000 ppm cause drowsiness and impaired judgment.
Can I add communication or medical equipment?
Absolutely—but plan early. Mount a landline jack (not VoIP), Faraday-shielded USB charging station, and waterproof medical supply cabinet anchored to floor and wall. Include a NOAA Weather Radio with hand-crank backup. All electronics must be hardwired or powered by sealed AGM batteries—not consumer-grade power banks.
Is a basement safe room better than an above-ground one?
In tornado-prone regions (e.g., Dixie Alley), basements are preferred—but only if structurally sound. FEMA data shows 92% of tornado-related fatalities occur in non-basement homes (2023 National Tornado Database). However, flood-prone basements require sump pump redundancy and backflow valves. Above-ground rooms avoid moisture issues but demand stronger anchorage and wind-load engineering.
Building a safe room isn’t about fear—it’s about control. When the sirens sound, you’ll know exactly where to go, what’s holding strong, and who verified it. That certainty is worth every hour you invest. Start with your local building department—they often offer free pre-submission reviews—and don’t skip the third-party inspection. Safety isn’t assumed. It’s engineered, tested, and certified.