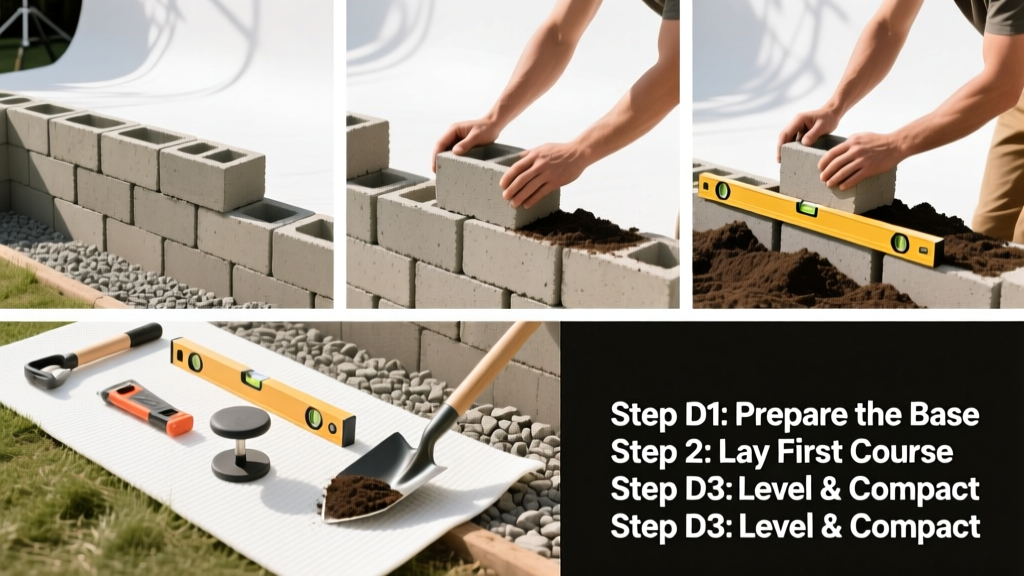
Building a retaining wall is a foundational landscaping skill that stops soil erosion, creates usable flat space, and adds structure to sloped yards. It’s a moderate-difficulty outdoor project—most homeowners can complete a 3-foot-tall, 20-foot-long wall in 2–3 weekends with basic tools and careful prep.
Overview
| Skill Level | Time Required | Tools Needed | Estimated Cost (3-ft × 20-ft) |
|---|---|---|---|
| Moderate (requires excavation, leveling, and precision layout) | 16–24 hours over 2–3 days | Tape measure, string line, level, rubber mallet, plate compactor, shovel, wheelbarrow | $850–$1,400 (interlocking concrete block system) |
Tools & Materials
| Category | Items |
|---|---|
| Materials | Interlocking concrete blocks (e.g., 6" H × 12" W × 18" L, 30–40 units per sq ft), crushed gravel (¾" angular, 1.5 tons), geotextile fabric (6-ft wide, UV-stabilized), drainage pipe (4" perforated PVC w/ sleeve), landscape pins, cap stones (optional but recommended) |
| Tools | Line level, transit or laser level (for walls > 4 ft), sledgehammer, plate compactor (rental: $55/day), mason’s string, chalk line, safety glasses, work gloves, knee pads |
Step-by-Step Instructions
1. Plan and Permit
Check local building codes—walls over 3 ft tall or supporting structures often require engineered plans and permits. Sketch your wall’s location, height, and setback; use stakes and string to mark the toe (front edge) and heel (back edge). Slope must be no steeper than 3:1 (3 ft horizontal per 1 ft vertical) behind the wall for stability.
2. Excavate and Compact the Base
Dig a trench 6–8 inches deep and 12 inches wide (or 1.5× block width) along the marked line. Remove topsoil until you hit firm subsoil. Fill with 4 inches of crushed gravel, then compact with a plate compactor in two passes—each pass overlapping by 3 inches. Verify level with a 4-ft level; tolerance: ±⅛ inch over 10 ft.
3. Lay the First Course
Set the first block on the compacted base. Tap gently with a rubber mallet to embed it—not just sit on top. Use a line level across three blocks to confirm alignment and elevation. Stagger joints like brickwork; offset each successive block by half its length. Anchor the first course with rebar pins driven into subsoil every 4 feet if the wall exceeds 2 ft or supports live loads.
- Tip: Snap a chalk line on the base gravel before placing blocks—it speeds up alignment.
- Warning: Never lay blocks directly on uncompacted soil or clay. Hydrostatic pressure will shift them within one season.
4. Install Drainage and Backfill
After laying the first course, unroll geotextile fabric behind the wall, extending 3 ft beyond the back face. Place 4-inch perforated drainpipe (sleeved in filter fabric) at the base of the wall, sloping 1 inch per 8 ft toward daylight or a dry well. Backfill the first 12 inches behind the wall with ¾" gravel only—no soil. Compact in 6-inch lifts using the plate compactor.
- Tip: Wrap pipe ends in filter fabric and cap with gravel to prevent clogging.
- Warning: Skipping drainage causes 78% of premature retaining wall failures, according to the National Concrete Masonry Association’s Design Manual for Segmental Retaining Walls (2022).
5. Stack and Stabilize Subsequent Courses
Apply manufacturer-recommended adhesive or pinning system between courses. Offset vertical joints by at least 2 inches. For walls over 2 ft, use deadmen anchors (12"×12"×2" pressure-treated lumber) buried 4 ft behind the wall and embedded in every third course. Check batter (inward lean) with a story pole: 1/4"–1/2" per foot of height.
Pro Tips
Retaining walls fail not from poor stacking—but from hidden water and weak foundations. Always prioritize drainage and compaction over speed. A wall built on solid, drained ground will outlast one made with premium blocks but poor prep.
“The number-one cause of leaning or bulging segmental walls isn’t block quality—it’s inadequate base compaction and missing or blocked weep holes.” — Scott R. D’Amico, P.E., NCMA Technical Director, 2023
Common mistakes include skipping the geotextile layer (lets fine soil migrate into gravel), over-tamping backfill (crushes pipe or fabric), and ignoring frost depth—below-grade base must extend below local frost line (e.g., 36" in Minneapolis, 12" in Atlanta).
What’s the maximum height I can build without engineering?
Most municipalities allow 3 ft-tall segmental walls without stamped plans—if freestanding, not supporting driveways or structures. But if your site has heavy clay soil, steep upslope (>20%), or groundwater seepage, consult an engineer even at 2 ft. The International Building Code (IBC 2021) requires design review for any wall exceeding 48 inches or subject to surcharge loading.
Can I build a retaining wall on a slope I’m grading myself?
Yes—but only after final grade is established and stabilized. Do not build while active soil movement is occurring. Allow newly graded areas to settle for at least 3 weeks (longer in wet climates) before excavation. Use a transit level to verify grade consistency; slopes greater than 5% behind the wall require stepped footing or terracing.
Do I need mortar for interlocking concrete blocks?
No—modern segmental retaining wall (SRW) units rely on mass, friction, and gravity. Mortar reduces flexibility and traps moisture, accelerating freeze-thaw damage. Instead, use manufacturer-approved pins, clips, or polymeric joint stabilizers for taller walls. Mortar is reserved for veneered or decorative stone walls under structural engineer oversight.
How do I handle tree roots near the wall line?
Cut roots larger than 2 inches diameter cleanly with a sharp saw—not torn with a shovel—to minimize stress to the tree. Avoid cutting more than 25% of a tree’s root zone within the drip line. If roots exceed 4 inches or wrap around utilities, contact an arborist before proceeding. Root removal may require additional soil stabilization like root barriers (how to install root barrier).
Can I integrate lighting or planters into the wall?
Absolutely—just plan early. Embed low-voltage LED wire conduits during backfill (use rigid PVC rated for burial). For planter tiers, build recessed pockets lined with EPDM pond liner and add 2" of coarse gravel beneath soil to prevent waterlogging. Ensure planter weight doesn’t exceed the wall’s lateral load capacity—consult your block manufacturer’s engineering specs (retaining wall block comparison).
What maintenance does a retaining wall need yearly?
Inspect weep holes every spring for debris; clear with a wire hanger or compressed air. Check for bulging, cracking, or separation at joints—minor shifts (<¼") are normal, but >½" requires professional evaluation. Replenish gravel behind caps every 2–3 years, and prune vines or shrubs whose roots could infiltrate the drainage zone (how to prune woody plants).
A well-built retaining wall fades into the landscape—not because it’s invisible, but because it works so quietly and reliably. Take your time on the base and drainage, double-check your batter, and don’t rush backfilling. That patience pays off in decades of stable, functional terrain—not just a weekend project, but long-term yard integrity.