Building a retaining wall is a mid-skill DIY project that stabilizes sloped yards, prevents erosion, and creates usable outdoor space. With moderate carpentry and excavation experience, you can complete a 3-foot-high, 20-foot-long wall in 3–4 weekend days. No concrete pouring or heavy machinery required if using segmental block systems.
Overview
| Skill Level | Time Required | Tools Needed | Estimated Cost (20-ft × 3-ft wall) |
|---|---|---|---|
| Intermediate | 24–32 hours total (over 3–4 days) | Shovel, level, string line, rubber mallet, plate compactor, tape measure, safety glasses | $680–$1,150 (blocks, base gravel, drainage pipe, filter fabric) |
Tools & Materials
| Category | Item | Notes |
|---|---|---|
| Materials | Concrete retaining blocks (e.g., Oldcastle ArmorLoc or Versa-Lok) | Plan for 10% extra for cuts and breakage; 36 blocks per sq ft for standard 8" × 16" units |
| Materials | ¾" crushed stone (washed, angular) | Minimum 6" base layer + 12" backfill; avoid pea gravel—it doesn’t compact |
| Materials | Perforated 4" PVC drain pipe (SCH 40) | Must slope 1/8" per foot toward daylight outlet; wrap in landscape fabric |
| Materials | Geotextile filter fabric | Non-woven polyester (e.g., Mirafi 140N); overlaps 12" at seams |
| Tools | Plate compactor (rental: $55/day) | Essential—hand-tamping won’t achieve >95% compaction needed for stability |
| Tools | Laser level or builder’s level + grade rod | Required for consistent 1"–2" batter (inward lean) per foot of height |
Step-by-Step Instructions
1. Survey and Mark Layout
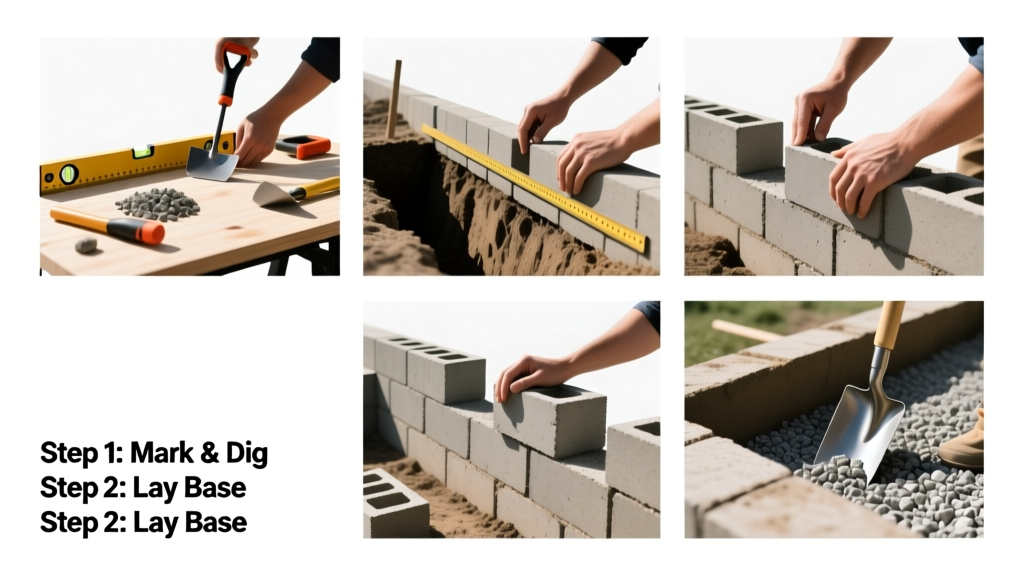
Use stakes and mason’s string to outline the wall’s footprint. Measure perpendicular to the slope—not along it—to ensure straight alignment. Mark the toe (front edge) and heel (back edge) lines. Set batter boards 2 ft beyond each end to preserve layout when excavating. Double-check right angles with the 3-4-5 triangle method: measure 3 ft on one side, 4 ft on the adjacent, and confirm the diagonal is exactly 5 ft.
2. Excavate and Prepare Base
Dig a trench 8–10" deep and 24" wide (for a 3-ft wall). Remove all organic topsoil—roots and clay compromise compaction. Slope the bottom 1/8" per foot toward the front to encourage water runoff under the wall. Lay 6" of ¾" crushed stone, moisten lightly, then compact in two 3" lifts using a plate compactor. Verify level and slope with a 4-ft level and string line before proceeding.
3. Lay First Course and Establish Batter
Set the first row of blocks on the compacted base. Tap gently with a rubber mallet—never a sledgehammer. Use a level and string line to keep blocks level side-to-side and front-to-back. For every foot of wall height, lean the wall 1" inward (batter). A laser level with grade rod makes this precise. Stagger vertical joints by at least 1/3 block length—like brickwork—to prevent shear failure.
4. Install Drainage and Backfill
After laying the second course, place perforated drain pipe against the wall’s back face, sloping 1/8" per foot toward an outlet. Wrap pipe and surrounding 12" of gravel in geotextile fabric. Backfill behind the wall with 12" of clean ¾" crushed stone—no soil yet. Compact in 6" lifts. Only after full stone backfill is complete should you add native soil—and only in 8" lifts, compacted each time.
Pro Tips
Retaining walls over 3 ft tall require engineering review in most U.S. municipalities—and many codes now mandate licensed design for walls above 4 ft. Even for shorter walls, skipping proper drainage causes 73% of premature failures, according to the National Concrete Masonry Association’s 2022 Field Failure Survey.
“A wall without integrated drainage isn’t a retaining wall—it’s a dam waiting to bulge. Always bury the pipe *behind* the first 12 inches of stone, not in the soil.”
—Linda Cho, P.E., NCMA Certified Segmental Retaining Wall Designer (2023)
- Never use mortar or adhesive between interlocking blocks—the system relies on gravity and friction
- Avoid placing walls directly against tree roots; root expansion can lift and crack blocks within 5 years
- If building on clay soil, extend the gravel base 12" beyond the wall’s footprint to prevent edge settlement
Can I build a retaining wall on a slope steeper than 3:1?
Yes—but only with engineered solutions. Steeper slopes demand stepped foundations, geogrid reinforcement (every 12–16" of height), or cantilevered designs. For slopes exceeding 3:1 (3 ft horizontal per 1 ft vertical), consult a soils engineer before digging. Soil test reports will reveal bearing capacity and lateral pressure values critical for design.
Do I need a permit for a 2.5-foot retaining wall?
In 37 states, yes—if the wall is within 3 ft of a property line, supports a structure, or retains more than 24" of fill. Check your local building department: many now require stamped drawings even for 24"–36" walls. Reading local code amendments takes 20 minutes and avoids costly rework.
What’s the best block type for freeze-thaw climates?
Look for ASTM C1372-compliant units with <5% water absorption. Concrete blocks made with air-entrained mix (like Oldcastle Envision or Basalite FrostGuard) resist spalling better than standard pavers. Avoid dry-stacked natural stone in zones with >100 freeze-thaw cycles/year—mortar joints degrade faster than engineered block interlocks.
Can I reuse existing patio stones as retaining blocks?
No—unless they’re specifically rated for retaining applications. Patio pavers lack shear resistance, key interlock geometry, and weight distribution. The American Society of Civil Engineers warns that repurposed pavers fail under lateral earth pressure within 3–7 years, often with sudden, dangerous collapse.
How do I handle utility lines during excavation?
Call 811 at least 3 business days before digging. Mark all lines in paint or flags—and verify depth with hand-digging within 18" of marked locations. If a gas or electric line runs within 24" of your planned wall footprint, contact the utility for relocation or engineered rerouting. Never cut or shift buried utilities yourself.
Should I seal the front face of the wall?
No. Sealing traps moisture behind the wall, accelerating freeze-thaw damage and weakening block bonds. Instead, apply a breathable silane-siloxane sealer *only* to the exposed front face—and only after the wall has cured 30 days in dry weather. Skip sealing entirely in shaded, high-humidity areas.
A well-built retaining wall becomes invisible infrastructure—supporting gardens, patios, and play areas without drawing attention. Focus on precision in the first three courses and drainage integrity, and your wall will hold firm through decades of rain, frost, and soil movement. For taller projects or complex site conditions, always pair DIY effort with a structural review—knowing when to call a pro is part of mastering the craft.