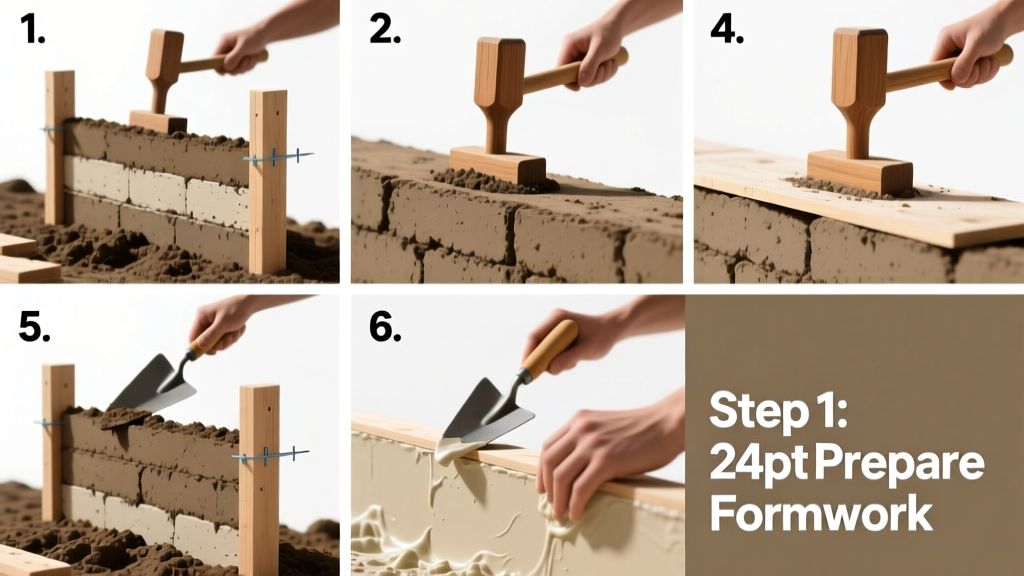
Rammed earth wall construction is a centuries-old technique revived for modern eco-homes and landscape features. It’s moderately difficult — requiring physical stamina, precision mixing, and patience — but entirely doable for a skilled DIYer or small crew. Expect 3–5 days per 10-foot wall section (8 ft high × 12 in thick), depending on weather and labor.
Overview
| Category | Details |
|---|---|
| Skill Level | Intermediate (requires soil testing, compaction discipline, and formwork carpentry) |
| Time Required | 3–5 days per 10-ft × 8-ft section (excluding curing and form removal) |
| Tools Needed | Soil sifter, pneumatic or manual tampers, plywood formwork, level, moisture meter, wheelbarrow, trowel |
| Estimated Cost | $18–$32 per sq ft (material-only; excludes labor or engineering review) |
Tools & Materials
| Item | Specification/Notes |
|---|---|
| Soil blend | 70% sandy gravel, 20% clay, 10% silt — tested per ASTM D698 for optimum compaction |
| Stabilizer (optional) | 4–6% Portland cement (by dry weight) for seismic zones or high-rainfall climates |
| Formwork | 3/4" BC-grade plywood, 2×6 bracing, galvanized steel tie rods (1/2" diameter, spaced ≤ 24" apart) |
| Tamping tool | Pneumatic tamper (120 psi minimum) or manual 12-lb round-end rammer with 4" face |
| Moisture control | Handheld moisture meter (calibrated for earthen mixes); target: 8–12% by weight |
Step-by-Step Instructions
1. Test and prepare your soil
Collect 5–7 soil samples from different depths across your site. Send them to a geotech lab for gradation analysis and Atterberg limits. Reject soils with >35% clay or <15% fines — they’ll crack or slump. Sieve onsite material through 3/8" mesh to remove roots, stones, and debris. Mix in stabilizer only if lab results and local building code require it.
- Tip: Always moisten soil the night before tamping — let it condition overnight in covered piles.
- Warning: Never use topsoil, organic-rich loam, or heavily weathered shale — they lack structural integrity.
2. Build and brace the formwork
Erect vertical plywood panels secured with 2×6 horizontal wales and steel tie rods. Ensure plumb and square using a laser level and diagonal measurements (difference ≤ 1/8" over 10 ft). Anchor base plates to footings with anchor bolts set before concrete pour. Leave 2" gaps at corners for future coursing alignment.
- Tip: Coat interior plywood faces with diesel oil or commercial form release — not vegetable oil (it gums up).
- Warning: Over-tightening tie rods bows panels inward — check deflection daily with straightedge.
3. Layer and compact the mix
Add 4–6" lifts of moistened soil into the forms. Tamp each lift uniformly: 25–30 passes per sq ft with pneumatic equipment, or 40–50 passes manually. Use a moisture meter after every third lift — adjust water content immediately if readings drift outside 8–12%. Stop tamping when surface glistens slightly and rebounds without denting.
According to the U.S. Department of Energy’s Building America Solution Center (2022), “Rammed earth walls achieve optimal compressive strength (1,200–1,800 psi) only when density exceeds 125 lb/ft³ — verified by nuclear density gauge or calibrated core sampling.”
4. Strip forms and cure
Wait 4–7 days before removing forms — longer in cool/humid conditions. Gently loosen tie rods and pry panels away with rubber mallets. Brush exposed surface with stiff nylon brush to reveal aggregate texture. Cure by misting twice daily for 7 days, then cover with breathable burlap. Avoid direct sun or wind exposure for first 10 days.
- Tip: Score control joints every 12 ft horizontally and 8 ft vertically using a grooving tool — reduces random cracking.
- Warning: Never seal with acrylic or silicone coatings early — trapped moisture causes efflorescence and delamination.
Pro Tips
Seasonal timing matters more than most assume. Late spring and early fall — with daytime temps 60–85°F and humidity 40–65% — deliver best compaction and drying rates. Avoid building during monsoon season or sub-45°F nights.
One common mistake is skipping the trial wall: build a 3-ft test panel first, let it cure 14 days, then perform a Schmidt hammer test. If rebound value falls below 32, adjust moisture or clay content.
“The biggest failure point isn’t soil quality — it’s inconsistent lift thickness. A 1/2-inch variation between layers creates shear planes that telegraph as horizontal cracks within 18 months.” — Dr. Lena Cho, Senior Researcher, UC Davis Center for Sustainable Building Science (2021)
Why does my rammed earth wall have hairline cracks?
Hairline cracks under 0.004" wide are normal and structural — they result from shrinkage during slow curing. Widen them slightly with a grout bag and fill with matching slurry (same soil + 2% cement). Seal only if water infiltration occurs behind the wall.
Can I build rammed earth in cold climates?
Yes — but only with ≥6% cement stabilization and heated enclosures during placement. The Canadian Mortgage and Housing Corporation (CMHC, 2020) reports successful rammed earth installations in Yukon using insulated formwork and infrared curing blankets.
Do I need an engineer’s stamp?
For load-bearing walls over 6 ft tall or any wall supporting roof loads, yes — per International Residential Code (IRC R612.2). Non-load-bearing garden walls under 4 ft typically don’t require it, but always verify with your local building department.
How long does a rammed earth wall last?
Properly designed and detailed rammed earth walls exceed 1,000 years — evidenced by structures like the Great Wall’s western sections and Yemen’s Shibam mud towers. Modern walls with stabilized mixes and adequate eaves routinely achieve 200+ year service life (Earth Architecture Association, 2023).
Can I add color or texture?
Absolutely. Iron oxide pigments (up to 5% by weight) integrate evenly during mixing. For texture, embed river stones, recycled glass, or locally quarried stone chips into the final lift before tamping — press them 1/4" deep for secure bond.
What maintenance does it need?
Annual visual inspection for spalling or erosion at grade line. Reapply natural lime wash (how to apply lime wash) every 5–7 years to protect against acid rain. Trim vegetation within 12 inches to prevent root pressure and moisture trapping — see our guide on preventing plant damage to masonry.
Rammed earth rewards meticulous preparation and respect for material behavior — not speed. When done right, it delivers unmatched thermal mass, fire resistance, and quiet beauty. Start small, document every lift, and trust the rhythm of the tamp.