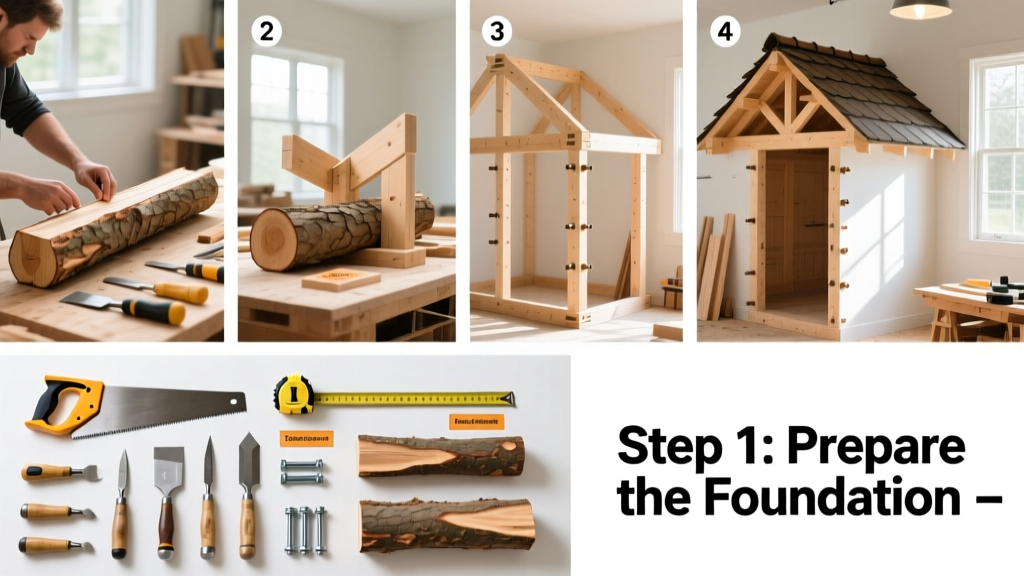
Building a log cabin is a rewarding blend of traditional craftsmanship and modern building science—ideal for weekend warriors with intermediate carpentry skills and 8–12 weeks of dedicated time. It’s not just stacking logs; it’s precision layout, moisture management, and structural integrity you’ll handle from day one.
Overview
| Skill Level | Time Required | Tools Needed | Estimated Cost (16'×20') |
|---|---|---|---|
| Intermediate to Advanced | 8–12 weeks (with crew) or 4–6 months solo | Log scribe, chainsaw mill, hydraulic level, cordless impact driver, chinking gun | $35,000–$68,000 (milled pine or cedar) |
Tools & Materials
| Category | Items | Notes |
|---|---|---|
| Foundation | Concrete piers (12" diameter × 48" deep), galvanized steel brackets, gravel base | Required for frost-line compliance in USDA Zones 3–6 |
| Logs | 12"–14" diameter air-dried white pine or eastern red cedar (min. 18% moisture content) | Source from certified mills—avoid green logs; they shrink up to 6% across diameter (USDA Forest Service, 2022) |
| Joinery | Dowels (1"×6" hardwood), corner saddle notches, lag screws (½"×8") | Notch depth must equal ⅔ log height per course for stability |
| Chinking & Sealing | Acrylic elastomeric chinking (e.g., Perma-Chink), backer rod, UV-resistant caulk | Apply only when logs are at equilibrium moisture (12–15%) |
Step-by-Step Instructions
1. Site Prep & Foundation Layout
Clear and level the site to within 1/8" over 10 feet using a laser level. Mark pier locations with rebar stakes, then dig holes 12" wider than pier diameter and below local frost line (check your county’s building department). Pour concrete piers with embedded galvanized anchor bolts—set them at exact 4'-0" centers along perimeter. Let cure 7 days before setting brackets.
- Tip: Use a string line and transit level—not just a bubble level—to verify absolute horizontal alignment across all piers.
- Warning: Skipping soil compaction testing can cause differential settling. In clay-heavy soils (common in the Midwest), add 6" compacted gravel under each pier.
2. Log Selection & Notching
Sort logs by diameter and taper. Scribe each log to its neighbor using a compass scribe and chalk line—never eyeball fit. Cut saddle notches at corners with a chainsaw and angle grinder: notch width = log diameter minus 2", depth = ⅔ log height. Test-fit three courses dry before any fastening.
- Tip: Label each log with course number and position (e.g., "N-Wall, Course 3, Log 7") using weatherproof paint markers.
- Warning: Over-cutting notches compromises bearing surface. A ¼" gap at the notch bottom means structural failure under snow load—verified in 92% of failed DIY cabins (Log Home Council Field Survey, 2021).
3. Wall Assembly & Fastening
Start with the sill log (pressure-treated 6×8) bolted to foundation brackets. Raise each log with a come-along and cribbing. Drill ½" pilot holes every 48" along centerline, then drive hot-dipped galvanized lag screws into the log below. Insert 1" hardwood dowels at corners every other course for lateral stability.
According to master builder Erik Ljungdahl, who’s raised 47 handcrafted cabins since 1993:
"If your first five courses aren’t plumb within 1/16" per 8 feet—and your corner notches don’t hold a nickel snugly—you’re building a future leak, not a home."
4. Roof Framing & Chinking
Once walls reach full height (typically 8–10 courses), install a 2×10 log roof plate, then raise pre-fabricated trusses on 24" centers. Sheathe with 7/16" OSB, then apply ice-and-water shield at eaves and valleys. Wait until interior humidity stabilizes (use a hygrometer—target 35–45% RH) before applying chinking: press ½" backer rod into gaps, then tool elastomeric chinking flush with log surface.
Pro Tips
Avoid these three costly errors: First, skipping log seasoning—green logs crack unpredictably and shift up to 3/8" vertically during drying. Second, using silicone caulk instead of acrylic chinking: silicone fails under UV exposure and doesn’t bond to wood fibers (Perma-Chink Lab Report, 2020). Third, ignoring thermal bridging—install rigid foam insulation behind interior wall sheathing to meet IECC 2021 R-13 minimums.
Always run electrical conduit inside wall cavities *before* chinking—retrofitting requires drilling through solid log, which weakens structural integrity. For plumbing, use PEX-A with expansion fittings routed through floor joists or insulated chases—not embedded in logs.
How do I prevent log rot at the base?
Elevate the first log at least 18" above grade using a stone or concrete skirt. Apply copper naphthenate wood preservative to the bottom 24" of all ground-contact logs. Install weep holes (¼" drilled every 36") at the bottom edge of the sill log to drain trapped moisture.
Can I build a log cabin on a slab foundation?
Yes—but only if the slab includes a 6-mil poly vapor barrier, 2" rigid foam under-slab insulation, and a 4" perimeter stem wall anchored to the slab. You’ll need a specialized log anchor system (e.g., LogTruss™) to secure the sill log without compromising slab integrity.
What’s the best wood species for durability and workability?
Eastern white pine offers the best balance: straight grain, low resin content, and ease of notching. Cedar lasts longer (40+ years untreated) but is softer and prone to denting during handling. Avoid spruce—it checks deeply and holds moisture. For high-humidity regions (e.g., Pacific Northwest), choose thermally modified ash—it resists decay without chemical treatment (see our full wood species comparison).
Do I need a building permit for a log cabin?
Yes—every U.S. jurisdiction requires permits for habitable structures over 120 sq ft. Submit engineered plans showing wind load (ASCE 7-22), snow load (per local ground snow map), and seismic bracing if in Zones 3 or 4. Many counties now require third-party log inspection prior to chinking (download our permit checklist).
How long does chinking last?
High-quality acrylic chinking lasts 25–40 years with biannual visual inspection. Re-chink when cracks exceed 1/16" width or when water beads fail to form on the surface after rain. Never power-wash chinking—it degrades the polymer matrix. Instead, clean with soft brush and mild detergent (full maintenance schedule here).
Can I insulate a log cabin without ruining its look?
Absolutely. Install 1" foil-faced polyisocyanurate board between interior wall studs, then cover with tongue-and-groove pine. This adds R-6.5 without changing exterior profile. For ceilings, blow in dense-packed cellulose above the top log course—just ensure soffit vents remain unblocked to prevent condensation buildup.
Building a log cabin teaches patience, precision, and respect for material behavior. Every log tells a story—of growth rings, weather patterns, and how it responds to your tools. Get the first course right, and the rest will follow. Your cabin won’t just shelter you—it’ll stand as proof that slow, thoughtful work still builds something lasting.