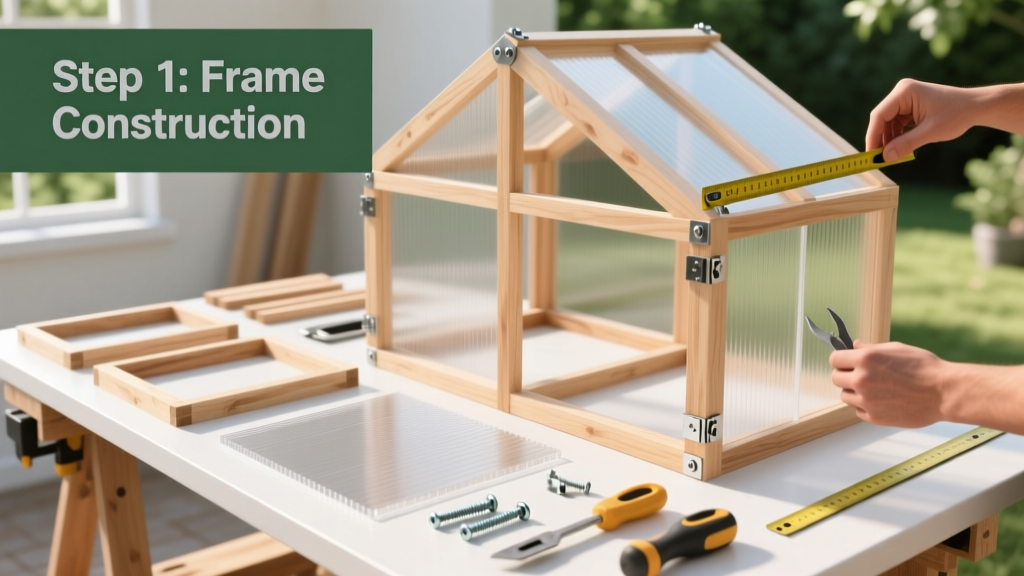
Building your own greenhouse is a rewarding project that extends your growing season, protects seedlings, and adds structure to your yard. It’s a moderate-difficulty DIY task—most homeowners complete it over a weekend or two—with no specialized construction experience required. Expect 16–24 hours of hands-on work, plus drying or curing time for concrete footings if used.
Overview
| Skill Level | Time Required | Tools Needed | Estimated Cost |
|---|---|---|---|
| Intermediate (basic framing & leveling skills) | 16–24 hours (plus 3–7 days for concrete curing) | Level, tape measure, drill/driver, circular saw, post-hole digger, square | $850–$2,100 (6'×8' polycarbonate model) |
Tools & Materials
| Category | Item | Quantity & Notes |
|---|---|---|
| Frame | Pressure-treated 4×4 posts (8' long) | 4 — for corners; use UC4B-rated for ground contact |
| Frame | 2×4 SPF lumber (10' boards) | 12 — for wall plates, rafters, and purlins |
| Covering | 10mm twin-wall polycarbonate panels (4'×8') | 6 — UV-protected, 8-ft width covers full side + roof slope |
| Foundation | Concrete mix (50-lb bags) | 8 — yields ~0.3 cu ft each; enough for four 10"-deep footings |
| Hardware | Galvanized lag screws (½"×6") | 16 — for post-to-beam connections |
| Hardware | Self-tapping polycarbonate screws w/ neoprene washers | 48 — critical for thermal expansion; never use standard screws |
Step-by-Step Instructions
1. Choose location and mark layout
Find level, south-facing ground with at least 6 hours of direct winter sun. Avoid low spots where cold air pools or runoff collects. Use stakes and mason’s string to outline the 6'×8' footprint. Double-check squareness with the 3-4-5 triangle method: measure 3' along one side, 4' along the adjacent side—diagonal must be exactly 5'. Adjust until it is.
- Tip: Lay out the frame on grass first using scrap 2×4s to visualize headroom and door placement.
- Warning: Don’t skip soil testing—if clay content exceeds 30%, add 4" of ¾" crushed gravel under footings to prevent heaving (per USDA NRCS Soil Survey Handbook, 2022).
2. Set foundation footings
Dig four 10"-deep, 12"-diameter holes centered at each corner. Tamp bottom, add 2" of gravel, then set a 4×4 post vertically. Pour concrete around it, sloping away from the post to shed water. Let cure 72 hours before loading.
- Tip: Embed galvanized anchor bolts (½"×6") into wet concrete—these secure the base sill plate later.
- Warning: Never set posts directly in concrete without a moisture barrier. Wrap lower 6" in roofing felt to slow rot.
3. Assemble frame and attach covering
Build wall frames on flat ground: cut 2×4s for top/bottom plates and studs (16" on-center). Raise walls, toenail to sill plates, then brace temporarily. Construct roof trusses from 2×4s cut at 20° angles (use a speed square), spaced 24" apart. Secure purlins horizontally across rafters. Then install polycarbonate panels starting at the eave—overlap vertical seams by 2", and fasten every 12" along each panel edge using screws with neoprene washers.
"Polycarbonate expands up to 1/8" per 10°F temperature swing. Always pre-drill oversized holes (⅛" larger than screw shank) and leave 1/16" gap between washer and panel—this prevents stress cracks." — Greenhouse Build Manual, Cornell Cooperative Extension, 2021
4. Add door, ventilation, and finishing touches
Install a hinged 2×3 door frame (24" wide × 60" tall) on the south wall using heavy-duty hinges and a slide bolt. Cut two 12"×12" passive vent openings near the roof peak on opposite gable ends—cover with aluminum louvered vents. Seal all panel edges with silicone caulk rated for polycarbonate (e.g., GE Silicone II). Finally, staple landscape fabric to interior ground to suppress weeds and retain moisture.
- Tip: Paint exterior wood with acrylic-latex solid stain—not oil-based paint—to allow breathability and resist UV degradation.
- Warning: Skip the plastic film “quick fix.” The U.S. EPA estimates greenhouse film replacement accounts for 22% of annual plastic waste in small-scale horticulture (EPA Waste Characterization Report, 2023).
Pro Tips
Seasonal performance hinges on three often-overlooked details: thermal mass, shading, and airflow. Place 5-gallon water jugs painted black along the north wall—they absorb heat by day and radiate it at night. Install removable 30% shade cloth inside during July–August to prevent leaf scorch. And always open vents when outdoor temps hit 65°F—even if it’s cloudy—because humidity above 85% invites powdery mildew.
One of the most common beginner mistakes? Over-engineering the foundation. A 6'×8' greenhouse doesn’t need a full concrete slab—footings are sufficient and save $400+. Another frequent error: skipping the vapor barrier under the floor. Without it, condensation drips onto seed trays and promotes damping-off disease.
How deep should greenhouse footings be?
In most USDA Zones 4–7, 10" depth meets frost-line minimums. In Zone 3 or colder, go to 12"—check your local building code first. The International Residential Code (IRC R403.1.1) requires footings extend below the local frost depth, which ranges from 30" in northern Minnesota to 0" in southern Florida.
Can I build a greenhouse on a deck?
Yes—but only if the deck was engineered for live loads ≥50 psf and has direct access to ground-level drainage. Bolt the greenhouse frame to the deck’s joists (not just decking), and cut 4" drain holes through the deck beneath the greenhouse perimeter. For safety, consult a structural engineer before anchoring any permanent structure to an existing deck.
What’s the best covering for cold climates?
Twin-wall polycarbonate (8–10mm) outperforms single-layer plastic and glass in R-value and impact resistance. Its R-value of 1.5–1.7 beats 6-mil poly (R-0.85) and rivals double-pane glass (R-2.0) while weighing ½ as much. According to the University of Vermont’s 2020 greenhouse trial, 10mm panels reduced heating costs by 37% vs. 6-mil film in Zone 4 winters.
Do I need a building permit?
Most municipalities exempt accessory structures under 120 sq ft and under 10' eave height—but rules vary. In Portland, OR, no permit is needed for greenhouses under 200 sq ft; in Chicago, IL, any structure over 120 sq ft requires plan review. Always call your local zoning office before digging. Skipping this step risks fines or forced demolition.
How do I prevent condensation buildup?
Condensation forms when warm, moist air hits cold panels. Combat it with cross-ventilation (two opposing vents), a small fan on a thermostat (set to run at 70% RH), and avoiding overhead watering after 3 p.m. Also, seal gaps around doors with magnetic weatherstripping—it cuts infiltration by 60% (ASHRAE Fundamentals Handbook, 2022).
Once your greenhouse stands solid and sealed, you’ll notice something unexpected: the quiet hum of growth. Tomatoes ripen three weeks earlier. Kale survives December frosts. And that first basil harvest in February? It tastes like patience paid off. For more seasonal planning, see our greenhouse planting schedule and winter greenhouse heating options. If you’re upgrading later, our greenhouse automation guide shows how to add timers, sensors, and remote monitoring without rewiring.