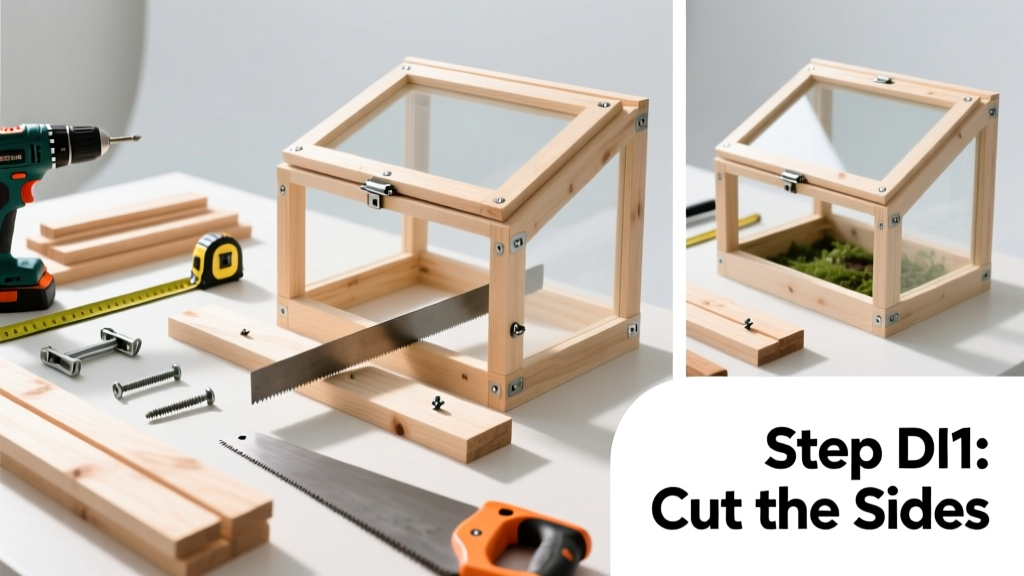
Building a cold frame is a foundational skill for gardeners who want to extend the growing season by 4–6 weeks in spring and fall. It’s a beginner-friendly woodworking project that takes under one full weekend (about 8–10 hours total), requires no power tools beyond a drill, and costs less than $75 using common lumber and repurposed materials.
Overview
| Category | Details |
|---|---|
| Skill Level | Beginner — basic measuring, drilling, and screwing |
| Time Required | 8–10 hours (including drying time for optional sealant) |
| Tools Needed | Drill/driver, tape measure, square, handsaw or circular saw, clamps, pencil |
| Estimated Cost | $45–$72 (using pressure-treated pine and salvaged plexiglass) |
Tools & Materials
| Item | Specs & Notes |
|---|---|
| Front board (bottom) | 1×6 × 24" (cedar or pressure-treated pine — rot-resistant) |
| Rear board (top) | 1×6 × 24" — cut at 15° angle for slope (use speed square) |
| Sides (2) | 1×6 × 18" — both cut with matching 15° bevels on top edge |
| Hinges & screws | 2 × 3" strap hinges + #8 × 1" screws (stainless steel recommended) |
| Cover material | 18" × 24" tempered glass or 1/8" plexiglass (UV-resistant grade) |
| Sealant (optional) | Waterproof wood glue + exterior-grade polyurethane sealant |
Step-by-Step Instructions
1. Cut and prepare all wood pieces
Measure and mark each board precisely before cutting. Use a speed square to scribe the 15° bevel on the rear board and both side tops — this ensures proper rain runoff and maximum sun exposure. Sand sharp edges smooth; splinters near seedlings are a real hazard. Clamp boards together before pre-drilling pilot holes to prevent splitting.
2. Assemble the box frame
Start with the front (low) and rear (high) boards parallel, 18" apart. Attach side boards using 2½" exterior screws — two per joint, countersunk slightly. Double-check squareness with a carpenter’s square: diagonals must match within 1/8". If they don’t, loosen screws and adjust before tightening fully.
3. Mount the cover hinge
Position the plexiglass or glass centered over the frame. Align the long edge flush with the rear board’s top edge. Pre-drill and attach hinges using stainless steel screws — avoid overtightening, which can crack acrylic. Leave a 1/16" gap between cover and wood for thermal expansion.
4. Install ventilation controls
Attach a simple prop stick (a 6" scrap of 1×2 with a notch cut at one end) or install a commercial automatic vent opener. For manual control, use a small hook-and-eye latch on the front board to hold the cover open at 2–4 inches on warm days. According to the University of Vermont Extension’s 2022 Small-Scale Farm Handbook, unvented cold frames can exceed 110°F internally — enough to cook tender greens in under an hour.
Pro Tips
Seasoned market gardeners rarely build identical cold frames twice — they adapt based on microclimate and crop needs. Here’s what separates functional from flimsy:
- Always orient the long side east-west so the sloped lid faces south — you’ll gain up to 25% more solar gain in winter (USDA NRCS Soil Health Division, 2021).
- Line the interior base with 2" of coarse gravel before adding soil — it prevents waterlogging and deters slugs.
- Avoid painted covers: even “non-toxic” paints degrade under UV and can leach into soil. Stick with clear, UV-stabilized acrylic or tempered glass.
“The biggest mistake I see? Building too tall. Keep the back wall under 12" — taller frames lose heat faster and shade seedlings. A 6–8" height differential front-to-back gives ideal light capture and airflow.”
— Sarah Lin, organic grower and author of Four-Season Harvest Revisited, 2023
How deep should the soil be inside the cold frame?
Fill to 6–8" deep with a mix of 60% compost, 30% topsoil, and 10% coarse sand. This depth supports root development without sacrificing thermal mass — deeper beds cool slower at night but take longer to warm in morning sun.
Can I build a cold frame without power tools?
Yes. A hand miter box and backsaw let you cut accurate 15° bevels. Use a bradawl to start pilot holes, then drive screws with a screwdriver — it’s slower but fully doable. Just budget extra time (add ~2 hours).
What’s the best cover material for durability and clarity?
Tempered glass lasts 15+ years and transmits 92% of light, but it’s heavy and breakable. UV-stabilized polycarbonate (not plexiglass) is lighter, impact-resistant, and insulates 30% better — though it costs ~$22 more. Avoid standard acrylic: it yellows and cracks within 2 seasons.
Do I need to anchor my cold frame to the ground?
Only if you’re in a high-wind zone (e.g., coastal or prairie areas). In most gardens, weight alone suffices — fill the frame with soil and mulch. For anchoring, drive two 12" rebar stakes at front corners and secure with galvanized wire loops.
Can I use a cold frame for summer seed starting?
You can — but only with aggressive shading and ventilation. Drape 30% shade cloth over the cover on days above 75°F, and prop open 6–8". Without modification, midsummer internal temps regularly hit 120°F, killing basil and lettuce seedlings in under 90 minutes.
How do I clean and maintain my cold frame?
Wipe the cover monthly with vinegar-water (1:3) to remove mineral deposits and algae film. Inspect screws and hinges every fall; replace corroded hardware. Reapply exterior sealant to bare wood every other year — skip the paint, but don’t skip the protection.
Once your cold frame is built and sited, you’ll notice seedlings emerging 7–10 days earlier than uncovered beds — and survive light frosts down to 24°F. It’s not magic, just smart physics and careful craftsmanship. Pair it with our how to start seeds indoors guide to time your sowings perfectly, or check out best cold frame plans for scaled-up versions like walk-in models. With practice, you’ll build your second one in half the time — and maybe even teach a neighbor.