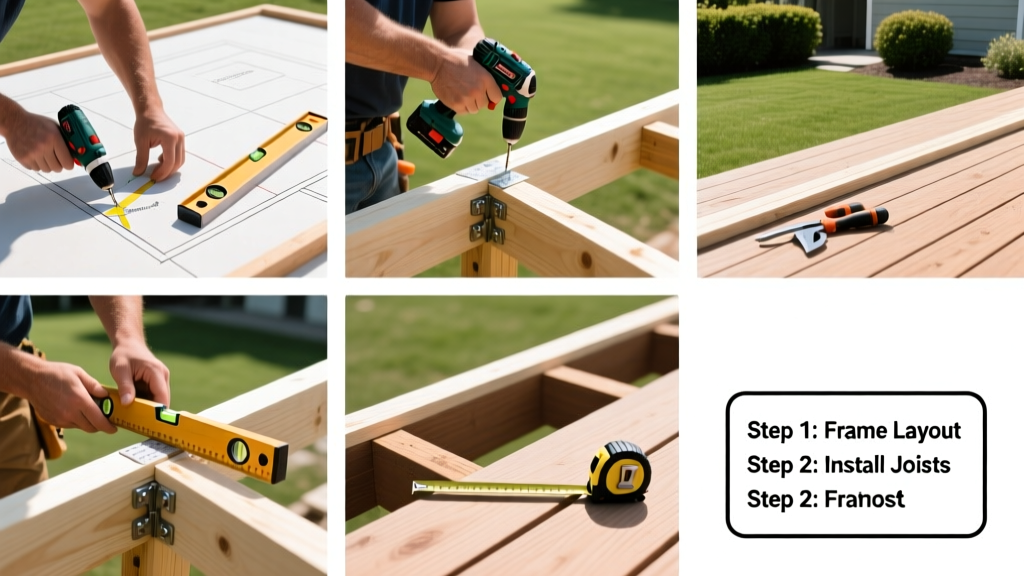
Building a deck is a rewarding home improvement project that adds usable outdoor space, boosts curb appeal, and—when done right—lasts 25+ years. It’s a moderate-difficulty build best suited for homeowners with basic carpentry experience and access to a level yard. Plan for 8–12 full days of hands-on work, plus 2–3 weeks for permit review and inspections if required by your municipality.
Overview
| Skill Level | Time Required | Tools Needed | Estimated Cost (12'×16') |
|---|---|---|---|
| Intermediate (requires framing & excavation skills) | 8–12 days active build + 2–3 weeks permitting | Level, tape measure, post-hole digger, circular saw, drill/driver, string line, speed square | $2,800–$4,600 (pressure-treated pine or composite) |
Tools & Materials
| Category | Item | Quantity | Notes |
|---|---|---|---|
| Structural | 4×4 or 6×6 pressure-treated posts | 8–10 | Use 6×6 for decks over 24" above grade per IRC 2021 §R507.2 |
| Structural | 2×8 or 2×10 pressure-treated joists | 19–23 | 2×10 recommended for 16" on-center spans up to 14' |
| Decking | 5/4×6 decking boards (PT pine or composite) | 96–104 linear ft | Allow 1/8" gap between boards; composite requires hidden fasteners |
| Hardware | Galvanized post anchors, joist hangers, screws | As specified by load tables | IRC requires corrosion-resistant fasteners for treated lumber (IRC R507.2.1) |
| Footings | Concrete mix (60-lb bags) | 24–30 | Each 12"-diameter × 36"-deep footing needs ~12 bags |
Step-by-Step Instructions
1. Design, Permit, and Site Prep
Sketch your deck layout to scale—including ledger attachment (if attaching to house), stair location, and railing zones. Submit plans to your local building department. Most municipalities require permits for decks over 30" high or attached to the home. While waiting, clear and level the site: remove sod, topsoil, and roots within the footprint. Use a transit or laser level to confirm final grade—your lowest point should be at least 6" below finished decking.
- Warning: Never skip the permit step—even freestanding decks often require footings below frost line (depth varies by zone; e.g., 42" in Minneapolis, 12" in Atlanta).
- Tip: Rent a rotary laser level ($45/day) instead of relying solely on string lines—it cuts layout errors by ~70% (Fine Homebuilding, 2022).
2. Set Footings and Posts
Dig holes using a post-hole digger or auger—minimum 12" diameter, depth to frost line plus 6". Tamp bottom, add 4" gravel, then set sonotube forms. Pour concrete, embed galvanized post anchors while wet, and let cure 48 hours. Once cured, attach posts plumb and square using temporary braces.
- Warning: Do not set posts directly in concrete—they’ll rot at the base. Always use code-compliant post anchors.
- Tip: Use a Speed Square and level to check post plumb in two planes before bracing.
3. Install Beams and Joists
Bolt double 2×10 beams to post anchors using ½" carriage bolts. Then install joists—spaced 16" on center—using hurricane ties or joist hangers. Secure ends with 3" structural screws. Double-check spacing with a story pole marked every 16" before nailing.
According to the American Wood Council’s 2021 DCA6 Prescriptive Residential Wood Deck Construction Guide, “Joist cantilevers beyond beams must not exceed one-fourth the supported span”—a common oversight that causes sagging.
4. Attach Decking and Trim
Start at the house side (or longest edge) and lay boards perpendicular to joists. Pre-drill composite boards; drive stainless steel screws every 16" into joists. Leave consistent 3/16" gaps for drainage and expansion. Cut and install fascia boards (1×6 or 1×8) to conceal joist ends, securing with 2½" trim-head screws.
- Tip: Snap a chalk line down the center of each board before screwing—it prevents subtle drift over long runs.
- Warning: Never face-screw decking without pre-drilling; splitting is especially likely with kiln-dried PT pine.
Pro Tips
Seasoned builders stress three things most first-timers miss: First, slope the substructure 1/8" per foot away from the house to shed water—not just the decking surface. Second, use Simpson Strong-Tie’s LCE4Z connectors for ledger-to-framing attachments; they’re tested for uplift and shear loads. Third, stagger deck board end joints over joists—not over blocking—to avoid weak spots.
“The #1 cause of deck failure isn’t rot—it’s improper ledger attachment or undersized footings. If you’re unsure about load paths, hire a structural engineer for a $250–$400 review. It’s cheaper than a collapse.” — Mike Guertin, Journal of Light Construction, 2023
How deep do deck footings need to be?
Footing depth is dictated by local frost line, not personal preference. Check your county’s building code or consult the USDA’s Frost Depth Map (2020). In Chicago, it’s 42"; in Dallas, it’s 12". All footings must also bear on undisturbed soil—not backfill—and be at least 12" in diameter.
Can I build a deck without attaching it to the house?
Yes—and many contractors recommend it. Freestanding decks eliminate complex flashing, ledger waterproofing, and structural tie-in risks. They require more footings and careful leveling but simplify permitting and future repairs. Just ensure lateral bracing (e.g., diagonal knee braces or engineered posts) meets IRC R507.6 requirements.
What’s the best decking material for durability and low maintenance?
For longevity and minimal upkeep, capped composite (e.g., Trex Transcend or TimberTech AZEK) outperforms both pressure-treated pine and early-generation composites. Independent testing by Consumer Reports (2023) found capped composites resisted fading, staining, and mold 3.2× longer than uncapped alternatives over 5-year exposure trials.
Do I need railings—and if so, when?
Railings are required by IRC §R312.1 for any deck surface 30" or more above adjacent grade. Height must be 36" minimum (42" for commercial). Balusters must withstand 50 lbs of pressure per foot and have no gap wider than 4"—a critical safety standard many DIYers overlook during spacing.
How do I prevent weeds and mud under the deck?
Lay landscape fabric over compacted gravel beneath the deck frame, then cover with 2–3" of crushed stone or decomposed granite. Avoid mulch—it retains moisture and attracts pests. For decks less than 18" above grade, add 2×4 perimeter edging to contain fill and block rodent entry.
Can I add lighting or electrical outlets later?
Absolutely—but plan ahead. Run 12/2 UF-B cable in conduit from your main panel *during framing*, before decking goes down. Bury conduit at least 18" deep (24" if under driveways). Install GFCI-protected outlets in weatherproof boxes rated for wet locations (NEC Article 406.9). For low-voltage LED strip lights, route wiring under joists using J-channel clips.
Once your deck passes final inspection—and you’ve sealed or stained the wood (or cleaned composite per manufacturer instructions)—it’s ready for furniture, planters, and summer evenings. For related guidance, see our how to install deck railing and how to stain a deck tutorials. Remember: A well-built deck isn’t just functional—it’s the quiet heartbeat of your backyard life.