Building your own compost bin is a practical, rewarding skill that turns food scraps and yard waste into nutrient-rich soil—no fancy equipment or carpentry degree required. This project is beginner-friendly, takes about 3.5 hours start-to-finish (plus optional curing time), and costs under $45 if you source reclaimed materials.
Overview
| Category | Details |
|---|---|
| Skill Level | Beginner — basic drilling and measuring skills sufficient |
| Time Required | 3.5–4 hours active build time; add 1–2 days for wood acclimation if using green lumber |
| Tools Needed | Drill/driver, tape measure, square, handsaw or circular saw, safety glasses, work gloves |
| Estimated Cost | $32–$44 (using new cedar boards) or $0–$12 (using de-nailed pallets) |
Tools & Materials
| Item | Specs & Notes |
|---|---|
| Cedar or rot-resistant lumber | 8 pieces: four 36" × 1" × 6" (side & back panels); four 36" × 1" × 2" (vertical corner posts) |
| Deck screws | 2½" exterior-grade stainless steel or coated screws (32 total) |
| Hinges & latch | 2 heavy-duty 3" strap hinges + 1 brass hook-and-eye latch (for removable front panel) |
| Optional but recommended | 1 gal of boiled linseed oil (non-toxic, water-resistant finish; apply after assembly) |
Step-by-Step Instructions
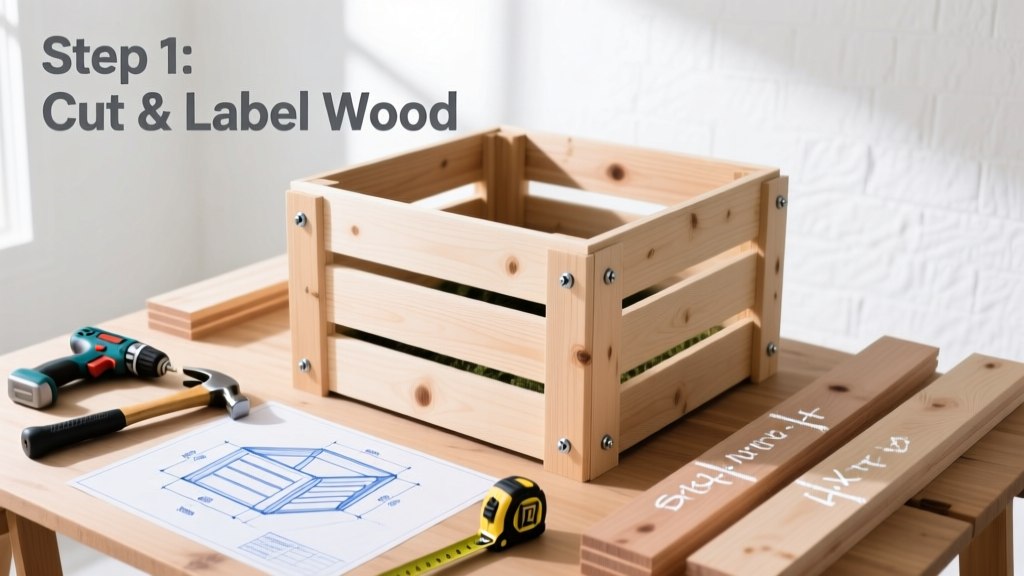
1. Cut and prep all lumber
Measure and cut boards to length using a square and saw. Sand rough edges—especially on cedar, which can splinter easily. Let wood sit indoors for 24 hours if it’s been stored outside; this reduces warping during assembly. Wear safety glasses when cutting.
2. Assemble the back and two side walls
Stand one 36" × 1" × 6" board vertically as the back panel. Attach two 36" × 1" × 2" posts to its left and right edges using three 2½" screws per post (top, middle, bottom). Repeat for both side panels—each gets one post on the interior edge only. This creates three independent U-shaped frames.
3. Join the walls into a three-sided box
Position the back panel between the two side panels, flush at the bottom and top. Pre-drill pilot holes through the side posts into the back panel’s edge to prevent splitting. Secure with three screws per joint (six total). Double-check squareness with a carpenter’s square—the diagonal measurements from corner to corner should match within ⅛".
4. Install the removable front panel and hardware
Cut a fourth 36" × 1" × 6" board for the front. Attach two strap hinges to its right edge, then screw them into the right-side post. Hang the front panel, then install the hook-and-eye latch on the left side to hold it closed. Test swing clearance: the front must open fully without scraping the ground or binding.
- Tip: Leave ¼" gaps between horizontal boards if stacking them vertically (not used here) to boost airflow—critical for aerobic decomposition.
- Warning: Never use pressure-treated lumber labeled “micronized copper azole” (MCA) or “alkaline copper quaternary” (ACQ)—these leach copper into compost. Cedar, redwood, or heat-treated pine are safe alternatives.
Pro Tips
Composting success hinges less on perfect construction and more on consistent use—and avoiding common pitfalls. According to the U.S. EPA, home composting diverts an average of 27% of household waste from landfills, but 60% of backyard bins fail within six months due to poor moisture or airflow management—not faulty builds.
“The biggest mistake I see isn’t bad framing—it’s over-engineering. A simple three-sided bin with a hinged front outperforms sealed plastic tumblers for hot composting because air moves freely up the sides and through the gaps.” — Sarah Lin, Master Composter Trainer, Oregon State University Extension, 2022
- Rotate your pile weekly with a pitchfork to maintain oxygen flow—this cuts decomposition time from 6 months to 6–8 weeks.
- Keep a small bucket near your kitchen sink for daily scraps, then dump and mix into the bin every 2–3 days (never let food sit >48 hours in warm weather).
- Line the bottom with 2" of dry shredded cardboard—this absorbs excess moisture and jumpstarts microbial activity.
How deep should my compost bin be?
Thirty-six inches is ideal: deep enough to retain heat for thermophilic breakdown, shallow enough to turn easily by hand. Going deeper than 48" restricts airflow to the center and invites anaerobic odors.
Can I build this on concrete or pavers?
Yes—but drill ½" drainage holes every 12" along the bottom edge of the back and side panels, and place the bin on a 2" layer of gravel underneath. Without drainage, leachate pools and cools the pile. Avoid asphalt—it can leach petroleum compounds.
Do I need a lid?
No. A lid traps moisture and limits oxygen, slowing decomposition. Instead, cover finished layers with 2" of dry leaves or straw to retain heat and deter flies—this mimics nature’s design better than any lid.
What if my bin starts smelling sour or attracts pests?
Sour smell = too wet or compacted. Immediately mix in 1 part dry brown material (shredded paper, sawdust, or dry leaves) to 2 parts greens. For pests like rats or raccoons, ensure your front panel closes tightly and avoid adding meat, dairy, or cooked grains—these aren’t necessary for effective composting.
How soon can I use the compost?
In warm climates with regular turning, you’ll harvest dark, crumbly compost in 6–8 weeks. In cooler zones or with passive piles, allow 4–6 months. Sift out unfinished chunks and return them to the active pile—they’ll break down faster next cycle.
Can I expand this bin later?
Absolutely. Design the back panel with extra screw holes spaced 6" apart—then add a second identical bin beside it, sharing the middle post. Two bins let you alternate: fill one while the other cures. Many urban gardeners in Portland and Seattle use this modular approach to manage seasonal yard waste surges.
Your new compost bin isn’t just a structure—it’s the heart of a living system. Every banana peel, coffee ground, and fallen leaf becomes part of a quiet, steady transformation. Pair it with our how to start composting guide to master feed ratios, and check out our best compost turners for efficient aeration. With consistent care, you’ll harvest black gold twice a year—and watch your garden thrive as a result.