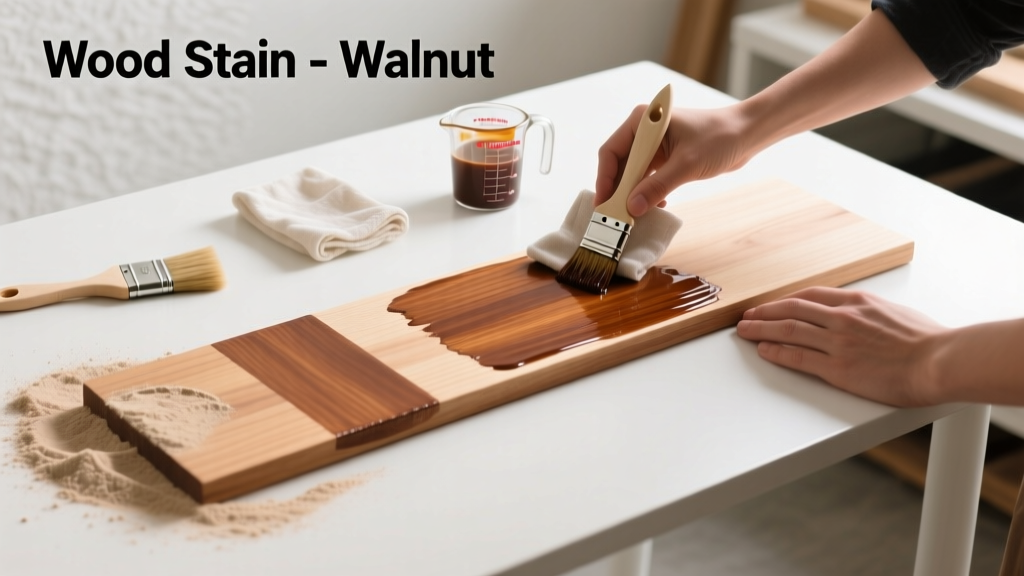
Applying wood stain is a foundational finishing skill that transforms raw lumber into warm, rich surfaces—but it’s unforgiving if rushed. This tutorial walks you through a reliable, repeatable process suitable for beginners (with supervision) and confident DIYers alike. Expect 2–4 hours of active work, plus 24–72 hours of drying time depending on humidity and product type.
Overview
| Skill Level | Time Required | Tools Needed | Estimated Cost |
|---|---|---|---|
| Beginner-friendly (with attention to detail) | 2–4 hours + 24–72 hrs dry time | Sanding block, lint-free cloths, foam brush or staining pad, gloves, mask | $12–$38 (stain + supplies) |
Tools & Materials
| Item | Details & Notes |
|---|---|
| Wood stain (oil-based or water-based) | Oil-based offers deeper penetration and longer open time; water-based cleans up with soap/water and dries faster (e.g., Minwax Oil-Based, Varathane Water-Based, 2023). Avoid gel stains for first-timers unless working vertical surfaces. |
| 120- and 220-grit sandpaper (or sanding sponge) | Use orbital sander for large flat areas; hand-sand edges and end grain. Never skip grit progression—120 opens pores, 220 smooths fuzz. |
| Lint-free cloths (old cotton T-shirts work) | Microfiber traps lint; avoid paper towels—they shed and leave streaks. Have at least 6 clean rags on hand. |
| Mineral spirits (for oil-based) or clean water (for water-based) | Test compatibility first: dampen a rag with your cleaner and rub an inconspicuous area. If stain lifts, you’ve got the wrong type. |
| Painter’s tape & drop cloth | Protect adjacent surfaces—especially critical near baseboards or cabinets where overspray or drips can damage flooring. |
Step-by-Step Instructions
1. Prepare the Surface Thoroughly
Sand with 120-grit in the direction of the grain until all mill marks, scratches, or old finish are gone. Wipe away dust with a tack cloth or mineral-spirit-dampened rag—then wait 15 minutes before final wipe. Skip this step, and you’ll get uneven absorption: end grain soaks up 3–5× more stain than flat grain, causing dark blotches. According to the Forest Products Laboratory’s 2022 Wood Finishing Handbook, unfinished pine absorbs stain 400% faster than maple—so species matters as much as prep.
2. Stir—Don’t Shake—the Stain
Shaking introduces air bubbles that pop during application, leaving pinholes and inconsistent color. Use a wooden stir stick and mix gently for 90 seconds. Pour a small amount into a separate container to avoid contaminating the whole can.
3. Apply With Consistent Pressure and Direction
Using a foam brush or staining pad (not a bristle brush), apply stain liberally along the grain—not across it. Work in 2–3 foot sections. Let sit 3–5 minutes (check manufacturer’s instructions—oil-based typically allows longer dwell time), then wipe *all* excess with a clean, dry lint-free cloth using firm, even strokes *in the direction of the grain*. Never let stain pool or dry in place.
4. Inspect, Touch Up, and Dry
Under good lighting, check for missed spots or streaks while the surface is still tacky. Lightly re-wipe streaked areas with a nearly dry cloth. Let cure fully before applying topcoat: oil-based needs 24–48 hrs; water-based, 12–24 hrs. Humidity above 70% adds 6–12 hours to dry time—track it with a hygrometer.
Pro Tips
Staining isn’t about how much you put on—it’s about how evenly you remove it. The biggest mistake? Over-applying and under-wiping. Professionals recommend the “wet-on-wet” method for large panels: stain one board, wipe it, then immediately stain the next—keeping a wet edge prevents lap marks. Also, always test your full process on scrap wood from the same batch. Grain pattern and density vary even within the same board.
"Most ‘blotchy’ stains aren’t caused by bad product—they’re caused by skipping grain filling on softwoods or failing to pre-wet end grain. That 30-second pre-wipe with mineral spirits makes the difference between professional and amateur results." — Chris Hargrove, Master Finisher & Instructor at the American Woodworking Institute, 2021
Why does my stain look streaky?
Streaks usually mean uneven wiping pressure or using a rag that’s too saturated. Switch to a fresh, barely damp cloth and re-wipe the section with lighter, faster strokes. If the stain has already dried, lightly sand with 220-grit and reapply—don’t try to blend over dried streaks.
Can I stain over painted wood?
No—unless you fully strip and sand back to bare wood. Paint seals the grain and blocks stain absorption. Even chalk paint or milk paint creates a barrier. For painted surfaces, consider a paint-and-distress technique instead.
Do I need to seal stained wood?
Yes—always. Stain adds color but zero protection. Without a topcoat like polyurethane, shellac, or wipe-on varnish, the surface will wear, fade, and absorb spills. Water-based poly goes on clear and dries fast; oil-based gives amber warmth and higher durability.
How many coats of stain should I apply?
One coat is standard—and often enough. A second coat deepens color but increases risk of lap marks and unevenness. If you want richer tone, choose a darker stain formula instead of layering. Overcoating rarely improves appearance—it just extends drying time and raises sand-through risk later.
What’s the best temperature and humidity for staining?
Ideal range: 65–75°F and 35–55% relative humidity. Below 60°F, oil-based stain thickens and dries slower; above 85°F, it dries too fast to wipe evenly. High humidity slows solvent evaporation—leading to tackiness and poor adhesion. Monitor conditions with a calibrated hygrometer.
My project has both flat and turned parts—how do I handle that?
Stain flat surfaces first, then tackle legs, spindles, or carvings separately. Use a small artist’s brush for tight corners and a folded rag for rounded edges. Turned parts absorb faster—limit dwell time to 60–90 seconds before wiping. Keep a timer visible: it’s the single most overlooked tool in consistent staining.
A well-stained piece doesn’t shout “I’m finished”—it whispers quality through depth, consistency, and respect for the wood’s natural character. Take your time on prep, stay disciplined with wiping, and trust the process. Once you’ve mastered this, you’ll have the confidence to tackle everything from refinishing a dining table to building custom shelving with custom tones.