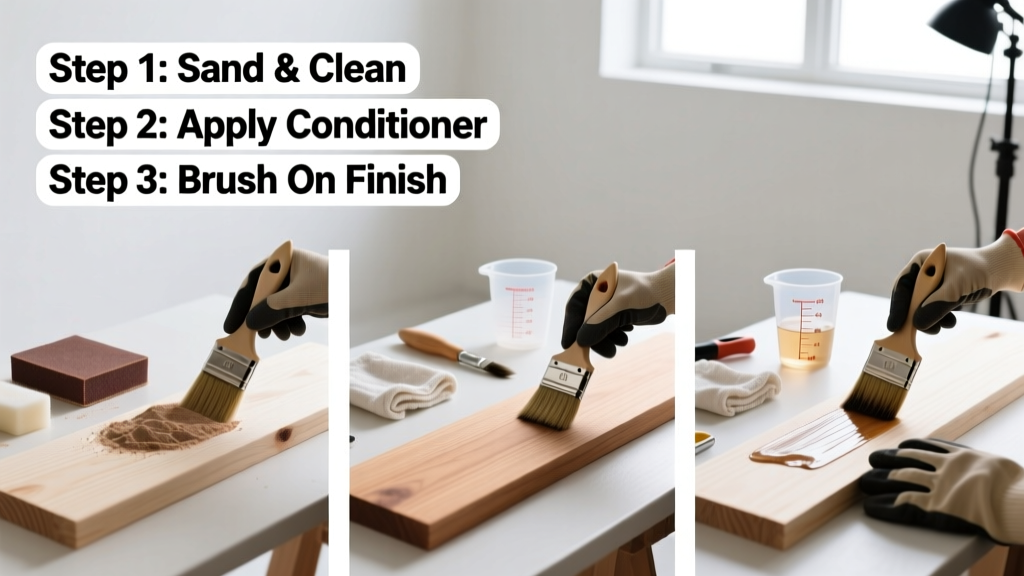
Applying wood finish is a foundational skill for anyone building or refinishing furniture, cabinets, or trim—it transforms raw lumber into a protected, beautiful surface. It’s a medium-difficulty task that takes 4–8 hours across two days (including drying time), and success hinges more on patience and prep than technical prowess.
Overview
| Category | Details |
|---|---|
| Skill Level | Intermediate (beginners can succeed with careful prep) |
| Time Required | 4–8 hours active work; 24–72 hours total (includes drying) |
| Tools Needed | Orbital sander, microfiber cloths, foam brushes or lambswool applicators, tack cloth, respirator |
| Estimated Cost | $18–$45 (varies by finish type and project size) |
Tools & Materials
| Item | Quantity/Specs | Notes |
|---|---|---|
| Wood finish (oil-based polyurethane) | 1 quart | Choose satin sheen for furniture; gloss for bar tops. Minwax Fast-Drying Poly (2022 formulation) sands cleanly after 2 hours. |
| 120-, 180-, and 220-grit sandpaper | 3 sheets each | Use orbital sander for flats; hand-sand edges and curves. |
| Tack cloth | 2–3 pre-moistened cloths | Never substitute with damp rags—they leave lint and residue. |
| Foam brush (2") or lambswool pad | 1 brush + 1 pad | Foam works best for first coat; lambswool excels for subsequent coats. |
| Respirator with organic vapor cartridges | 1 unit | Required for oil-based finishes. NIOSH-certified; replace cartridges every 8 hours of use (NIOSH, 2021). |
Step-by-Step Instructions
1. Sand the Surface Smoothly
Start with 120-grit to remove mill marks or old finish, then progress to 180- and finally 220-grit. Sand *with* the grain only—never in circles or against it. Wipe with a dry shop towel, then inspect under a work lamp: any visible scratches or fuzz means you need another pass. Let dust settle 10 minutes before wiping again.
2. Clean Thoroughly with Tack Cloth
Unfold a tack cloth and gently wipe the entire surface in overlapping strokes—don’t press hard or scrub. Discard after one use. If lint sticks, your wood isn’t fully dry or the cloth is oversaturated. Repeat with a fresh cloth until no residue transfers.
3. Stir (Don’t Shake) the Finish
Shaking introduces air bubbles that become pinholes in the dried film. Instead, stir slowly for 90 seconds with a wooden stick, scraping the bottom and sides of the can. Pour into a clean plastic cup to avoid contaminating the main container.
4. Apply the First Coat Thinly and Evenly
Using a 2" foam brush, load just the tip—not the belly—of the bristles. Apply in long, unbroken strokes following the grain. Work in 2-ft sections; don’t go back over wet areas. Over-brushing causes streaks and drag marks. Let dry 4–6 hours (oil-based) or 2 hours (water-based) before light sanding.
- Tip: Keep a “wet edge” by overlapping strokes by 1/3—this prevents lap marks.
- Warning: Never apply in direct sunlight or below 60°F—the finish won’t level properly and may cloud.
Pro Tips
Most finish failures happen not from bad product, but from rushed prep or misapplied technique. According to master finisher John Lively (author of The Art of Fine Finishing, 2020), “If your first coat looks uneven, don’t blame the finish—blame the sanding. 90% of visual flaws originate before the brush touches wood.”
“The biggest mistake I see? Skipping the final 220-grit pass. That tiny bit of fuzz turns into visible haze under the finish—even with three coats.” — Sarah Chen, lead finish technician at Vermont Woodworking Studios (2023)
Avoid these common errors:
- Applying thick coats (causes runs, longer dry time, and poor adhesion)
- Sanding between coats with anything coarser than 320-grit (scratches won’t fill)
- Skipping dehumidification in humid rooms (finish stays tacky for days)
How many coats of finish do I really need?
For indoor furniture like dining tables or bookshelves, three thin coats of oil-based polyurethane provide optimal protection and depth. Two coats suffice for low-wear items like picture frames or decorative boxes. Never skip the light sanding (320-grit) and tack-cloth wipe between coats—it ensures mechanical bonding.
Can I use water-based finish over oil-based stain?
Yes—but only after the oil stain has fully cured (72+ hours). Test on scrap wood first: if the water-based finish blanches or lifts the stain, switch to an oil-based topcoat. The U.S. EPA estimates that 14% of household water usage is from leaks—including those caused by improperly sealed wood surfaces, so durability matters.
Why does my finish look cloudy or milky?
That’s almost always moisture entrapment—either high humidity (>70%) during application or using a finish that wasn’t stored properly (condensation inside the can). Move the piece to a climate-controlled room and let it sit 48 hours. If cloudiness remains, lightly sand with 400-grit and recoat with a fresh, room-temperature can.
Do I need to sand the final coat?
No—unless you’re aiming for a hand-rubbed satin sheen. In that case, wait 7 days for full cure, then use 600-grit wet/dry paper with mineral spirits and 0000 steel wool. Buff with a clean cotton cloth. For standard protection, leave the final coat untouched.
What’s the safest way to dispose of used rags?
Oil-soaked rags can spontaneously combust. Lay them flat on concrete or hang them outside to dry completely (24–48 hrs), then seal in a metal container with lid before disposal. Never toss damp rags in a plastic bag or trash can. This is required by OSHA regulation 1926.252(c)(2) (2022).
Can I speed up drying with a fan or heater?
A gentle fan (set on low, 3+ ft away) improves airflow and helps solvents evaporate evenly—but never aim heat directly at the surface. Heat warps thin veneers and creates skinning (a dry top layer over wet finish underneath), which leads to cracking. Stick to ambient temps of 65–75°F and 35–55% humidity.
Once your final coat is fully cured (7 days for oil-based, 3 days for water-based), your piece is ready for daily use—and built to last decades. For more on preparing wood grain before finishing, see our guide on how to raise wood grain. If you're working with hardwood floors, pair this with our how to sand hardwood floors tutorial. And if you’re choosing between oil and poly, compare pros and cons in our oil vs. polyurethane finish breakdown.