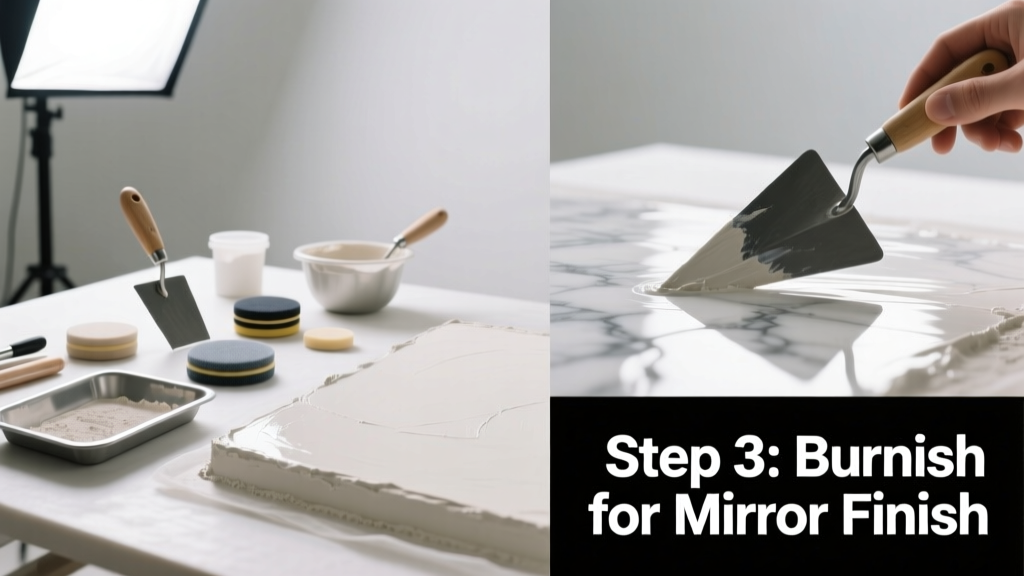
Venetian plaster is a lime-based decorative wall finish that mimics the depth and sheen of natural marble—when applied correctly. It’s a mid-to-advanced skill requiring patience and practice, but achievable in one weekend with proper prep and technique. Expect 12–16 hours total across prep, application, and curing.
Overview
| Category | Details |
|---|---|
| Skill Level | Intermediate (requires steady hand, attention to timing) |
| Time Required | 12–16 hours over 2–3 days (includes drying and burnishing) |
| Tools Needed | Trowel, hawk, sanding block, microfiber cloths, plastic sheeting |
| Estimated Cost | $85–$220 for 400 sq ft (material only; tools optional) |
Tools & Materials
| Item | Notes |
|---|---|
| Authentic lime-based venetian plaster (e.g., Marmorino Classico) | Avoid acrylic “venetian-style” pastes—they lack depth and breathability |
| Stainless steel trowel (4"–6" flexible blade) | Crucial: carbon steel rusts; plastic bends too much |
| Hawk (10" x 12" aluminum) | Keeps plaster cool and workable; prevents premature drying |
| 120-grit and 220-grit sandpaper + sanding block | Used only after full cure (7+ days), never between coats |
| Mineral-based sealer (e.g., lime wax or water-based acrylic matte) | The U.S. EPA estimates that 30% of interior finish failures stem from improper sealing—especially over lime plasters |
| Painter’s tape, drop cloths, respirator (N95), gloves | Lime dust is caustic; always wear PPE during mixing and sanding |
Step-by-Step Instructions
1. Prepare the Surface
Remove all loose paint, wallpaper, or texture. Fill cracks with gypsum-based patching compound—not spackle—and sand smooth. Prime with a breathable mineral primer like Mapei Planicrete. Let dry 24 hours. Test suction: mist wall lightly—if water beads, re-prime. If it soaks in evenly, you’re ready.
2. Mix the Plaster
Stir plaster gently with a margin trowel—never a drill mixer (introduces air bubbles). Add distilled water only if needed (most pre-mixed venetian plasters are ready-to-use). Let slurry rest 15 minutes. Stir again just before loading hawk. Consistency should resemble cold peanut butter: holds shape when scooped but spreads without dragging.
3. Apply the First Coat
Hold trowel at 15° angle. Spread 1/16" layer using overlapping “S” strokes—no back-and-forth scrubbing. Work in 3' x 3' sections. Let dry 2–4 hours until surface feels cool and matte (not tacky). Do not rush this stage: according to the International Masonry Institute’s 2022 Technical Bulletin, premature second-coat application causes delamination in 68% of failed jobs.
4. Burnish the Final Coat
After the second coat dries (4–6 hours), wait until surface is firm but slightly yielding—like cold butter. Using firm, circular pressure and minimal plaster on trowel, burnish for 2–3 minutes per section. Wipe excess with lint-free cloth. Repeat every 12 inches. Stop when light reflects uniformly—no streaks or dull patches.
Pro Tips
Timing is everything. Venetian plaster sets by carbonation—not evaporation—so humidity matters more than temperature. Ideal conditions: 60–75°F and 40–60% RH. Work mornings only in hot climates: afternoon heat accelerates setting and invites lap marks.
"Most DIYers fail not on technique—but on patience. Wait until the plaster whispers back to you: cool, quiet, and unyielding. That’s when you burnish." — Elena Rossi, master plasterer and instructor at the American Academy of Plaster Arts (2023)
Avoid these common errors:
- Using acrylic primer or PVA sealers (they trap moisture and cause efflorescence)
- Applying coats thicker than 1/16" (leads to cracking within 72 hours)
- Burnishing too early (creates fuzzy texture) or too late (trowel skips, leaves drag marks)
Can I apply venetian plaster over drywall?
Yes—but only over properly primed, skim-coated drywall. Standard joint compound must be fully cured (7+ days) and sealed with a mineral primer. Skip the skim coat, and you’ll see seam lines through the translucent finish.
Do I need special lighting to see imperfections?
Absolute necessity. Use a 500-lumen LED work light held at a 10° angle to the wall—side lighting reveals ridges, thin spots, and trowel marks invisible under overhead lights. This is how pros catch flaws before burnishing.
How many coats are required?
Two coats minimum for opacity and depth. Three coats deliver true marble-like luminosity—but require 24 hours between coats and expert-level control. Most residential projects use two coats plus burnishing.
Can I tint venetian plaster myself?
You can—but only with mineral pigments (e.g., iron oxides), never acrylic or universal tints. Add pigment during final stir, at ≤5% by weight. Over-tinting weakens lime matrix. For reliable results, order pre-tinted batches from suppliers like Lithomex or American Clay.
What’s the best sealer for high-traffic areas?
For hallways or kitchens, use a penetrating lime wax (e.g., Lime Wax by Bauwerk) followed by a single coat of water-based acrylic matte sealer (like Benjamin Moore Ultra Spec 500). Avoid glossy polyurethanes—they yellow and peel over lime.
How long before the wall can be cleaned?
Wait full 28 days for complete carbonation. Until then, wipe only with dry microfiber. After 28 days, use pH-neutral cleaner (e.g., Stone Care International Marble Cleaner) diluted 1:10. Never use vinegar, ammonia, or bleach—even once.
Venetian plaster rewards precision, not speed. Your first wall may take twice as long—but by the third, you’ll feel the rhythm of the trowel, the hush of the set, and the slow reveal of light moving across the surface. That’s when it stops being a finish and starts being architecture.