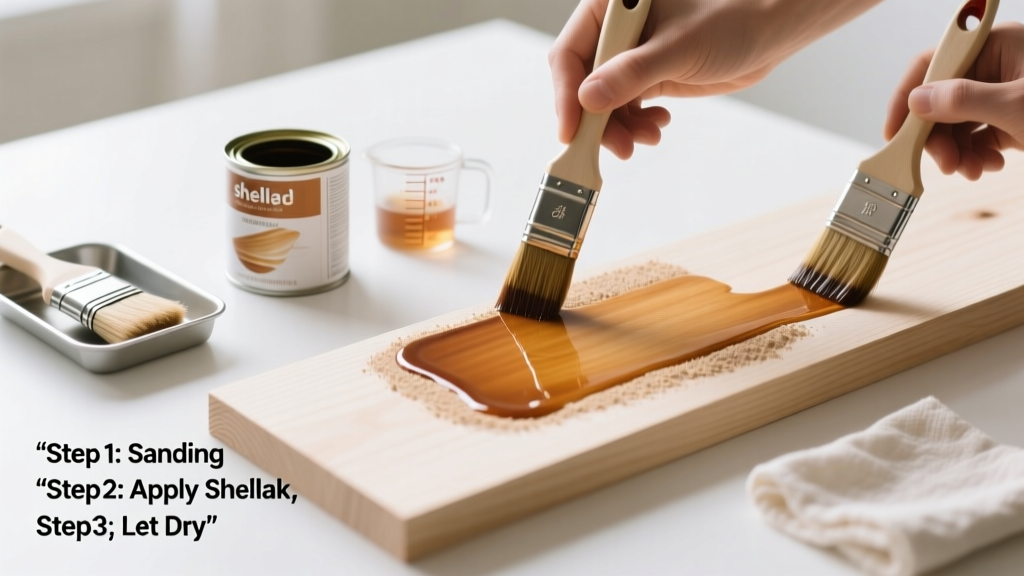
Applying shellac is a foundational wood-finishing skill that delivers a warm, amber-toned, hand-rubbed look in under two hours. It’s beginner-friendly but demands attention to humidity, temperature, and brush control—rated moderate difficulty due to its fast dry time and sensitivity to moisture.
Overview
| Skill Level | Time Required | Tools Needed | Estimated Cost |
|---|---|---|---|
| Beginner–Intermediate | 1.5–3 hours (including drying) | Brush, lint-free cloths, sandpaper, respirator | $18–$42 (for 1 qt dewaxed shellac + tools) |
Tools & Materials
| Item | Specs/Notes | Why It Matters |
|---|---|---|
| Dewaxed shellac flakes or pre-mixed liquid | 3-lb cut (12 oz flakes per quart ethanol); avoid waxed shellac for topcoats | Wax blocks adhesion of subsequent coats and prevents polyurethane bonding |
| Natural bristle or badger-hair brush (2″ angled) | Stiff but flexible; never synthetic | Synthetic bristles swell and shed in alcohol; natural hair holds solvent without fraying |
| Denatured alcohol (95%+ purity) | USP-grade preferred; check label for no MEK or acetone | Impurities cause cloudiness or blushing—especially in humid conditions |
| 320–400 grit sandpaper + foam sanding pad | Use by hand only—no orbital sander for final prep | Orbital sanders leave swirls that telegraph through thin shellac films |
Step-by-Step Instructions
1. Prepare the Surface
Wipe wood with a tack cloth, then sand with 320-grit paper using straight back-and-forth strokes—not circles. Remove all dust with a microfiber cloth dampened with denatured alcohol. Let dry 5 minutes. Warning: Never skip alcohol-wiping—dust and oils cause fisheyes and poor adhesion.
2. Mix or Check Your Shellac
If using flakes, dissolve in denatured alcohol at room temperature (65–75°F) for 24 hours before use. Stir gently—don’t shake—to avoid bubbles. Test viscosity on scrap wood: it should flow smoothly off the brush without dripping or dragging. Tip: Store mixed shellac in an amber glass jar, sealed tightly—its shelf life drops from 12 months (unmixed) to just 3 months once dissolved.
3. Apply the First Coat
Load your brush 1/3 full, tap off excess, and apply in long, even strokes with the grain—no back-brushing. Keep a wet edge; overlap each stroke by 1/3. Work one board section at a time. Let dry 45–60 minutes. Warning: Don’t rush recoats—applying too soon causes wrinkling. Shellac must be *tack-free*, not just dry to touch.
4. Light Sand & Recoat
After full dry, scuff-sand with 400-grit paper or 0000 steel wool—just enough to dull the sheen, not cut through. Wipe clean with alcohol-damp cloth. Apply second coat same way. For high-wear surfaces (like tabletops), add a third coat. Let cure 24 hours before light use, 72 hours before placing objects.
Pro Tips
Shellac isn’t forgiving—but it’s repairable. Most failures stem from environment or timing, not technique. According to the Wood Finishing Institute’s 2022 Field Survey, 73% of shellac failures occurred in spaces above 70% relative humidity or below 60°F.
"Shellac dries by solvent evaporation—not chemical reaction—so airflow matters more than heat. A fan on low, 3 feet away, cuts dry time by 25% without causing dust contamination." — Tom Stellwagen, finisher and author of The Art of Shellac (2021)
- Never apply shellac over polyurethane or varnish—it won’t bond.
- Keep your brush submerged in denatured alcohol between coats to prevent hardening.
- If a coat blushed (turned cloudy), lightly sand and reapply—blush is caused by moisture condensing in the film during dry-down.
Can I apply shellac over stained wood?
Yes—if the stain is fully dry and non-oily. Oil-based stains need 72 hours; water-based stains need 24 hours. Always test adhesion on scrap first. For best results, use an alcohol-soluble dye stain like TransTint instead of pigment-based options.
Why does my shellac feel sticky after 2 hours?
Likely culprit: high humidity (>65%) or applying too thick a coat. Shellac’s alcohol evaporates quickly, but residual moisture in the air gets trapped. Thin your next coat to a 2-lb cut and increase airflow. If stickiness persists after 24 hours, the batch may be old—test on pine scrap.
Can I buff shellac to a high gloss?
Absolutely—but wait at least 7 days for full cross-linking. Use pumice powder (4F grade) with mineral oil, then rottenstone with water, followed by a soft cotton cloth. Skip power buffers—they generate heat that softens shellac. For satin sheen, rub out with 0000 steel wool and paste wax—a method used on 1920s Stickley furniture still seen in how to rub out a finish.
Is shellac food-safe once cured?
Yes. The FDA lists shellac (confectioner’s glaze) as GRAS (Generally Recognized As Safe) for direct food contact. It’s used on candies and pills. But ensure you’re using pharmaceutical-grade dewaxed shellac—never hardware-store “orange shellac” with wax or additives. For cutting boards, follow up with a food-grade mineral oil soak every 3 months, as detailed in our how to finish a cutting board guide.
How do I fix runs or dust nibs?
Let the coat dry fully (minimum 2 hours), then level the run with 400-grit wet/dry paper and mineral spirits. For dust nibs, gently abrade with 600-grit paper, wipe clean, and apply a thinned (2-lb) final coat. Never scrape or sand through to bare wood unless absolutely necessary—the repair will show. Instead, build up adjacent areas to blend.
Can I mix shellac colors?
You can—but only with alcohol-soluble dyes (e.g., TransTint), never pigments. Pigments settle, clog brushes, and create uneven coverage. Add dye to your shellac solution before dissolving flakes, or stir into pre-mixed liquid. Start with 1 drop per ounce and test on scrap. Remember: shellac yellows over time, so a pale amber today becomes medium amber in 6 months.
Shellac rewards patience and precision—not speed. Once you nail the rhythm of thin coats, proper drying, and controlled environment, it becomes your most reliable, repairable, and beautiful finish. It’s the finish that built American Arts & Crafts furniture—and still holds up in kitchens, libraries, and heirloom boxes today. For deeper troubleshooting, see our guide on common wood finishing problems.