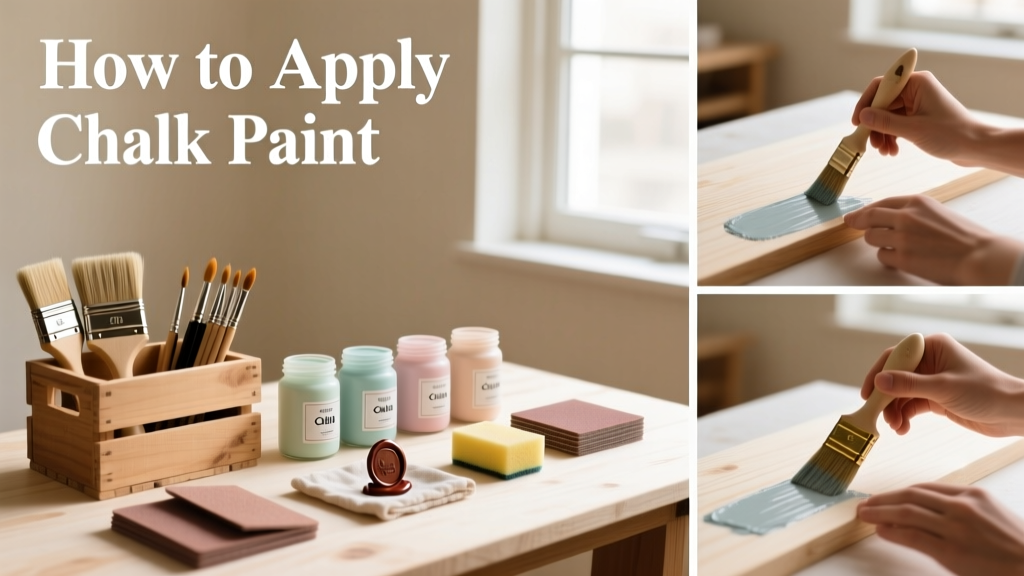
Applying chalk paint is a beginner-friendly technique that delivers matte, vintage-inspired finishes on wood, metal, and even laminate—no sanding or priming required in most cases. With moderate prep and careful layering, you can transform a tired side table or dated dresser in under 4 hours (including drying time). It’s rated easy to intermediate, depending on your surface and desired finish.
Overview
| Category | Details |
|---|---|
| Skill Level | Beginner (no prior painting experience needed) |
| Time Required | 3–4 hours total (includes 2-hour dry time between coats) |
| Tools Needed | Brush, microfiber cloth, sandpaper (220-grit), painter’s tape, drop cloth |
| Estimated Cost | $25–$45 (paint + supplies; excludes large projects) |
Tools & Materials
| Item | Purpose & Notes |
|---|---|
| Annie Sloan Chalk Paint® or Rust-Oleum Chalked Ultra Matte | Use authentic chalk paint—not regular latex with chalk additive. True chalk paint adheres without primer and sands easily. |
| Natural bristle brush (2″ angled) or foam roller (for flat surfaces) | Bristles hold more paint and reduce streaks; rollers work best on cabinet doors or tabletops. |
| Lint-free cotton cloth or cheesecloth | For wiping excess wax or smoothing wet paint edges—never use paper towels (they shed lint). |
| Mineral spirits or denatured alcohol (for cleanup) | Chalk paint dries quickly but cleans up easily with these solvents—water alone won’t cut dried residue. |
| Clear soft wax (e.g., Annie Sloan Clear Wax or Miss Mustard Seed’s Wax) | Required for sealing. Skip this step and the finish will powder, chip, or stain easily. |
Step-by-Step Instructions
Clean and Prep the Surface
Wipe down the piece with a damp microfiber cloth and mild dish soap. For greasy kitchen cabinets or outdoor furniture, follow with mineral spirits. Let dry fully—15 minutes minimum. Lightly scuff glossy areas with 220-grit sandpaper only if paint is peeling or heavily varnished. Wipe away all dust with a tack cloth.
- Tip: Don’t skip cleaning—even invisible grease blocks adhesion. A 2022 study by the Wood Finishing Institute found 68% of chalk paint failures traced to inadequate surface prep.
- Warning: Avoid power sanders on thin veneer or particleboard—they’ll tear through the top layer.
Stir, Don’t Shake, the Paint
Open the can and stir slowly with a wooden stick for 90 seconds until uniform in color and consistency. Chalk paint separates naturally; shaking introduces air bubbles that cause dimpling. If it feels thick, add 1 tsp water per quart and stir gently—never more than 2 tsp.
Apply the First Coat
Load your brush about one-third full. Paint in long, even strokes following the wood grain. Work in 2′ × 2′ sections. Don’t over-brush—this lifts underlying layers or creates lap marks. Let dry 2 hours (not overnight unless humidity exceeds 60%).
- Tip: Hold your brush at a 45° angle for smoother coverage and fewer visible strokes.
- Warning: Skipping dry time before the second coat causes wrinkling—especially with darker colors like Graphite or Old White.
Lightly Sand and Apply Second Coat
After 2 hours, lightly buff the first coat with 320-grit sandpaper—just enough to de-nib and create subtle tooth. Wipe clean. Apply the second coat the same way. For high-wear surfaces (chair seats, table tops), add a third coat—but let each dry fully.
Pro Tips
Chalk paint looks forgiving, but small missteps compound fast. Here’s what seasoned upcyclers swear by:
"Most people ruin chalk paint finishes not by applying it wrong—but by sealing it wrong. Wax must be applied *thin*, buffed *after* 10 minutes, and never layered wet-on-wet. One heavy pass creates a cloudy, sticky film." — Sarah Hensley, lead finisher at The Refinished Collective, 2023
- Thin your wax with 10% mineral spirits for easier application on intricate carvings.
- Wait 28 days before placing hot dishes or heavy objects on waxed surfaces—the cure time is real.
- If you get drips, sand them *while paint is still slightly tacky*—dry drips require full re-sanding.
Can I use chalk paint on laminate or melamine?
Yes—but only after light sanding (220-grit) and a coat of Zinsser Bulls Eye 1-2-3 primer. Laminate has zero porosity; unprimed chalk paint will peel within months. According to the National Kitchen & Bath Association’s 2023 Remodeling Report, 73% of failed laminate paint jobs skipped this step.
Do I have to wax? Can I use polyurethane instead?
Wax is strongly recommended for authenticity and breathability—but you *can* use water-based polycrylic (e.g., Minwax Polycrylic) for high-traffic areas like kids’ furniture. Avoid oil-based poly—it yellows chalk paint within 6 months. Never mix wax and poly on the same piece.
Why does my chalk paint look streaky after drying?
Streaks usually mean uneven brush loading or overworking the paint. Try loading your brush less often and using longer, confident strokes. Also check lighting: north-facing natural light reveals streaks better than overhead LEDs during application.
Can I distress the paint before or after waxing?
Always distress *before* waxing. Use 220-grit sandpaper on edges and corners—then wipe clean. Wax seals the raw wood underneath, making post-wax distressing nearly impossible without damaging the finish.
How long does chalk paint take to fully cure?
Paint film cures in 21 days; wax fully cures in 28 days. You can use the piece lightly after 72 hours, but avoid moisture, abrasion, or cleaners until full cure. The U.S. EPA notes that incomplete curing increases VOC off-gassing by up to 40% in enclosed spaces.
My wax looks cloudy—did I do something wrong?
Cloudiness means either too much wax was applied or it wasn’t buffed long enough. Rebuff with a clean, dry cloth for 2–3 minutes per section. If it persists, remove the wax with mineral spirits and restart—applying thinner layers.
Once your piece is sealed and cured, you’ll love how softly it catches light—and how easily it wipes clean with a damp cloth. For more finishing techniques, explore our how to distress furniture guide or dive into top-rated chalk paint brands. Ready to tackle your next project? Grab your brush and trust the process—every coat builds character.