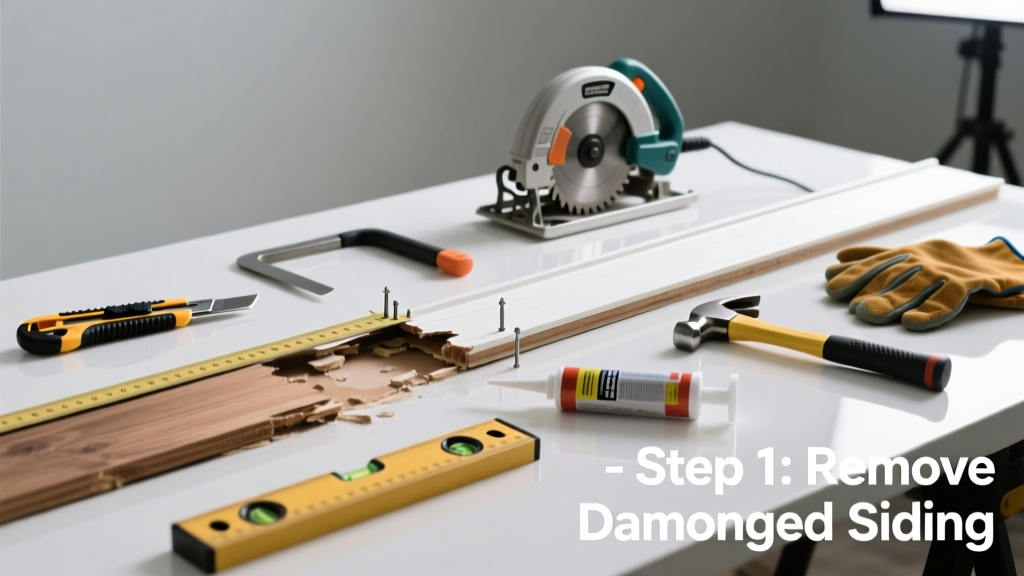
If you’ve spotted soft, spongy, or discolored wood on your home’s exterior, that’s not just cosmetic — it’s active decay compromising weather resistance and structural integrity. Left unaddressed, rot spreads fast, especially in humid climates or shaded north-facing walls. Catching it early means replacing only the affected board instead of an entire wall section.
Quick Diagnosis
Rotten wood siding rarely appears in isolation. Here are the most common underlying causes:
- Missing or cracked caulk around windows, doors, and trim allowing water infiltration
- Clogged gutters or downspouts directing runoff onto siding instead of away from the foundation
- Improperly installed house wrap (e.g., gaps, tears, or staples piercing the membrane)
- Direct soil contact — wood siding within 6 inches of grade invites moisture wicking and termite entry
- Paint failure: peeling, blistering, or bare wood exposed for more than 12 months
Tools & Materials Needed
| Item | Purpose | Estimated Cost |
|---|---|---|
| Cordless drill/driver with carbide-tipped bits | Removes rusted nails without splitting adjacent boards | $85–$140 |
| 10-in. circular saw with fine-tooth blade | Makes clean, square cuts on replacement cedar or pine lap siding | $65–$120 |
| 16d galvanized ring-shank nails | Corrosion-resistant fasteners that grip wet wood and resist withdrawal | $12–$18 per box |
| 3M 8000 Series polyurethane caulk | Flexible, paintable sealant rated for exterior wood joints and flashing laps | $14–$22 per tube |
| Zinsser Bulls Eye 1-2-3 primer | Blocks tannin bleed and seals damp wood before painting | $18–$24 per quart |
Step-by-Step Fix
Replace the rotted board cleanly and correctly — no shortcuts. These three methods cover most residential lap siding scenarios:
- Full board replacement: Cut out the entire damaged board using a circular saw set to depth (just past the board thickness), then chisel out remaining nails. Slide in a pre-primed replacement, nail every 12 inches into studs, and caulk top and bottom edges.
- Partial patch (for mid-board rot): Use a router with a straight bit to remove only the decayed section (minimum 2" deep). Insert a matching cedar plug glued with epoxy, sand flush, prime, and paint.
- Overlay method (if substrate is sound): Screw a new 1×6 board over the rotted section after sealing the backside with Thompson’s WaterSeal. Only acceptable if original siding isn’t load-bearing and local code permits overlays.
When to Call a Pro
Some situations demand licensed expertise — not just extra hands. Stop and call a contractor if:
- The rot extends behind the siding into sheathing or framing (visible during removal or confirmed with a moisture meter reading >20% MC)
- You find evidence of active carpenter ants or powderpost beetles — their presence indicates long-term undetected moisture
- The affected area exceeds 4 linear feet or involves corner boards, window/door trim, or soffit connections
- Your home has lead-based paint (pre-1978) and you lack EPA RRP certification for containment and disposal
Prevention Tips
Replacement is only half the job — longevity depends on proactive care. Follow these four habits:
- Inspect all wood siding twice yearly: spring and fall, focusing on north/east exposures and areas under roof overhangs
- Re-caulk every 3 years — especially where siding meets windows, doors, and chimneys — using silicone-modified acrylic or polyurethane sealants
- Maintain gutters and downspouts: clean at least twice annually and extend downspouts 5+ feet from the foundation
- Keep shrubs and vines trimmed back at least 12 inches from siding — airflow prevents trapped moisture and fungal growth
Can I use bleach on this?
No. Sodium hypochlorite (household bleach) kills surface mold but does nothing for internal rot fungi and degrades wood lignin over time. It also corrodes nearby fasteners. Instead, scrub with a 1:10 vinegar/water solution for mildew, then rinse thoroughly and let dry before priming.
How long does replacement siding last?
Properly installed and maintained cedar or redwood lap siding lasts 25–40 years; primed and painted pine lasts 15–25 years. According to the National Association of Home Builders’ 2022 Exterior Cladding Report, 68% of premature wood siding failures stem from inadequate drainage or poor paint maintenance—not material quality.
Do I need to replace the house wrap behind the rotted board?
Yes — if it’s torn, wrinkled, or shows water stains. Even minor damage compromises its ability to shed bulk water while allowing vapor diffusion. Cut out the damaged section, overlap new wrap by 6 inches, and tape seams with UV-rated acrylic tape (e.g., DuPont Tyvek Tape).
What’s the best paint for repaired wood siding?
Use 100% acrylic latex paint with ≥30% volume solids and mildewcide — like Benjamin Moore Aura or Sherwin-Williams Duration. Oil-based paints trap moisture and fail faster on wood. Always prime first with a stain-blocking primer; skipping this step leads to tannin bleed in cedar or knots in pine.
Can I match the existing color exactly?
Often — but not guaranteed. Take a 2"×2" chip to a paint store with spectrophotometer capability (e.g., Sherwin-Williams ColorSnap). Expect slight variation due to weathering, chalk buildup, and aging. For best results, repaint the full board — not just the patch — and feather edges into adjacent boards.
Is pressure washing safe before repair?
Only at low pressure (<1,200 PSI) and with a 40-degree fan tip, held 12–18 inches from the surface. High-pressure washing drives water behind siding and loosens old caulk. The U.S. Department of Energy advises against pressure washing wood siding more than once every 5 years — excessive cleaning accelerates fiber breakdown.
“Rot doesn’t happen overnight — it’s the final symptom of months or years of unnoticed water intrusion. Your repair isn’t done until the source is found and fixed.” — Gary Henson, Certified Exterior Remodeling Inspector, NAHB, 2023
A well-executed siding repair buys decades of protection — but only if the root cause stays addressed. Don’t rush the prep work: measuring twice, cutting once, and sealing every seam makes the difference between a quick patch and a lasting fix. For related guidance, see our how to seal wood siding joints and gutter maintenance schedule.