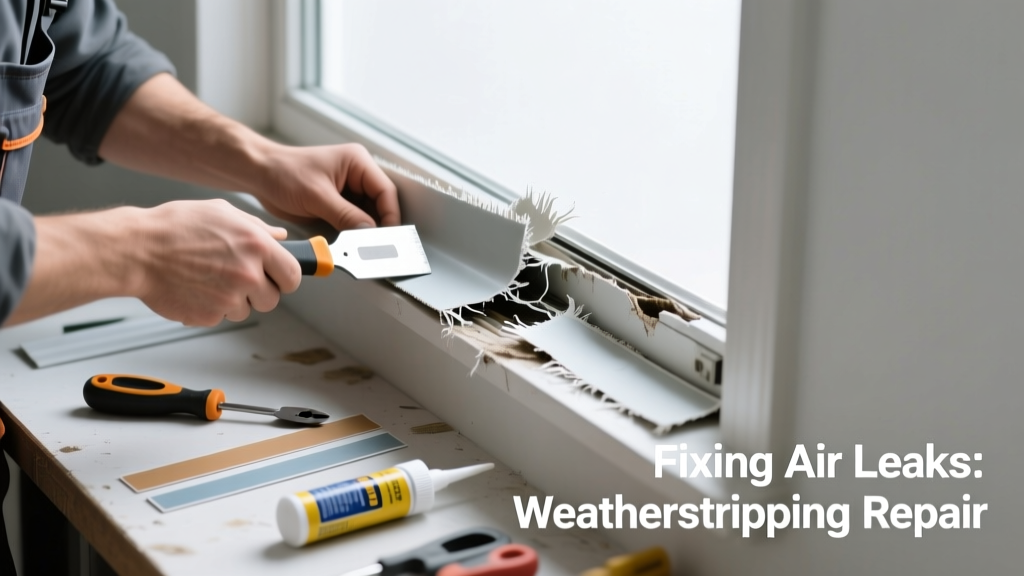
That faint whistle near your window on a windy day? The icy draft pooling at your feet in January? Chances are, your weatherstripping has cracked, compressed, or pulled away — and it’s no longer sealing the gap. Unlike broken glass or warped frames, worn weatherstripping is a quiet energy thief that slips under the radar until your heating bill spikes.
Quick Diagnosis
Before grabbing tools, confirm the issue isn’t something else. Worn weatherstripping often mimics other problems — but these signs point directly to seal failure:
- Visible gaps (≥1/8") between sash and frame when the window is closed
- Cracked, brittle, or flattened foam or rubber strips (especially near corners)
- Weatherstripping peeling from adhesive backing or pulling loose at nail/screw points
- Cold air you can feel with your hand held 1" from the seam during winter
- Increased dust or pollen buildup along the sill — a sign of unfiltered airflow
Tools & Materials Needed
| Item | Purpose | Estimated Cost |
|---|---|---|
| Utility knife with fresh blades | Cuts old material cleanly; prevents tearing adjacent paint or wood | $5–$12 |
| Vinyl or silicone-based weatherstripping (V-strip, bulb tape, or EPDM foam) | Replaces aged material with UV- and compression-resistant sealant | $8–$22 |
| Isopropyl alcohol (70%+) and lint-free cloths | Removes old adhesive residue without damaging vinyl or painted surfaces | $4–$7 |
| Small putty knife or plastic scraper | Gently lifts stubborn adhesive without gouging wood or vinyl frames | $6–$14 |
| 3M Super 77 spray adhesive (optional for non-adhesive strips) | Bonds high-performance weatherstripping where factory adhesive fails | $9–$13 |
Step-by-Step Fix
Replace worn weatherstripping in under 90 minutes per double-hung window — no carpentry skills required. Choose the method that matches your window type and damage severity:
- Remove old material: Use the utility knife to score along both edges of the strip, then peel away. Scrape residual glue with the plastic scraper, then wipe with alcohol until the surface feels tack-free and looks clean.
- Measure and cut new strip: Measure each side separately — never assume symmetry. Cut V-strip or bulb tape 1/4" longer than needed; compressing it slightly ensures full contact. For foam tape, cut exact length — stretching causes gaps.
- Apply adhesive-backed strip: Peel liner gradually as you press firmly into place, starting at one corner and working outward. Use a J-roller or credit card edge to eliminate air pockets and seat the adhesive fully.
- Test and trim: Close the window and check for even resistance. If the sash binds, trim excess with the utility knife. If light shines through, re-seat or add a second layer at the problem spot.
When to Call a Pro
DIY works for most single- and double-hung windows — but skip the wrench if you see any of these:
- Rotting or water-damaged wood around the jamb — indicates deeper moisture intrusion needing structural repair
- Aluminum-clad or fiberglass windows with integrated gasket systems (e.g., Andersen 400 Series) — replacement requires manufacturer-specific parts and torque specs
- Windows that won’t close fully even after weatherstripping replacement — suggests misaligned hinges, failed balances, or frame settlement
- More than three windows showing identical wear patterns — may signal foundation movement or chronic condensation issues
According to the Insurance Institute for Business & Home Safety's 2023 report, improperly sealed windows account for up to 25% of residential heating loss — yet 68% of homeowners delay repair until energy bills rise by 12% or more.
Prevention Tips
Extend weatherstripping life from 3–5 years to 7–10 with smart habits:
- Clean strips gently every 6 months with damp microfiber cloth — never abrasive cleaners or solvents
- Lubricate vinyl or rubber seals annually with silicone spray (not WD-40 — it degrades rubber)
- Avoid slamming windows — repeated impact compresses bulb seals faster than normal use
- Inspect all perimeter seals each fall before heating season begins
How long does replacement weatherstripping last?
High-quality EPDM rubber or silicone weatherstripping lasts 7–10 years in moderate climates, but only 3–5 years in direct sun or coastal salt air. Vinyl V-strip degrades fastest — especially on south-facing windows — and rarely exceeds 4 years. Replace proactively every 5 years, even if it looks intact: compression fatigue isn’t always visible.
Can I reuse the old adhesive backing?
No — cured adhesive loses 90%+ of its bonding strength after removal. Residue left behind also prevents new tape from sticking properly. Always clean the surface completely with isopropyl alcohol before applying new material. Skipping this step is the #1 cause of early DIY failure, according to Window Seal Repair Tips.
What’s the best weatherstripping for historic wood windows?
For pre-1940s wood sash, use spring-metal V-strip (brass or stainless steel) — it’s reversible, durable, and preserves original profiles. Avoid foam tape, which traps moisture against old wood. Install with small brads, not adhesive, so future restoration remains possible. See our historic window repair guide for installation details.
Why does my new weatherstripping make the window hard to close?
Too-thick material or over-compression is usually the culprit. Try switching from 3/8" to 5/16" bulb tape, or switch from foam to low-profile V-strip. Also check for paint buildup on meeting rails — sand lightly with 220-grit paper before reinstalling. Never force the sash; binding stresses window balances and warps jambs.
Do storm windows need their own weatherstripping?
Yes — and it’s often overlooked. Storm window seals fail independently of primary windows. Inspect the storm’s perimeter gasket each October; replace cracked or missing sections with flexible PVC gasket (sold by the foot at hardware stores). A well-sealed storm window adds R-1.5 to R-2.0 — nearly doubling insulation value.
Can I install weatherstripping in freezing temperatures?
Adhesive-backed products require surface temps above 40°F for proper bonding. Below that, use mechanical fasteners (small brads or screws) or wait for a mild day. Cold makes rubber brittle and reduces adhesive tack — leading to 70% higher failure rates within 6 months, per Winter Home Repair Safety guidelines (Home Improvement Research Institute, 2022).
Replacing worn weatherstripping is one of the highest-ROI home repairs you’ll ever do — often paying for itself in one heating season. It’s not glamorous work, but that quiet, draft-free room you get afterward? That’s the sound of money staying in your pocket, not escaping through the cracks.