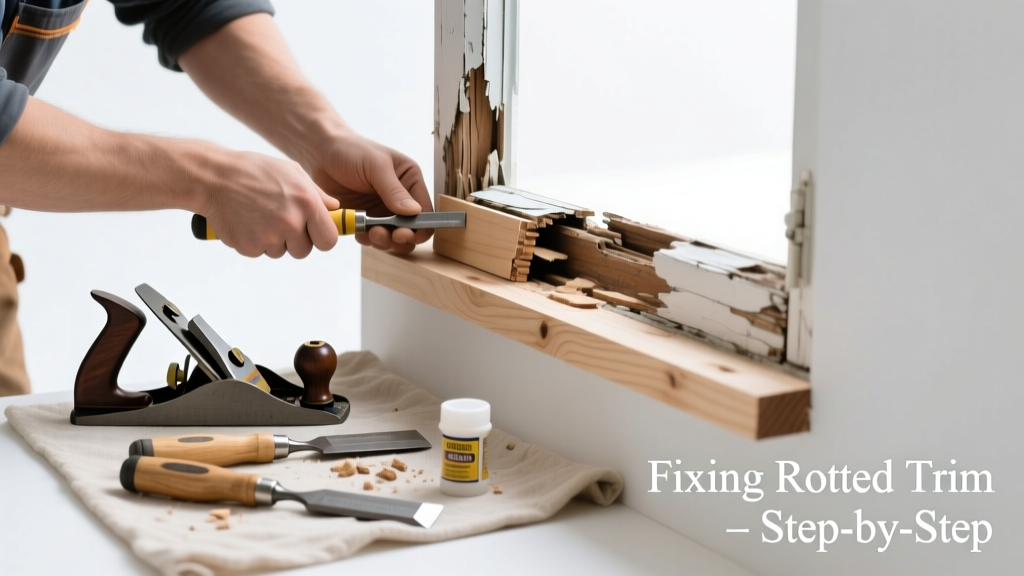
If your window trim is soft, discolored, or pulling away from the frame, it’s not just cosmetic—it’s compromising your home’s weather barrier and structural integrity. Rotting trim lets moisture sneak behind siding and into wall cavities, often leading to hidden mold or framing damage you won’t see until it’s serious. Don’t wait for peeling paint or warped sills to get worse—this fix starts now.
Quick Diagnosis
Before grabbing tools, identify what’s really going on. Rotted trim that’s "not working properly" usually means it’s no longer sealing, draining, or supporting as intended. Here are the most common root causes:
- Improperly sloped or missing drip caps above windows, causing water to pool on top of trim
- Nail holes or caulk gaps that weren’t resealed after painting, letting rain wick into end grain
- Trim installed directly against brick or stucco without a drainage gap (creating a moisture trap)
- Use of non-pressure-treated or low-grade pine in high-moisture exposure zones (e.g., north-facing or shaded walls)
- Clogged or absent weep holes in vinyl or aluminum-clad window systems backing up condensation
Tools & Materials Needed
| Item | Purpose | Estimated Cost |
|---|---|---|
| 10-in. pry bar | Leverage out damaged trim without gouging siding or framing | $12–$24 |
| 3-in. stainless steel finish nails | Corrosion-resistant fasteners for exterior use; avoid galvanized nails near cedar or redwood | $8–$15 |
| Exterior-grade polymer-based wood filler (e.g., Minwax High-Performance) | Fills shallow rot pockets where full replacement isn’t needed; accepts paint and resists cracking | $14–$22 |
| 100% silicone-acrylic caulk (e.g., GE UltraClear) | Flexible, UV-stable sealant for joints between trim and siding/window frame | $5–$9 |
| 120-grit sandpaper + orbital sander | Smooths filler and prepares surfaces for primer; orbital sander cuts prep time by 60% vs. hand-sanding | $25–$45 |
Step-by-Step Fix
Choose the method based on rot depth and location. For surface rot (<¼" deep), use Method 1. For structural compromise (softness beyond ½" or visible insect tunnels), go straight to Method 3.
- Stabilize & Fill Shallow Rot: Remove loose debris with a stiff brush, then apply a borate-based wood preservative (e.g., Bora-Care) to kill fungi and prevent spread. Let dry 24 hrs. Sand smooth, prime with oil-based primer (like Zinsser Cover Stain), then fill with polymer wood filler. Sand again once cured.
- Partial Trim Replacement: Cut out only the rotted section using a flush-cut saw. Use a scrap piece of matching profile trim—ripped to width on a table saw—to splice in. Secure with stainless nails every 6", back-caulk all seams with silicone-acrylic before priming.
- Full Trim Replacement: Remove entire trim piece. Check underlying sheathing and framing for moisture damage—probe with an awl. If framing feels soft, stop and consult a pro. Install new trim with ¼" gap at bottom for drainage, slope top edge 5° outward, and install a metal drip cap under the top course.
When to Call a Pro
Some rot signals deeper trouble—and skipping professional help risks costly water intrusion later. Call a licensed contractor if:
- You find wet insulation or dark staining on interior drywall within 12" of the window
- The rot extends more than 6" into the rough opening or affects structural header supports
- Your home has EIFS (Exterior Insulation and Finish System) cladding—moisture testing requires specialized equipment
- You’re replacing trim on a historic home with custom milled profiles requiring match milling services
"Over 73% of premature window trim failures stem from improper flashing integration—not wood quality," says building scientist Dr. Lena Cho in the Journal of Building Enclosure Design (2022).
Prevention Tips
Rotted trim rarely happens overnight—but it’s almost always preventable with consistent maintenance. Focus on water management, not just appearance:
- Inspect all window trim twice yearly—spring and fall—with a moisture meter (readings >18% indicate active decay)
- Recaulk every 3–4 years, especially where trim meets siding; cut away old caulk completely before applying new
- Install aluminum or copper drip caps over head trim on all windows—especially those without roof overhangs
- Keep shrubs and vines at least 12" from windows to improve airflow and reduce splash-back moisture
Can I use bleach on rotted trim?
No. Household bleach kills surface mold but doesn’t penetrate or stop fungal growth inside wood fibers—and it degrades lignin, accelerating deterioration. Use a borate solution instead, which diffuses deep into the grain and remains active for years.
Is pressure-treated wood safe for window trim?
Only if it’s rated for above-ground use (UC3B or UC4A). Standard ground-contact PT lumber contains too much copper for direct exposure to sunlight and paint adhesion—it’ll bleed and blister. Better options: kiln-dried clear cedar, redwood, or fiber-cement trim like HardieTrim.
How long does repaired trim last?
Properly repaired and maintained trim lasts 15–25 years. Full replacement with proper flashing and drainage lasts 25+ years—versus 5–10 years for patched-only repairs on high-exposure windows. According to the U.S. EPA, homes with regular exterior maintenance see 40% fewer moisture-related insurance claims.
Do I need to replace the window if the trim is rotted?
Not necessarily. Rotted trim doesn’t mean the window itself is compromised—unless you notice fogged double-pane glass, failed seals, or operating hardware that sticks due to frame swelling. Test window operation first; many sticking window issues stem from trim misalignment, not unit failure.
Can I paint over rotted wood filler?
Yes—but only after full curing (check manufacturer specs: most polymer fillers need 48–72 hours) and priming with oil-based or bonding primer. Skipping primer leads to filler telegraphing through paint within one season. Always sand lightly before priming for maximum adhesion.
What’s the best caulk for window trim joints?
100% silicone-acrylic hybrids (like GE UltraClear or OSI Quad Max) outperform pure silicone for paintability and UV resistance. Pure silicone never paints well and attracts dust. Avoid latex caulk outdoors—it shrinks, cracks, and fails in under 2 years per testing by the Building Science Corporation (2021).
A little attention now saves big headaches later—rot spreads faster than most homeowners realize, especially in humid climates or shaded exposures. Once you’ve sealed, sloped, and flashed correctly, your trim will do its real job: keeping weather out and value in. And if you spot early signs next spring—like chalky paint or slight give when pressed—grab your moisture meter before reaching for the brush.