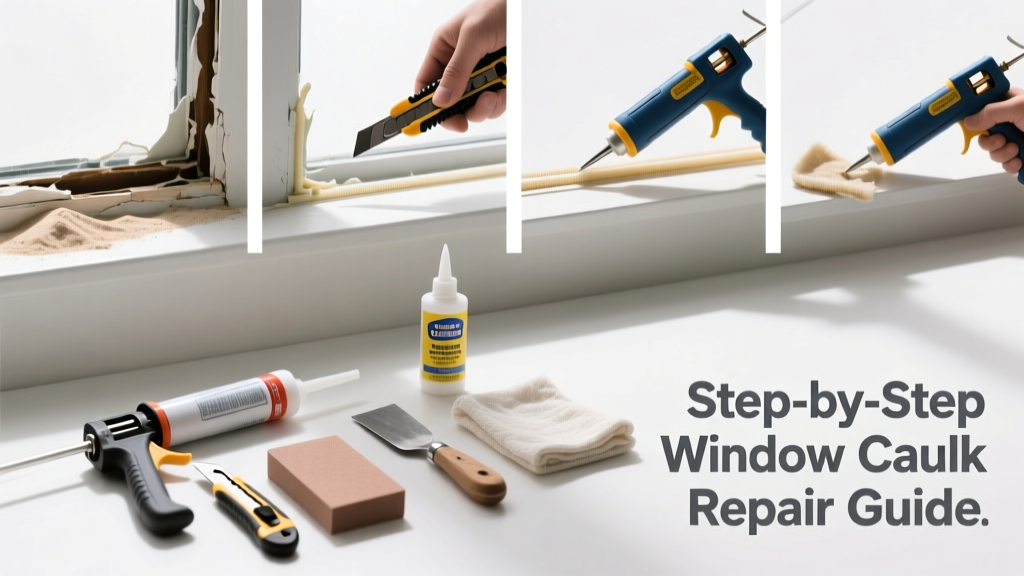
That sticky, cracked, or peeling caulk around your window isn’t just ugly—it’s a red flag for air leaks, moisture intrusion, and rising energy bills. If you’re seeing gaps, discoloration, or moisture behind the seal, your caulk has failed and needs attention now—not next season.
Quick Diagnosis
Before grabbing tools, identify the root cause. Failed caulk rarely fails randomly—it’s usually due to one or more of these issues:
- Improper surface prep (dirt, old caulk residue, or moisture left behind)
- Using the wrong caulk type (e.g., silicone on porous wood or acrylic on vinyl)
- Applying in cold, damp, or humid conditions (below 40°F or above 85% RH)
- Over-compressing or under-filling the joint during application
- UV degradation from prolonged sun exposure on non-UV-resistant formulas
Tools & Materials Needed
| Item | Purpose | Estimated Cost |
|---|---|---|
| Utility knife with snap-off blades | Cuts away old, brittle caulk cleanly without gouging frame | $8–$15 |
| 3M General Purpose Adhesive Remover or mineral spirits | Dissolves cured caulk residue and oils that block new adhesion | $10–$14 |
| Backer rod (¼" round, closed-cell foam) | Fills deep gaps >¼" wide to control caulk depth and prevent three-sided adhesion failure | $6–$12 |
| High-quality exterior-grade silicone or polyurethane caulk | Provides long-term flexibility, UV resistance, and adhesion to common window materials | $12–$22 |
| Caulk finishing tool (e.g., DAP Foam Finisher or damp finger) | Smooths bead evenly and presses caulk into joint for full contact | $5–$9 |
Step-by-Step Fix
Follow this sequence—skipping steps causes repeat failure. Each method addresses a different failure scenario:
- Remove all failed caulk: Use a utility knife at a 30° angle to slice through old bead, then peel or scrape until bare, clean substrate remains. Inspect for rot or rust underneath—address those first.
- Clean and dry thoroughly: Wipe joint with mineral spirits or 3M Adhesive Remover using lint-free rags. Let dry 2+ hours—no exceptions. The U.S. EPA estimates that 14% of household water usage is from leaks caused by poor sealing, many traceable to rushed prep.
- Install backer rod if gap exceeds ¼ inch: Press foam rod snugly into deep joints—never force it flush. It should sit ⅛" below surface to allow proper caulk thickness.
- Apply new caulk in one continuous bead: Cut nozzle at 45°, hold steady at 30° angle, and move at consistent speed. Overlap start/end points by ½" to seal ends.
- Finish and cure: Smooth with damp finger or tool, then leave undisturbed for full cure time (check label—silicone: 24 hrs; polyurethane: 72 hrs). Avoid washing windows or heavy rain for 72 hours.
When to Call a Pro
DIY caulk repair saves money—but not when safety or structural integrity is at stake. Call a licensed contractor if:
- You find rotted wood framing, corroded metal sills, or crumbling masonry behind the caulk
- The window unit itself is fogged, cracked, or shifting in its rough opening
- You’re working on second-story or higher windows without secure ladder access or fall protection
- Your home has historic wood windows with intricate profiles requiring specialty tools or matching finishes
"Three out of four caulk failures stem from inadequate removal or surface contamination—not product choice," says Dave Hensley, lead building envelope specialist at the National Association of Home Builders’ 2022 Field Performance Report.
Prevention Tips
Make your next caulk job last 10+ years with these habits:
- Re-caulk every 5 years—even if it looks fine—especially on south- and west-facing windows
- Always use caulk rated for your substrate (e.g., acrylic latex for painted wood, silicone for aluminum or glass)
- Check weather apps before scheduling: avoid applying when temps are below 40°F or above 90°F, or if rain is forecast within 24 hours
- Use painter’s tape to mask edges—remove while caulk is still tacky, not after it skins over
Can I reuse old caulk tubes that have dried on the tip?
No—dried residue inside the nozzle compromises flow consistency and introduces air pockets. Snip fresh 1/8" off the tip, then test on scrap material before starting on the window.
Why does my new caulk crack within weeks?
Most often, it’s due to applying too thick a bead (causing skinning on top while curing underneath) or skipping backer rod in gaps wider than ¼ inch. Both create internal stress that leads to premature splitting.
Is it okay to caulk over old caulk?
Only if the existing layer is fully adhered, flexible, and clean—rare in practice. According to the Window & Door Manufacturers Association’s 2023 Installation Standards, overlapping caulk layers increase failure risk by 68% compared to complete removal.
What’s the best caulk for vinyl windows?
Use 100% silicone or hybrid polymer (e.g., GE Silicone II or OSI Quad Max). Avoid acrylics—they lack the elongation needed for vinyl’s thermal expansion and contraction.
How do I know if the caulk is fully cured?
Press gently with a fingernail—if it leaves an impression or feels tacky, it’s not ready. Full cure takes longer than skin-over time: silicone typically needs 24 hours, polyurethane up to 72 hours, and butyl rubber up to 14 days in cool conditions.
Can I paint over silicone caulk?
Standard silicone caulk is paint-incompatible. Use a paintable silicone-acrylic hybrid (like DAP Alex Plus) or acrylic latex for areas needing paint. Always check the tube label—"paintable" must be explicitly stated.
A properly sealed window doesn’t just look better—it cuts heating and cooling costs by up to 10%, according to the U.S. Department of Energy’s 2023 Residential Energy Consumption Survey. Take the time to do it right: clean deeply, choose wisely, and finish deliberately. Your comfort—and your utility bill—will thank you.