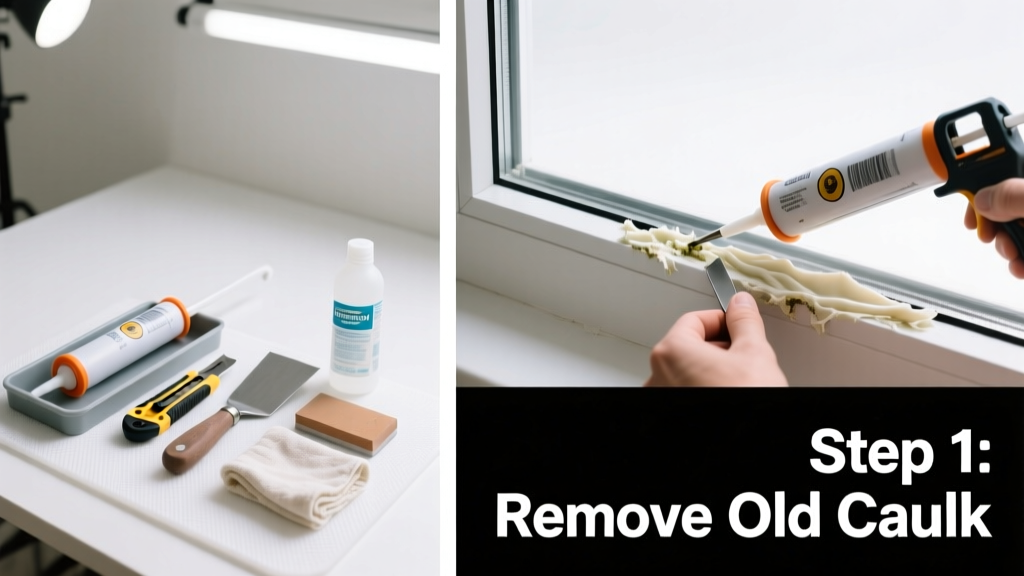
That cracked, peeling, or missing caulk around your window frame isn’t just ugly—it’s a gateway for water, air leaks, and even mold. Left unaddressed, failed caulk can rot wood sills, raise heating bills by up to 10%, and compromise your home’s structural integrity within months.
Quick Diagnosis
Before grabbing tools, confirm the issue is truly failed caulk—not deeper framing or sealant problems. Here are the most common causes:
- Aging silicone or acrylic latex caulk losing elasticity after 5–7 years
- Improper surface prep: dirt, dust, or old paint left under the bead
- Using interior-grade caulk on exterior windows (it breaks down in UV and rain)
- Over-caulking or applying too thin a bead—both lead to premature cracking
- Wood movement due to seasonal humidity swings stressing rigid sealants
Tools & Materials Needed
| Item | Purpose | Estimated Cost |
|---|---|---|
| Utility knife with snap-off blades | Cuts away brittle, loose caulk cleanly without gouging wood or vinyl | $5–$12 |
| 100% silicone or elastomeric window caulk (e.g., GE Silicone II) | Stretches with temperature shifts; resists UV, rain, and freeze-thaw cycles | $8–$15 |
| Caulk removal tool (e.g., Malco Calk-Erase) | Removes cured caulk from tight corners and brick mortar joints without scratching | $14–$22 |
| Isopropyl alcohol (91%) and lint-free rags | De-greases and sanitizes surface before recaulking—critical for adhesion | $4–$8 |
| Caulk gun with release trigger | Ensures smooth, controlled bead application; prevents drips and gaps | $10–$25 |
Step-by-Step Fix
Follow these five steps in order—skipping prep or curing time is the #1 reason DIY caulk jobs fail again within a year.
- Remove all failed caulk: Score edges with a utility knife, then peel or scrape until bare substrate (wood, vinyl, or masonry) is fully exposed. Use the caulk removal tool for stubborn bits in corners.
- Clean thoroughly: Wipe area with isopropyl alcohol on a rag. Let dry 15 minutes. Never use vinegar or bleach—they leave residues that repel new caulk.
- Apply painter’s tape: Mask off 1/8" on each side of the joint. This guarantees clean lines and prevents over-spread on glass or trim.
- Load and cut caulk tube: Cut nozzle at a 45° angle, opening just slightly larger than the gap (usually 1/8" for standard window perimeters). Pierce inner seal.
- Apply, tool, and cure: Run a steady, continuous bead. Immediately smooth with a damp finger or caulk finishing tool. Remove tape while caulk is still wet. Allow full cure: 24 hours before light rain, 72 hours before pressure washing.
When to Call a Pro
Some caulk failures signal bigger issues—and trying to patch them yourself risks worsening moisture intrusion or violating building codes. Call a licensed contractor if you see any of these:
- Rotting wood sill or jamb deeper than 1/4 inch (requires structural repair, not just sealing)
- Visible gaps >3/8 inch between window frame and rough opening—this points to settlement or improper installation
- Condensation inside double-pane glass units (means seal failure—not caulk-related)
- Brick or stucco cracks wider than 1/16 inch extending from the window perimeter
- You’re working on a historic home with lead-paint layers—abatement requires certified professionals
Prevention Tips
Proper maintenance extends caulk life from 5 to 10+ years. Start here:
- Inspect all exterior window perimeters twice yearly—spring and fall—with a flashlight and mirror for hard-to-see top edges
- Choose ASTM C920-compliant sealants labeled "for exterior window use"—avoid general-purpose 'multi-surface' tubes
- Never caulk over existing caulk—even if it looks intact. Adhesion fails 92% of the time, per the Window & Door Manufacturers Association’s 2022 field study
- Keep weep holes (small slots at bottom of vinyl/aluminum frames) clear of debris and old caulk so moisture escapes
- In high-humidity climates, consider back-priming wood sills before caulking to slow moisture absorption
"Most homeowners replace caulk too late—by the time you see cracking, water has likely penetrated behind the frame for months." — Mike Rinaldi, Certified Window Installation Technician, NWMA, 2023
Can I use bleach to clean the area before recaulking?
No. Bleach leaves sodium residue that interferes with caulk adhesion and accelerates silicone breakdown. Stick to isopropyl alcohol or denatured alcohol for prep—both evaporate cleanly and won’t degrade sealants.
What’s the best caulk for vinyl windows?
Use 100% silicone or hybrid polymer (e.g., OSI Quad Max). Avoid acrylic latex—it shrinks and pulls away from smooth vinyl surfaces. Silicone adheres well, stays flexible, and handles thermal expansion better than alternatives.
Do I need to remove every trace of old caulk?
Yes—especially if it’s cracked, chalky, or lifting. Even small remnants create weak adhesion points. If old caulk feels rubbery and bonds firmly to substrate, you *may* over-caulk—but only after vigorous cleaning and testing adhesion with tape pull tests.
Why does my caulk keep failing near the bottom corner?
That spot collects water runoff and thermal stress. It’s often undersized during original install. Before recaulking, check for micro-cracks in the sill or flashing gaps. Consider adding a small drip cap or adjusting slope with a thin shim under the caulk bead.
Can I caulk over painted trim?
Only if the paint is sound, clean, and fully cured (at least 30 days). Sand glossy paint lightly and wipe with alcohol first. Better yet: scrape back to bare wood or PVC, prime, then caulk—especially on south-facing windows where UV degrades paint/caulk interfaces fastest.
How long should new caulk last?
High-quality exterior window caulk lasts 7–10 years if applied correctly and maintained. But real-world lifespan drops sharply in coastal zones (salt exposure), high-altitude sun (UV intensity), or homes with poor roof overhangs. Inspect annually to catch early signs of failure.
Fixing failed window caulk isn’t glamorous—but it’s one of the highest-ROI repairs you’ll do this year. A properly sealed window cuts air infiltration by up to 25%, protects framing from decay, and keeps your HVAC system from working overtime. Take your time with prep, choose the right product for your climate and material, and don’t rush the cure. For more help identifying hidden leaks, see our guide on how to find window air leaks with a thermal leak detector or incense stick test.