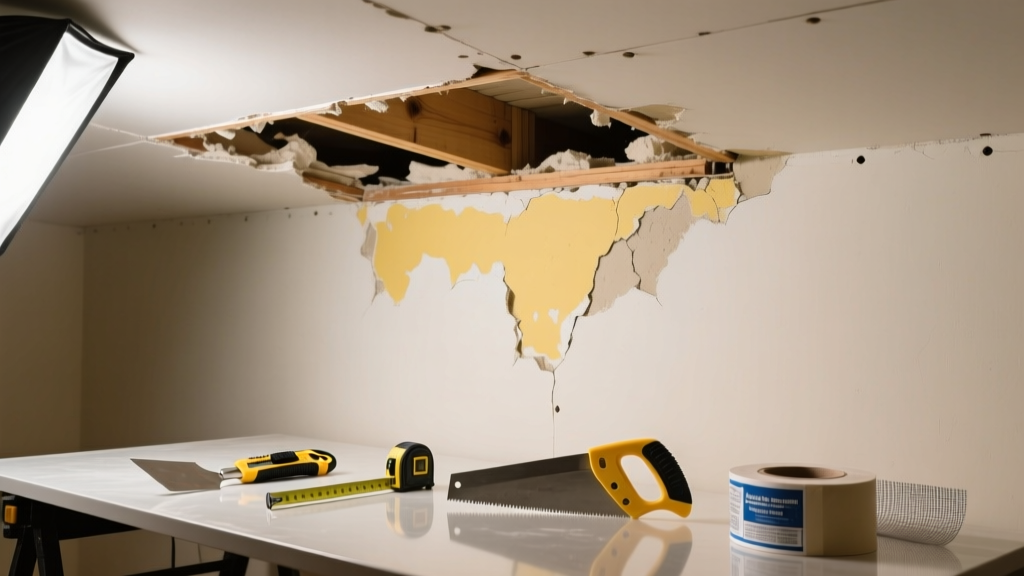
That brownish-yellow stain spreading across your ceiling isn’t just ugly—it’s a red flag that moisture has compromised the drywall’s integrity. If the surface is soft, sagging, or crumbles when pressed, patching won’t cut it: you need to replace the damaged section. Ignoring it risks mold growth, structural weakening, and recurring leaks.
Quick Diagnosis
Before cutting into your ceiling, confirm the source and extent of damage. Water stains rarely appear directly above the leak—gravity pulls moisture along framing or pipes before it bleeds through.
- Roof leak (missing shingle, cracked flashing, or deteriorated underlayment)
- Clogged or leaking HVAC condensate drain line (especially near attic-mounted units)
- Leaking plumbing pipe in attic or upper-floor wall cavity
- Improperly sealed bathroom exhaust fan duct allowing condensation to drip back
- Ice damming in winter causing roof deck saturation
Tools & Materials Needed
| Item | Purpose | Estimated Cost |
|---|---|---|
| Drywall saw or utility knife | Cuts precise opening around damaged area without cracking adjacent drywall | $8–$15 |
| 1/2-inch gypsum drywall (4' x 8') | Standard thickness for residential ceilings; matches most existing substrate | $12–$18 |
| Self-tapping drywall screws (1-1/4") | Secures new panel to ceiling joists without splitting | $5–$9 |
| Joint compound & fiberglass mesh tape | Seals seams and prevents future cracking at repair joints | $10–$16 |
| Drop cloths & plastic sheeting | Protects floors, furniture, and HVAC vents from dust and debris | $6–$12 |
Step-by-Step Fix
Replacing the damaged drywall section takes 4–6 hours (plus drying time), but it’s far more durable than skim-coating over rot.
- Turn off power to any nearby lights or fixtures. Shut off water supply if plumbing is suspected—and verify no active leak remains using a moisture meter (readings >15% indicate active saturation).
- Mark and cut a square or rectangular outline around the stain, extending at least 2 inches beyond all discolored or soft areas. Use a straightedge and pencil, then cut with a drywall saw—keeping cuts aligned with ceiling joists where possible.
- Remove the damaged panel, checking joist spacing (typically 16" or 24" on center). Measure the opening and cut a replacement piece to fit snugly between joists—or add wood backing if the hole spans mid-joist.
- Screw the new drywall in place using 1-1/4" screws every 6–8 inches along edges and joists. Slightly dimple each screw head—not break the paper—to allow proper mud coverage.
- Apply joint compound in three thin coats over seams and screw heads, embedding fiberglass mesh tape on the first pass. Sand lightly between coats with 120-grit sandpaper.
When to Call a Pro
Some water damage crosses into hazardous or code-regulated territory. Don’t risk your safety or home value by DIY-ing these scenarios:
- The stain covers more than 10 sq ft or spans multiple joists
- You find black mold (Stachybotrys) or musty odors—even behind drywall
- Electrical wiring runs through the affected area and shows corrosion or insulation damage
- The leak originates from a flat roof, skylight, or complex flashing detail requiring roofing expertise
- Your home was built before 1980 and you suspect asbestos-containing textured ceiling material (popcorn ceiling)
"Over 60% of water-damaged drywall replacements fail within 18 months when the underlying moisture source isn’t fully resolved—making diagnosis more critical than the repair itself." — National Association of Home Builders Remodeling Report, 2022
Prevention Tips
Once the repair is done, prevent recurrence with targeted maintenance:
- Inspect roof flashings and shingles twice yearly—especially after storms
- Clean HVAC condensate drain lines with vinegar and a wet/dry vac every spring and fall
- Install a smart water leak detector like the Moen Flo under sinks and near water heaters
- Ensure bathroom exhaust fans vent outside, not into the attic—check duct termination in soffits or roof caps
- Add attic ventilation baffles if insulation blocks soffit intake vents
Can I paint over the stain without replacing drywall?
No—if the drywall feels spongy or crumbles under light pressure, painting traps moisture and accelerates decay. Primer like Kilz Original may hide discoloration temporarily, but it won’t stop mold spores from growing beneath the surface. Replacement is the only permanent fix for compromised substrate.
Do I need to remove insulation above the damaged area?
Yes—if fiberglass or cellulose insulation is wet, compressed, or discolored, it must be removed and replaced. Wet insulation loses R-value and becomes a mold reservoir. Wear an N95 mask and gloves during removal, and bag debris in heavy-duty plastic per EPA guidelines.
How long does joint compound take to dry between coats?
Under normal conditions (70°F, 50% humidity), standard all-purpose joint compound dries in 24 hours per coat. Fast-setting “hot mud” (e.g., Durabond 45) dries in 45 minutes—but requires precise mixing and faster application. Always sand with a pole sander and vacuum dust before recoating.
What type of primer should I use after sanding?
Use a stain-blocking oil-based primer like Zinsser Cover Stain or BIN. Latex primers often fail to block tannin bleed from water-damaged paper facing. Apply two thin coats, letting each dry fully (4–6 hours) before topcoating with ceiling paint.
Can I reuse the old drywall screws?
No—reused screws lose grip and may strip joist wood or create uneven surfaces. Always install fresh, phosphate-coated drywall screws rated for ceiling use. Count on roughly one screw per 6–8 inches along joist contact points.
Is it safe to leave the repair uncovered overnight?
Yes—as long as the area is dry and no active leak remains. However, cover the opening with plastic sheeting taped to surrounding drywall if dust or airflow could disturb the repair site. Never leave exposed electrical wires or insulation unattended.
A clean, solid ceiling repair restores both appearance and peace of mind—but only if the root cause stays fixed. Replacing the damaged drywall is the right move when texture, strength, or safety are compromised. Pair it with proactive leak detection and seasonal inspections, and you’ll keep your ceiling looking tight for years. For persistent or puzzling leaks, consider hiring a certified water intrusion specialist who uses thermal imaging and moisture meters to trace hidden paths.