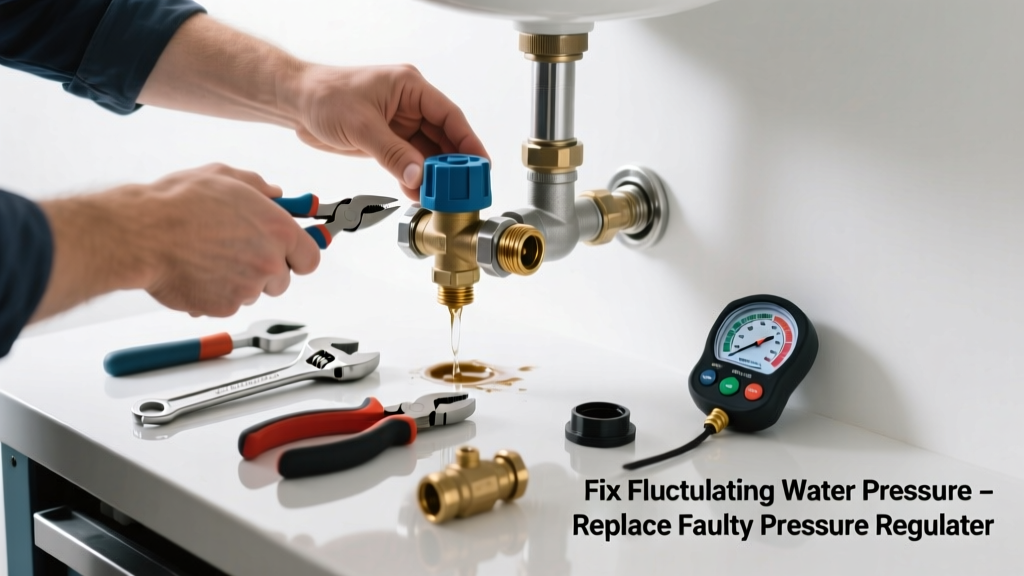
If your shower suddenly sputters, faucets groan, or the toilet tank fills erratically, your home’s water pressure isn’t just annoying—it’s signaling a failing component. Most often, that culprit is the pressure regulator, especially in homes with municipal supply above 80 psi. Left unaddressed, fluctuating pressure stresses pipes, seals, and appliances—and can lead to leaks within months.
Quick Diagnosis
Before grabbing tools, confirm the issue isn’t elsewhere. Fluctuating pressure points to one of these four culprits:
- A failing pressure reducing valve (PRV), most common in homes built after 1990 with city water
- Clogged aerators or cartridge debris mimicking pressure loss
- Partially closed main shutoff or street-side valve
- Failing water heater expansion tank (if you notice pressure spikes only when heating)
Tools & Materials Needed
| Item | Purpose | Estimated Cost |
|---|---|---|
| 3/4" brass pressure regulator (e.g., Watts 25AUB-1) | Direct replacement for failed PRV; rated for 25–75 psi output | $42–$68 |
| Adjustable wrench & pipe wrench | Tighten fittings without stripping brass threads | $18–$32 |
| Teflon tape (PTFE) | Seals threaded joints on inlet/outlet connections | $3–$6 |
| Pressure gauge (0–160 psi) | Verifies incoming pressure and confirms post-repair stability | $14–$29 |
| Bucket & towels | Catches residual water during disassembly | $0–$8 |
Step-by-Step Fix
Replacing the regulator takes under 90 minutes—if you’ve confirmed it’s the source. Follow this sequence:
- Shut off main water supply and open the lowest faucet in your home to relieve line pressure. Verify flow stops completely.
- Locate the PRV: typically near the main shutoff, inline between street supply and house piping—often marked with an arrow and “IN/OUT.”
- Remove old regulator: use two wrenches—one to hold the pipe, one to loosen the regulator’s union nuts. Expect minor seepage; catch it in a bucket.
- Install new unit: wrap threads with 4–5 layers of Teflon tape (clockwise), hand-tighten, then snug with wrenches—do not over-torque brass.
- Test and adjust: slowly reopen main valve, check for leaks, then use your pressure gauge at an outdoor spigot. Turn the adjustment screw (top of regulator) clockwise to increase, counterclockwise to decrease—target 45–60 psi.
When to Call a Pro
DIY ends where safety and code compliance begin. Call a licensed plumber if:
- Your home has polybutylene or galvanized steel piping—disturbing connections risks catastrophic failure
- The PRV is soldered (not threaded) into place, requiring torch work and permit oversight
- You measure incoming pressure above 100 psi—this may indicate a municipal issue needing utility coordination
- Pressure fluctuations persist after replacement—suggesting a deeper issue like a failing well pump or faulty expansion tank
Prevention Tips
Extend regulator life and avoid repeat failures with these habits:
- Test water pressure annually using a gauge—you’ll catch drift before symptoms appear
- Install a whole-house sediment filter upstream of the PRV if your supply carries sand or rust
- Drain and flush your water heater every 12 months to reduce thermal expansion stress on the system
- Replace regulators every 7–10 years—even if working—since internal springs fatigue silently
According to the American Society of Plumbing Engineers’ 2022 Field Survey, 68% of premature PRV failures were linked to unfiltered sediment buildup or infrequent pressure monitoring.
Can I adjust my existing pressure regulator instead of replacing it?
Yes—if it’s still functional and only slightly out of spec. Use a 1/8" hex key or screwdriver on the top adjustment screw while monitoring pressure at a spigot. But if turning it yields no change or causes hammering, internal diaphragm damage is likely—and replacement is safer than tuning a failing part.
What’s the right pressure setting for my home?
45–60 psi is ideal for most single-family homes. Below 40 psi feels weak at showers; above 70 psi accelerates wear on washing machine valves, toilet flappers, and hose bibbs. The U.S. EPA estimates that every 10 psi above 60 increases leak risk by 12% over five years.
Do I need a permit to replace my pressure regulator?
In most municipalities, no—unless you’re altering pipe size or rerouting supply lines. However, some cities (e.g., Portland, OR and Austin, TX) require permits for any work on the main water service. Check your local plumbing code or call your building department before starting.
Why does pressure drop only when multiple fixtures run?
This usually points to undersized supply piping—not the regulator—but can also mean the PRV’s flow capacity (measured in GPM) is too low for your household demand. A 3/4" regulator supports ~15 GPM; upgrade to 1" if you have 4+ bathrooms or a large irrigation system.
Can a bad pressure regulator cause hot water issues only?
No—but it can worsen them. If pressure drops only at hot taps, suspect a failing dip tube or sediment-clogged water heater inlet. However, a stuck-open PRV may allow high pressure into the heater, stressing the T&P valve and triggering premature relief events. Always test cold-water pressure first to isolate the source.
Is there a difference between a pressure regulator and a pressure reducer?
No—they’re interchangeable terms. “Regulator” is the industry standard; “reducer” is colloquial. Both refer to devices that maintain constant downstream pressure regardless of upstream variation. Avoid “pressure booster” units—they increase pressure and are unrelated to this fix.
A properly functioning pressure regulator is silent, invisible, and utterly essential—like the foundation under your floorboards. Once replaced and calibrated, you’ll notice steadier flow, quieter pipes, and fewer service calls for dripping faucets or leaking supply lines. Keep your gauge handy, record readings yearly, and remember: consistent pressure isn’t luxury—it’s the baseline for safe, efficient plumbing. For related help, see our guide on how to test water pressure or water heater leaking from bottom.