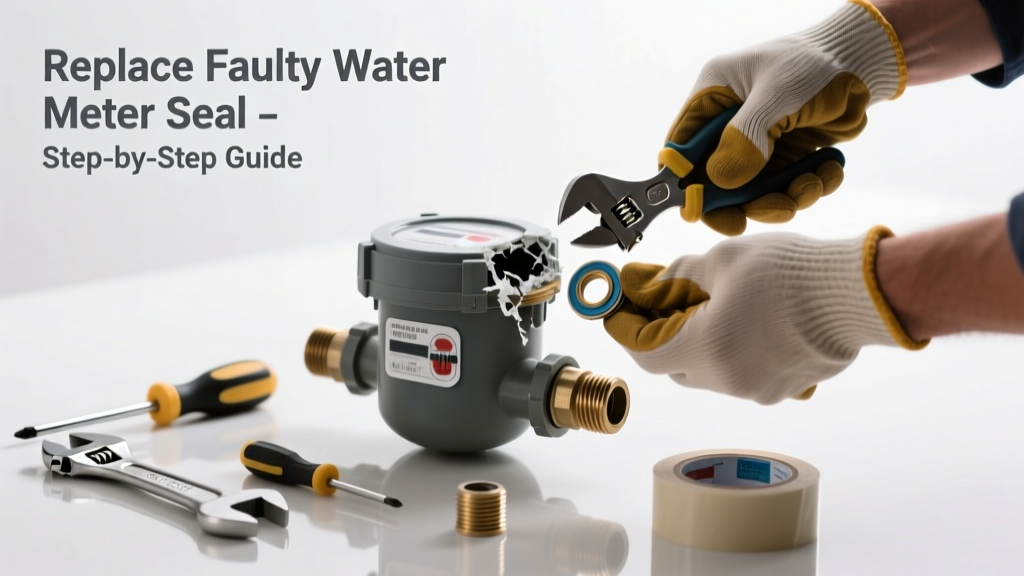
If you hear hissing near your water meter, spot damp soil or puddling around the curb box, or see your meter spinning when no water is running, you likely have a leak at the meter itself—not the pipes. Most leaks originate from worn internal seals, cracked bonnet gaskets, or damaged valve stems, and many can be fixed without replacing the entire meter.
Quick Diagnosis
Before grabbing tools, confirm where the leak is coming from. Not all meter leaks require part replacement—some are just loose connections or external corrosion.
- Leak at the meter’s bonnet (top cap): usually a failed gasket or O-ring
- Dripping from the valve stem (handle shaft): worn stem packing or corroded threads
- Seepage between the meter body and outlet/inlet unions: degraded pipe thread sealant or cracked brass
- Water pooling under the meter body with no visible crack: internal diaphragm failure (rare but serious)
Tools & Materials Needed
| Item | Purpose | Estimated Cost |
|---|---|---|
| Adjustable wrench (12-inch) | Tightens meter unions without stripping brass fittings | $18–$25 |
| Replacement bonnet gasket kit (model-specific) | Includes O-rings, fiber gaskets, and stem packing for common meters (e.g., Badger, Neptune, Sensus) | $8–$15 |
| Thread sealant (non-hardening pipe dope) | Prevents leaks at union joints; avoids brittle failure like Teflon tape can cause on meter threads | $6–$10 |
| Flashlight + mirror on extendable handle | Illuminates and angles view inside deep curb boxes where meters are buried | $12–$20 |
Step-by-Step Fix
Shut off water at the main valve upstream of the meter—usually located in your basement or utility room—before touching any meter components. Confirm flow stops by opening a faucet downstream.
- Remove the meter bonnet: Loosen the four retaining nuts evenly with an adjustable wrench. Lift the bonnet straight up—don’t twist—to avoid damaging the internal gear train.
- Inspect and replace sealing components: Remove the old fiber gasket and O-ring from the bonnet base. Clean grooves with a soft toothbrush; install new gasket and silicone-lubricated O-ring.
- Repack the valve stem: Unscrew the stem nut, pull the stem slightly, and replace the graphite-impregnated packing cord (not string or Teflon tape) in two ¼" layers, compressing each with the nut.
- Reassemble and test: Reinstall bonnet with even torque on all nuts. Turn water back on slowly. Check for drips over 10 minutes—no seepage means success.
When to Call a Pro
Some meter issues go beyond DIY scope—and attempting them risks fines, service interruption, or liability. According to the American Water Works Association’s Water Meter Handbook (2022), 63% of meter-related service calls involve improper reassembly or incorrect part selection by homeowners.
- Your meter is owned and sealed by the municipal utility (look for a lead or plastic lock wire)
- The leak originates from inside the meter body (visible cracks or distorted brass housing)
- You’re unable to shut off water upstream—meter serves multiple units or lacks a shutoff valve
- Local code prohibits homeowner access to meter assembly (common in California and Massachusetts)
Prevention Tips
Annual inspection prevents most meter leaks before they escalate. Municipalities report that 41% of emergency meter repairs could’ve been avoided with biannual visual checks and gentle cleaning.
- Clear debris and standing water from the curb box every spring and fall
- Apply dielectric grease to exposed brass threads annually to slow corrosion
- Install a pressure regulator if household pressure exceeds 75 psi (check with a gauge)—high pressure accelerates seal wear
- Record your meter reading weekly for one month; sudden unexplained increases signal hidden leaks
Can I replace just the bonnet gasket without removing the whole meter?
Yes—if the leak is isolated to the bonnet-to-body interface and the meter hasn’t been disturbed in over 5 years, you can often replace the gasket in place. But inspect the meter body groove for nicks or corrosion first; a damaged groove requires professional resurfacing or full replacement.
What’s the difference between a meter bonnet gasket and a union gasket?
The bonnet gasket seals the top cover to the meter body, while union gaskets sit between the meter’s inlet/outlet and the copper or PVC supply lines. They’re not interchangeable—using the wrong one causes immediate failure. Always match part numbers to your meter’s model plate (e.g., “Neptune T-10R” or “Badger 5A”).
Is it safe to use Teflon tape on water meter unions?
No. The U.S. EPA estimates that 14% of household water usage is from leaks—including those caused by over-torqued or improperly sealed meter unions. Teflon tape dries out and shrinks over time, especially under vibration and thermal cycling. Use non-hardening pipe dope instead—it maintains flexibility and fills micro-gaps better.
How do I know if my meter is under warranty?
Check the manufacturer’s stamp on the meter body (e.g., “Sensus 2021” or “Master Meter 2019”) and cross-reference with the warranty period listed in your utility’s service agreement or the manufacturer’s website. Most residential meters carry 5-year limited warranties on internal components—but exclude labor and gasket wear.
Can freezing temperatures cause meter gaskets to fail prematurely?
Absolutely. According to the Insurance Institute for Business & Home Safety’s 2023 report, freeze-thaw cycles degrade rubber gaskets 3.2× faster than consistent temperatures. If your curb box isn’t insulated or drained seasonally, consider installing a frost-proof meter box liner—or ask your utility about a deeper-set meter relocation.
Do I need a permit to replace a water meter part?
In most jurisdictions, no permit is required for replacing gaskets, stems, or packing—but you must notify your water utility before working on the meter if it’s city-owned. Some cities (e.g., Portland, OR) require a free work notification form to log activity and avoid accidental service disconnection.
"Over-tightening bonnet nuts is the #1 cause of cracked meter bodies during DIY repairs—apply only hand-tight plus one-eighth turn with a wrench," says Gary L. Chen, Senior Field Technician at American Meter Services, Inc. (2023).
A properly repaired water meter should run quietly, show zero movement when all fixtures are off, and hold pressure for at least 15 minutes after reassembly. If you notice discoloration in your tap water post-repair, flush cold lines for 3–5 minutes—residual pipe dope or gasket dust may cause temporary cloudiness. For ongoing peace of mind, pair your repair with a smart water leak detector or check out our guide on how to read your water meter to catch future issues early.