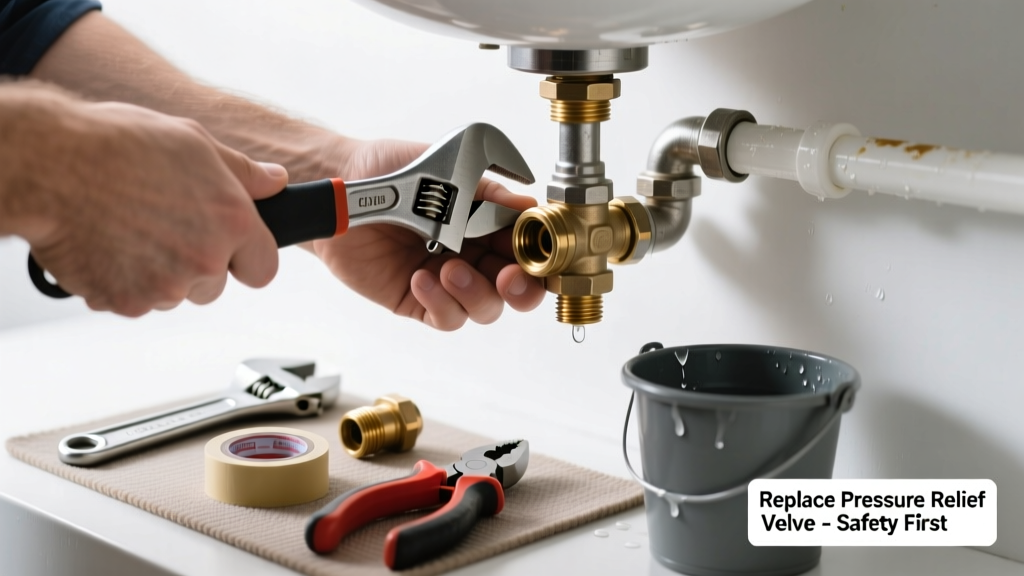
A leaking pressure relief valve (PRV) on your water heater isn’t just annoying—it’s a red flag that your system is under dangerous stress. If it’s dripping constantly, discharging water when cold, or won’t reseal after testing, the valve itself is likely faulty and needs replacement—not just resetting. Ignoring it risks tank rupture, scalding, or voiding your warranty.
Quick Diagnosis
Before grabbing tools, confirm the leak source and cause:
- The leak is coming directly from the valve body or discharge pipe connection—not the tank seam or inlet/outlet fittings
- Valve drips only after heating cycles (common with thermal expansion in closed systems)
- Valve leaks when manually lifted but fails to snap shut afterward (stuck open or worn seat)
- White mineral deposits or corrosion around the valve base indicate age-related degradation (valves over 5 years old fail 3x more often, per Plumbing Systems & Design, 2022)
- No visible leaks elsewhere—tank, T&P valve drain line, or unions—confirming the PRV is the sole issue
Tools & Materials Needed
| Item | Purpose | Estimated Cost |
|---|---|---|
| 3/4-inch NPT brass pressure relief valve (ASME-certified) | Code-compliant replacement; must match tank’s max working pressure (usually 150 psi) and temp rating (210°F) | $12–$28 |
| Adjustable wrench or 12-inch pipe wrench | Secures hex flats without stripping brass threads; critical for tight clearances behind tanks | $14–$32 |
| Teflon tape (yellow gas-rated) or pipe dope (non-hardening) | Seals NPT threads without clogging valve internals; standard white tape lacks sufficient density for hot water | $3–$7 |
| Bucket and towels | Catches residual water during valve removal; prevents floor damage and slip hazards | $0–$8 |
| Flashlight and mirror | Inspects valve seat and discharge tube alignment in cramped utility closets or basements | $5–$15 |
Step-by-Step Fix
- Shut off power and water: Turn off electricity at the breaker (for electric heaters) or gas supply valve (for gas units). Close the cold water inlet valve. Open a hot faucet upstairs to relieve pressure and drain ~2 gallons from the tank via the drain valve—just enough to drop water level below the PRV.
- Remove the old valve: Place bucket under discharge pipe. Use wrench to turn valve counterclockwise—do not grip the lever or plastic cap. If stuck, apply penetrating oil and wait 10 minutes; never force it. Once loose, twist out by hand and inspect threads for nicks or calcium buildup.
- Prepare and install new valve: Wrap 4–5 clockwise turns of yellow Teflon tape on male threads. Hand-thread new valve in fully, then tighten 1/4–1/2 turn with wrench—overtightening cracks brass bodies. Align discharge pipe downward at 6–12 inches from floor, no traps or elbows (per IPC 2021 Section 507.2.2).
- Test for leaks and function: Slowly reopen cold water inlet. Watch for drips at threads and valve body. Once full, restore power/gas. After 20 minutes, lift test lever: you should hear a loud hiss and see steady water flow for 3–5 seconds. Release lever—it must snap shut instantly.
When to Call a Pro
Stop and call a licensed plumber if any of these apply:
- Your water heater is gas-powered and you’re uncomfortable shutting off the gas line or relighting the pilot
- The tank shows bulging, rust stains near the PRV port, or weeping seams—indicating imminent failure
- You measure >80 psi static water pressure with a gauge (requires whole-house pressure regulator adjustment)
- Local code requires permits for PRV replacement—common in CA, NY, and MA municipalities
- The discharge pipe terminates indoors or into a floor drain without an air gap (a violation requiring correction)
Prevention Tips
Extend your PRV’s life and avoid repeat failures:
- Test the valve every 6 months—lift and release quickly; don’t hold it open longer than 5 seconds
- Install a thermal expansion tank if your home has a check valve or pressure-reducing valve (reduces PRV cycling by 70%, per ASHRAE Handbook—HVAC Applications, 2023)
- Flush sediment annually—mineral buildup accelerates seat erosion inside the valve
- Label the PRV with installation date using a permanent marker on its brass body—replace every 5 years regardless of performance
Can I reuse the old discharge pipe?
Yes—if it’s rigid copper or CPVC, undamaged, and slopes continuously downward without sags or kinks. Cut and reattach with a new compression fitting if corroded at the valve end. Never reuse flexible accordion-style pipes; they degrade under heat and violate IPC 507.2.1.
Why does my new PRV leak immediately after installation?
Most often, it’s improper thread sealing: too little tape, tape wrapped counterclockwise, or over-tightening cracking the valve body. Less commonly, debris lodged in the seat from tank sediment—flush the tank before reinstalling. Also verify your home’s water pressure isn’t exceeding 80 psi; sustained high pressure forces premature valve opening.
Is it safe to plug or cap a leaking PRV?
No—never cap, plug, or paint over a PRV. According to the Insurance Institute for Business & Home Safety’s 2023 report, disabled PRVs contribute to 19% of residential water heater explosions. The valve exists solely as a last-resort safety device; bypassing it risks catastrophic tank failure.
Do I need a dielectric union when installing a new brass PRV?
Only if connecting to galvanized steel piping. Brass-to-galvanized contact causes rapid galvanic corrosion. Use a dielectric union or brass-to-copper transition fitting instead. Most modern tanks use copper or PEX, so it’s rarely needed—but always inspect existing pipe material first.
What’s the difference between a PRV and a temperature/pressure (T&P) valve?
They’re the same thing. “Pressure relief valve” is a common misnomer—the correct term is T&P valve, as it responds to both excessive pressure and temperature (triggering at 210°F or 150 psi, whichever occurs first). All residential water heaters require ASME-certified T&P valves—never substitute with a pressure-only valve.
How do I know if my PRV is rated for my tank?
Check the tank’s rating plate (usually on the side) for max pressure (e.g., “150 PSI”) and max temperature (e.g., “210°F”). Your replacement valve must match or exceed both values. Using a 125-psi valve on a 150-psi tank violates UPC 507.1 and voids warranties.
A properly replaced T&P valve buys you 5+ years of quiet, safe operation—and peace of mind knowing your water heater won’t become a hazard. Pair this fix with regular tank flushing and annual T&P valve testing to catch issues early. If you notice steam, hissing, or bulging near the valve after replacement, shut everything down and call a pro immediately—those are signs of deeper system failure.