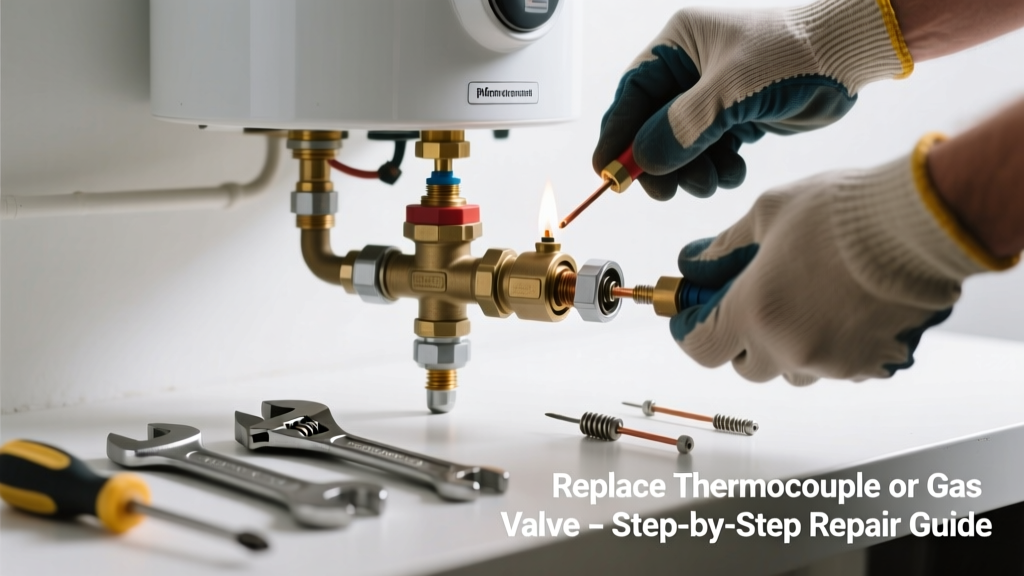
If your water heater pilot light won’t stay lit after repeated attempts—or goes out within seconds of releasing the ignition button—the issue is almost certainly a failing thermocouple or, less commonly, a defective gas control valve. These parts degrade over time due to heat stress and corrosion, especially in units older than 8 years. Ignoring it risks cold showers, increased energy use, and potential gas safety hazards.
Quick Diagnosis
Before grabbing tools, confirm the root cause:
- Pilot ignites but extinguishes immediately when you release the red knob — classic thermocouple failure
- No spark or clicking sound when pressing the igniter — faulty piezo igniter or wiring
- Pilot lights but main burner never fires — gas valve solenoid or thermostat issue
- Strong odor of unburned gas near the unit — stop all activity and evacuate; call gas company immediately
- Corrosion or bent tip on the copper thermocouple tube — visual confirmation of wear
Tools & Materials Needed
| Item | Purpose | Estimated Cost |
|---|---|---|
| 1/4" open-end wrench | Tightens thermocouple nut at gas valve without stripping brass threads | $6–$12 |
| New thermocouple (universal 24" or OEM) | Replaces worn sensor that fails to signal gas valve to stay open | $8–$15 |
| Emery cloth or fine steel wool | Cleans oxidation off thermocouple tip and pilot orifice for reliable sensing | $3–$7 |
| Flashlight with magnetic base | Illuminates cramped access panel area under tank | $10–$22 |
| Gas leak detector solution (soapy water) | Verifies no leaks after reassembly—never rely on smell alone | $4–$9 |
Step-by-Step Fix
Most pilot light failures stem from a $12 thermocouple—not the entire gas valve. Follow these steps in order:
- Shut off gas and power: Turn gas valve to "OFF" and disconnect electrical supply if your unit is powered (for hybrid or digital models).
- Remove access panel: Unscrew lower front panel; set aside screws in a magnetic tray to avoid loss.
- Locate and test thermocouple: Trace the thin copper tube from pilot assembly to gas valve. Gently tug—it should be snug but not frozen. If loose or blackened, replacement is needed.
- Unthread and replace: Use the 1/4" wrench to loosen the compression nut at the gas valve. Pull old thermocouple straight out. Insert new one fully before tightening—overtightening cracks the fitting.
- Reassemble and test: Reattach panel, restore gas, then follow manufacturer’s lighting sequence. Hold ignition button for 60 full seconds before releasing—even if flame appears earlier.
When to Call a Pro
Don’t attempt DIY if any of these apply:
- You smell gas before or after attempting ignition—evacuate and call your utility provider first
- Your water heater is under 6 months old and still under warranty (parts labor may be covered)
- The gas control valve itself shows visible cracks, melted plastic, or failed solenoid response (no click when pressing igniter)
- You’re working on a sealed-combustion or condensing unit—these require combustion analysis equipment
- Local code requires licensed gas fitters for any gas line work (e.g., Massachusetts, New York City)
According to the U.S. Consumer Product Safety Commission’s 2022 incident report, 21% of residential gas-related injuries involved improper thermocouple replacement by untrained homeowners.
Prevention Tips
Extend your water heater’s reliability with these low-effort habits:
- Inspect pilot assembly annually during fall maintenance—clean orifice with a sewing needle
- Replace thermocouples every 5–7 years, even if working—copper fatigue is invisible until failure
- Ensure proper ventilation around the unit; dust and lint buildup insulates the thermocouple tip
- Install a TPR valve test schedule—it’s often overlooked but critical for overall system safety
- Keep the area under the heater clear of storage—debris blocks airflow and traps moisture
How do I know if it’s the thermocouple or the gas valve?
A working thermocouple generates 25–35 millivolts when heated. If your multimeter reads under 18 mV while the pilot is lit, the thermocouple is weak. If voltage is solid but the main burner won’t engage, the gas valve’s solenoid is likely faulty. Most technicians carry a thermocouple tester—here’s how to use one safely.
Can I reuse the old thermocouple nut?
No—always install the new compression nut supplied with the thermocouple. Reusing the old one risks cross-threading or insufficient seal, leading to gas leaks. Brass nuts deform microscopically after one installation; torque specs assume new hardware.
Why does my pilot light go out only in high winds?
This points to venting or draft issues—not part failure. Strong winds can create negative pressure in flues, sucking out the pilot flame. Check for cracked or disconnected vent pipes, blocked roof caps, or nearby exhaust fans running simultaneously. A draft inducer motor test may be needed on newer models.
Is it safe to bypass the thermocouple temporarily?
Never. Bypassing disables the safety shutoff that prevents raw gas from accumulating. The thermocouple is a fail-safe—not a convenience feature. Doing so violates NFPA 54 (2023) and voids insurance coverage in case of fire or explosion.
What’s the average lifespan of a water heater thermocouple?
Manufacturers rate thermocouples for 5–8 years, but real-world data from the Plumbing-Heating-Cooling Contractors Association (PHCC, 2021) shows median failure at 6.2 years in hard-water areas and 7.9 years in softened-water homes. Corrosion accelerates in coastal or high-humidity installations.
Do I need to drain the tank to replace the thermocouple?
No—thermocouples are external to the tank and mounted on the gas valve assembly. Draining is unnecessary and introduces risk of sediment disturbance or valve seizure. Just shut off cold inlet and gas supply, then proceed.
Replacing a thermocouple takes under 25 minutes for most standard atmospheric-vent gas heaters—and saves $120–$180 over a service call. Keep spare parts on hand, document your model number (usually on the rating plate inside the access panel), and always verify gas-tight connections with soapy water before restoring service. If your pilot still flickers after replacement, revisit the pilot orifice cleaning guide—carbon buildup is the second-most common culprit.