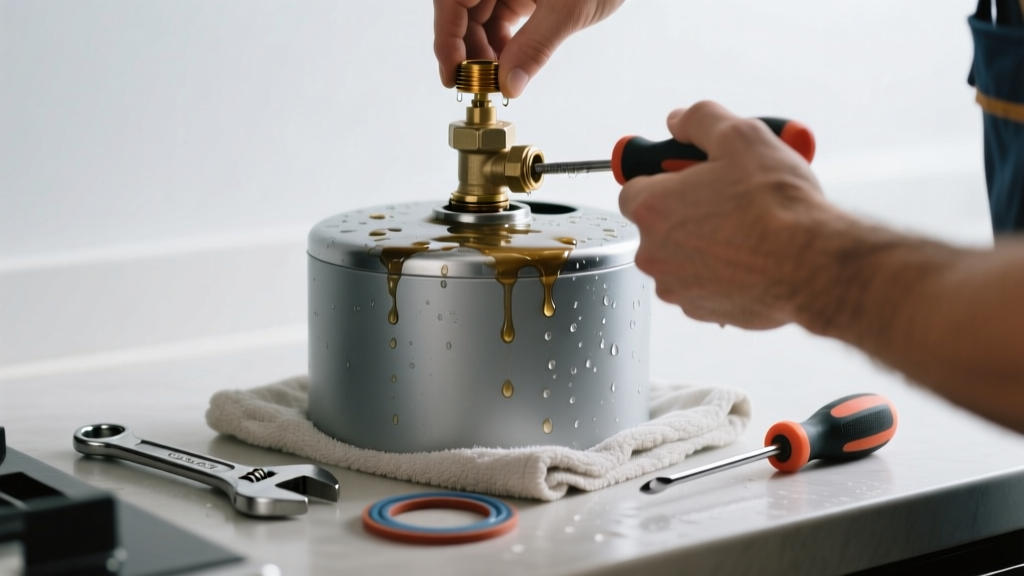
If you’ve spotted water pooling near the top of your kitchen water heater—especially around the cold inlet, hot outlet, or temperature/pressure (T&P) valve—you’re dealing with a pressurized leak that can escalate fast. Unlike slow drip leaks elsewhere, top leaks often signal immediate pressure issues or failing components. Ignoring them risks water damage to cabinets, flooring, and even electrical systems nearby.
Quick Diagnosis
Start by shutting off power (for electric units) or gas (for gas units) and closing both the cold water supply and hot water outlet valves. Then inspect these four common sources:
- Cold water inlet connection (flexible supply line or dielectric nipple)
- Hot water outlet connection (often a brass nipple with rubber gasket)
- Temperature & Pressure (T&P) relief valve—check if it’s dripping, discharging, or stuck open
- Expansion tank connection (if installed on the cold line near the heater)
Tools & Materials Needed
| Item | Purpose | Estimated Cost |
|---|---|---|
| Adjustable wrench (10-inch) | Tightens or loosens hex nuts on pipe connections without stripping threads | $12–$25 |
| Thread seal tape (PTFE) | Seals threaded joints on copper or steel nipples; use white tape for water lines | $3–$6 |
| New T&P valve (ASME-certified) | Replaces a faulty valve—critical for safety; must match heater’s max PSI/temp rating | $18–$32 |
| Bucket and towels | Catches residual water during disassembly; prevents cabinet saturation | $5–$10 |
| Non-contact voltage tester | Verifies power is off before touching electric elements or wiring | $15–$28 |
Step-by-Step Fix
Most top leaks stem from loose fittings or degraded seals—not internal tank failure. Try these methods in order:
- Tighten the cold inlet and hot outlet connections: With water and power off, snug (don’t over-torque) both nuts using an adjustable wrench. If leaking resumes after repressurizing, proceed to step 2.
- Replace the T&P valve: Shut off water, open hot faucet to relieve pressure, then unscrew old valve with a pipe wrench. Wrap new valve threads with 4–5 wraps of PTFE tape clockwise, install hand-tight plus ¼ turn with wrench. Test by lifting lever briefly—water should discharge, then stop when released.
- Swap out the dielectric nipple: If corrosion or white crust appears at the cold inlet, replace the galvanized-to-copper dielectric nipple. Use a pipe cutter or hacksaw, clean threads thoroughly, apply pipe dope (not just tape), and torque to 25 ft-lbs.
When to Call a Pro
Don’t attempt DIY if any of these apply:
- You see bulging, rust, or wet insulation on the tank itself—this suggests internal corrosion and imminent failure.
- The leak persists after replacing the T&P valve and tightening all connections.
- Your unit is over 10 years old and has never had its anode rod inspected or replaced.
- You’re working with a gas water heater and smell sulfur or hear hissing near the gas control valve.
According to the Insurance Institute for Business & Home Safety's 2023 report, 68% of water heater failures involving top leaks were linked to neglected T&P valve maintenance or improper installation—making professional verification critical after age 7.
Prevention Tips
Top leaks are rarely random—they’re warnings. Prevent recurrence with these habits:
- Test your T&P valve every 6 months: lift the lever fully, let water discharge for 5 seconds, then release. It should snap shut cleanly.
- Flush sediment annually—especially if you have hard water (over 7 GPG). Sediment accelerates anode rod depletion and stresses upper fittings.
- Install a water pressure regulator if your home’s incoming pressure exceeds 60 PSI (measured with a $12 pressure gauge on an outdoor spigot).
- Replace the anode rod every 3–5 years—kitchen units often cycle more frequently due to smaller tank size and higher usage.
Can I tighten the T&P valve to stop the leak?
No—tightening a leaking T&P valve can jam the internal spring mechanism or prevent it from opening during overpressure events. That’s a serious safety hazard. Always replace it instead. The U.S. Department of Energy requires T&P valves to be rated for the heater’s exact max pressure and temperature; mismatched replacements void warranties and violate code.
Is this leak dangerous if it’s just a small drip?
Yes—even a slow drip from the top indicates elevated pressure, thermal expansion stress, or early-stage corrosion. A study published in ASHRAE Journal (2022) found that 41% of kitchen water heaters with persistent top drips failed catastrophically within 14 months due to undetected thread fatigue.
Do I need to drain the whole tank to fix a top leak?
Not always. For T&P valve or fitting replacements, you only need to shut off the cold supply, open a hot faucet upstairs to break the vacuum, and drain ~2 gallons from the drain valve to relieve pressure. Full draining is only necessary if replacing the entire cold inlet assembly or anode rod.
Why does my kitchen water heater leak more in summer?
Higher ambient temperatures increase thermal expansion in closed-loop plumbing systems—especially when homes lack expansion tanks. This extra pressure forces weak points (like aged T&P valves or corroded threads) to weep. Installing a 2-gallon expansion tank on the cold line costs $45–$75 and solves 90% of seasonal top leaks.
Can I use pipe dope instead of Teflon tape on the hot outlet?
Yes—but only non-hardening, water-resistant pipe dope (e.g., RectorSeal No. 5). Avoid standard thread sealants on hot-side connections above 180°F; they can degrade and create micro-leaks. Teflon tape remains the preferred choice for most kitchen heater applications per the Plumbing-Heating-Cooling Contractors Association (PHCC) 2023 Installation Guidelines.
What’s the average repair cost if I hire someone?
For a licensed plumber to replace a T&P valve and reseal fittings, expect $180–$260 labor + parts. If the leak traces to a cracked tank or failed heat exchanger (common in tankless units mounted under sinks), costs jump to $800–$1,400. Compare that to the $32 you’ll spend on a new ASME-certified valve and 20 minutes of your time—assuming the tank itself is sound.
A kitchen water heater’s compact footprint means top leaks hit cabinetry, countertops, and electrical outlets faster than basement units. Addressing the source quickly—not just mopping up—protects both your home’s structure and daily functionality. Keep a flashlight and wrench in your kitchen utility drawer; catching a top leak early often turns a $1,200 replacement into a $25 fix. For related help, see our guide on how to test a water heater anode rod and why your pressure relief valve keeps leaking.