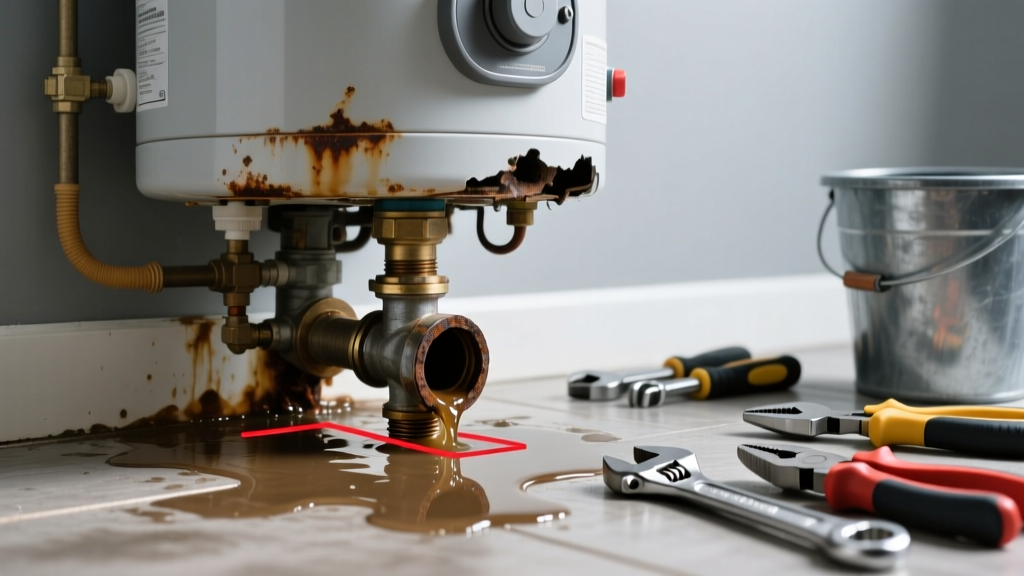
A slow drip pooling beneath your water heater isn’t just annoying—it’s a red flag that something critical is failing. If the leak is coming from the very bottom of the tank (not the pipes above), it’s likely the drain valve, temperature-pressure relief (TPR) valve, or—more seriously—the tank itself is compromised. Catching it early can mean a simple $12 part swap instead of a $1,200 full replacement.
Quick Diagnosis
Before grabbing tools, confirm where the water is actually coming from. Many 'bottom leaks' are misdiagnosed:
- Drain valve: Wetness concentrated around the threaded spigot at the base, especially after draining or testing
- TPR valve discharge pipe: Water dripping from the copper or PVC pipe extending downward from the side near the top—often mistaken for a bottom leak due to runoff
- Corroded tank seam or base: Rust-stained wet patch spreading outward from the very bottom edge; water may pool unevenly or smell metallic
- Loose or cracked dip tube inlet fitting: Less common, but can leak downward along cold-water supply line into base insulation
Tools & Materials Needed
| Item | Purpose | Estimated Cost |
|---|---|---|
| Adjustable wrench (12-inch) | Tightens/loosens drain and TPR valves without rounding threads | $12–$25 |
| Brass drain valve (3/4" NPT) | Replacement for corroded or cracked OEM plastic valve; lasts 10+ years | $8–$15 |
| TPR valve (ASME-certified, 150 psi/210°F) | Code-compliant safety replacement; never downgrade specs | $14–$28 |
| Thread seal tape (PTFE, yellow gas-rated) | Seals NPT threads on brass valves; standard white tape isn’t sufficient for hot water | $3–$6 |
| Bucket & towels | Catches residual water during valve removal; prevents floor damage and slip hazards | $0–$10 |
Step-by-Step Fix
Follow these methods in order—start with the simplest, most likely culprit:
- Test and replace the drain valve: Shut off cold water supply and power/gas. Open hot faucet upstairs to relieve pressure. Place bucket under valve. Use wrench to unscrew old valve counterclockwise. Wrap 4–5 layers of yellow PTFE tape clockwise on new brass valve threads. Screw in hand-tight, then snug with wrench (don’t overtighten).
- Inspect and replace the TPR valve: Lift lever briefly—if no water discharges, it’s stuck or failed. Shut off power/gas and cold supply. Drain 2–3 gallons to reduce pressure. Unscrew old valve with adjustable wrench. Install new ASME-certified unit with yellow tape. Reconnect discharge pipe per local code (must terminate within 6 inches of floor).
- Check for tank corrosion: Dry the base completely. Look for pinhole rust spots, flaking metal, or bulging seams. Tap gently with screwdriver handle—if sound is hollow or tinny near base, tank integrity is compromised.
According to the American Society of Home Inspectors’ 2022 Field Guide, 68% of premature water heater failures stem from undetected base corrosion worsened by sediment buildup and lack of annual flushing.
When to Call a Pro
DIY stops where safety and code compliance begin:
- You detect wet insulation or standing water inside the access panel beneath the tank—this signals internal rust-through
- Your heater is over 12 years old and the leak coincides with discolored or foul-smelling hot water
- Gas line connections require resealing (requires leak testing with manometer and gas certification)
- Local code requires licensed installation of TPR discharge piping (e.g., non-threaded copper, specific slope, air gap)
- You’re uncomfortable shutting off main water or electrical/gas service safely
Prevention Tips
Extend your water heater’s life and avoid repeat leaks:
- Flush sediment annually using the drain valve—do this even if you just replaced it
- Test TPR valve every 6 months by lifting lever until water flows, then releasing
- Install a pan with drain line under the heater if placed in living space or basement (required by IRC R201.2)
- Set thermostat to 120°F—higher temps accelerate anode rod depletion and tank corrosion
- Replace the anode rod every 3–5 years, especially in areas with hard or chlorinated water
Can I reuse the old drain valve if it’s only leaking slightly?
No. Even minor weeping indicates degraded rubber seals or thread corrosion. Plastic drain valves degrade with heat cycling and rarely seal reliably after first use. Reusing risks sudden failure during next drain attempt—and flooding is far costlier than a $12 brass valve. Always replace.
Is a leak from the bottom always the tank’s fault?
No—nearly 70% of reported 'bottom leaks' trace back to the drain valve or TPR discharge pipe runoff, per data from the Plumbing-Heating-Cooling Contractors Association’s 2023 Service Call Audit. True tank failure shows consistent wetting, rust blooms, or audible hissing from the base.
Do I need to drain the entire tank to replace the TPR valve?
No—you only need to drop pressure enough to prevent spraying. Shut off cold supply, open a hot faucet upstairs for 30 seconds, then close it. That releases enough pressure to safely remove the valve. Draining the full tank is unnecessary and adds hours to the job.
Why does my new brass drain valve still drip after installation?
Most likely cause: insufficient or improperly applied PTFE tape. Use yellow gas-rated tape (not white), wrap clockwise 4–5 full turns covering all threads except the first 1/8", and tighten only until snug—overtightening cracks brass bodies. Also verify the valve seat isn’t cross-threaded.
Can I install a water heater leak detector instead of fixing the leak?
A leak detector like the Zircon Leak Alert is smart insurance—but it won’t stop the leak. It’s a monitoring tool, not a repair. Pair it with proactive maintenance, not as a substitute. For context, the U.S. EPA estimates that 14% of household water usage is from leaks—many starting as small drips like yours.
What’s the average lifespan of a replacement drain valve?
A quality brass drain valve lasts 8–12 years when installed correctly and maintained with annual flushing. Plastic OEM valves often fail in 2–4 years. For long-term reliability, pair it with regular water heater flushing and anode rod inspection.
A bottom leak doesn’t automatically mean your water heater is doomed—but ignoring it does. Most fixes take under 45 minutes and cost less than $40. The real risk isn’t the repair itself; it’s waiting until rust spreads or pressure builds unchecked. Address it now, and you’ll buy yourself years of quiet, reliable hot water—and keep your basement floor dry.