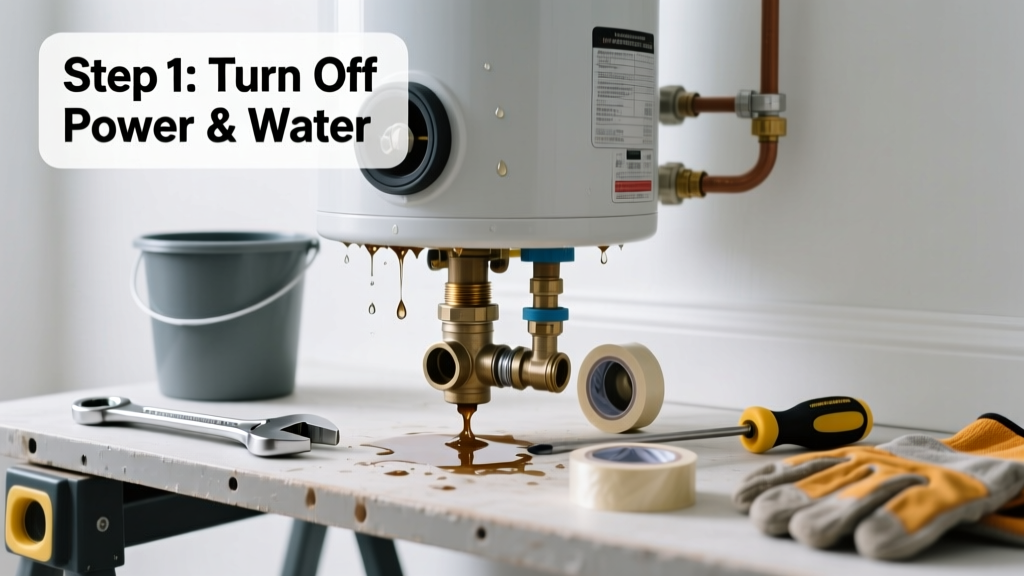
A puddle forming under your water heater isn’t just annoying—it’s a red flag that something’s seriously wrong. Leaks from the bottom often mean internal corrosion, failing components, or pressure issues that could escalate fast. Ignoring it risks water damage, mold, or even a catastrophic tank failure.
Quick Diagnosis
Before grabbing tools, identify the likely source. Bottom leaks rarely come from one single point—here’s where to look first:
- Drain valve (cracked, loose, or worn rubber washer)
- Temperature and Pressure (T&P) relief valve discharge pipe connection
- Rust-perforated tank bottom (often with orange-brown sediment in puddle)
- Corroded anode rod mounting point near the top, dripping down the side and pooling below
- Leaking heating element gasket (electric units only)
Tools & Materials Needed
| Item | Purpose | Estimated Cost |
|---|---|---|
| Adjustable wrench | Tightens or removes drain valve, T&P valve, and element nuts | $12–$25 |
| Replacement drain valve (brass, 3/4" NPT) | Direct swap for cracked or seeping valves | $8–$15 |
| T&P relief valve (ASME-certified) | Required replacement if valve is leaking or fails test | $10–$22 |
| Channel-lock pliers | Grips stubborn corroded fittings without rounding edges | $14–$28 |
| Bucket and towels | Catches water during draining; absorbs spills and prevents floor damage | $5–$12 |
Step-by-Step Fix
Follow these methods in order of likelihood and simplicity. Always shut off power and water supply first.
- Test and replace the drain valve: Close the cold water inlet, open a hot faucet upstairs to relieve pressure, then open the drain valve slightly. If it drips when closed—or leaks around the handle—replace it. Unscrew the old valve counterclockwise with a wrench, wrap threads with Teflon tape, and install the new brass valve hand-tight plus ¼ turn with a wrench.
- Check and reset the T&P valve: Lift the test lever fully and hold for 5 seconds. It should release steam/water briskly and snap shut when released. If it weeps afterward or won’t close, replace it immediately—this is a critical safety component.
- Inspect for tank corrosion: Shine a flashlight at the base. Look for pinhole rust spots, flaking metal, or wet streaks tracing upward from the floor. If you see active rust bleeding through, the tank is compromised and not repairable.
- Drain and flush sediment (if leak stops after flushing): Sediment buildup accelerates corrosion. Drain 3–5 gallons every 6 months. According to the U.S. Department of Energy’s 2022 Water Heating Guide, regular flushing extends tank life by up to 3 years.
When to Call a Pro
Some leaks aren’t DIY-safe—especially when they involve structural integrity or code compliance:
- The tank itself shows visible rust-through holes or bulging seams
- You smell gas near a gas water heater (evacuate and call utility immediately)
- Leak persists after replacing both drain and T&P valves
- Your unit is over 10 years old and has never had its anode rod replaced
- Local code requires licensed plumbers to replace T&P valves or perform gas line work
"A leaking tank bottom almost always means end-of-life—especially if rust is present on the exterior. Don’t waste time patching. Replacement is safer and more cost-effective than repeated repairs." — Plumbing Code Handbook, ICC, 2023 Edition
Prevention Tips
Stop future bottom leaks before they start:
- Replace the anode rod every 3–5 years (check your manual—aluminum rods last longer in hard water)
- Install a water softener if your home’s hardness exceeds 7 gpg (grains per gallon)
- Set thermostat to 120°F—higher temps accelerate corrosion and pressure stress
- Add a drip pan with overflow tubing routed to a floor drain (required by IRC for garage installations)
- Test the T&P valve every 6 months—not just when you suspect trouble
Can I use epoxy or sealant on a rust hole?
No. Epoxy may temporarily mask a small pinhole, but it won’t withstand constant thermal cycling or internal pressure. The U.S. EPA estimates that 14% of household water usage is from leaks—including those worsened by failed DIY patches. Rust indicates advanced degradation; sealing delays inevitable failure and increases flood risk.
Why does my water heater leak only when I use hot water?
This points to thermal expansion. As heated water expands, pressure rises—and if your home lacks an expansion tank, that pressure forces water out through the weakest seal (often the drain valve or T&P discharge pipe). Install a properly sized expansion tank on the cold inlet line to resolve this.
Is it safe to keep using the heater if it’s leaking a little?
Not long-term. Even a slow drip can erode flooring, rot subflooring, or create slip hazards. More critically, persistent moisture accelerates electrical faults in electric units and rust in gas units. The Insurance Institute for Business & Home Safety’s 2023 report found that 68% of water heater-related insurance claims involved units leaking for more than 48 hours before being addressed.
Do I need to drain the whole tank to replace the drain valve?
Yes—but you don’t need to drain it completely. Shut off cold water, open a hot faucet to vent air, then open the drain valve just enough to relieve pressure and drain ~2 gallons. That lowers the water level below the valve opening so you can swap it dry. Keep a bucket ready—you’ll get about 1–2 gallons total.
What’s the difference between a leak at the T&P valve versus its discharge pipe?
If water drips directly from the valve body (near the lever), the valve itself is faulty. If water pools where the copper or CPVC discharge pipe connects to the valve outlet, the joint is loose or the pipe is misaligned—tighten the union nut or reposition the pipe so it slopes downward without kinks or traps.
Can a leaking water heater cause carbon monoxide exposure?
Only in gas models with improper venting or backdrafting—but a bottom leak itself doesn’t produce CO. However, water damage can warp or dislodge vent connectors or combustion chambers over time. If you notice soot, yellow flames, or CO detector alarms, shut off gas and call a licensed HVAC technician immediately.
Fixing a bottom leak starts with smart diagnosis—not brute force. Most cases are resolved with a $15 valve and 20 minutes of focused effort, but knowing when to walk away saves time, money, and risk. If your water heater is older than 8 years and you’re seeing rust, consider browsing our water heater replacement cost guide or checking out how to install a tankless water heater for a longer-term upgrade. Regular maintenance isn’t glamorous, but it keeps your hot water reliable and your basement dry.