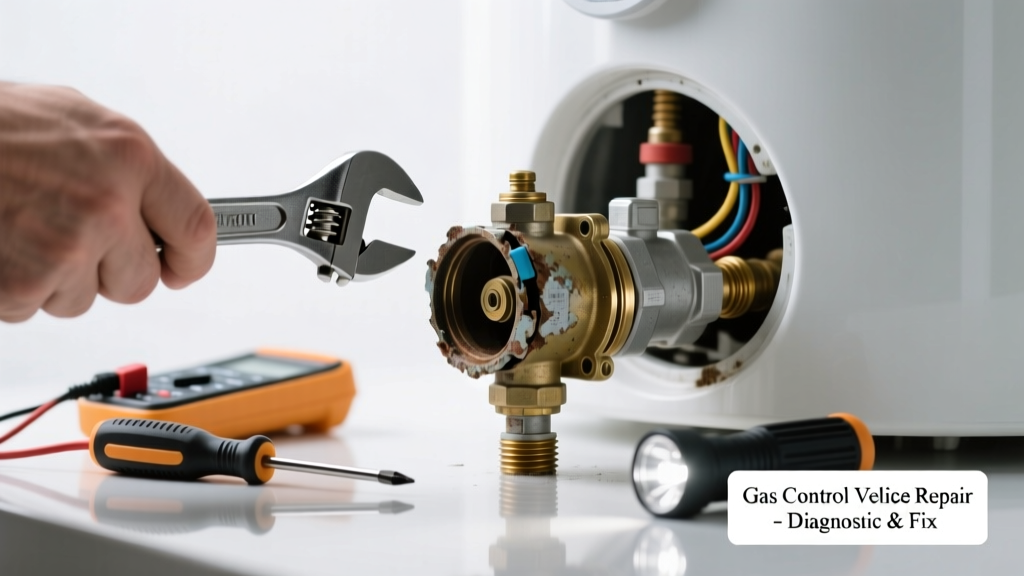
If your water heater suddenly starts hissing, buzzing, or rapid-clicking—especially when it should be idle—it’s likely the gas control valve failing. This isn’t just an annoyance: a malfunctioning valve can cause inconsistent heating, pilot light extinction, or even dangerous gas leaks. Don’t ignore it—address it fast.
Quick Diagnosis
Before assuming the valve is dead, rule out these common mimics:
- Pilot light flame lifting or floating (caused by dirty orifice or draft)
- Loose thermocouple connection or worn thermocouple (causes intermittent pilot outage)
- Gas pressure fluctuations from utility supply or regulator issues
- Mineral buildup in burner tubes causing uneven combustion noise
- Internal solenoid chatter due to low voltage (check 24V AC at valve terminals)
Tools & Materials Needed
| Item | Purpose | Estimated Cost |
|---|---|---|
| Multi-meter (with continuity & AC voltage) | Verify 24V AC supply and thermocouple millivolt output (should be 25–35 mV) | $45–$85 |
| Adjustable wrench & 7/16" socket | Tighten gas line fittings and remove valve mounting nuts without rounding | $12–$28 |
| New OEM gas control valve (e.g., Honeywell S8600M, Robertshaw 7000MV) | Exact replacement—non-OEM valves risk improper gas flow or safety lockout | $110–$195 |
| Leak detection solution (soapy water mix) | Test all gas connections post-installation—never use open flame | $3–$8 |
| Thread sealant (gas-rated Teflon tape or pipe dope) | Seal NPT threads on gas inlet/outlet—standard tape won’t hold LP or natural gas pressure | $4–$10 |
Step-by-Step Fix
These steps assume the valve has been confirmed faulty (no pilot ignition despite clean thermocouple, no gas release when thermostat calls, or erratic clicking with no flame). Always shut off gas and power first.
- Shut down completely: Turn gas shutoff valve to "OFF", disconnect power at breaker, and close cold water inlet valve.
- Depressurize & drain: Open hot water tap at nearest faucet; attach garden hose to drain valve and empty ~2 gallons to relieve tank pressure and cool internal components.
- Disconnect wiring & gas lines: Label wires (TH, TP, TH/TP) before unplugging; use adjustable wrench to loosen gas unions—wrap threads with gas-rated sealant before reassembly.
- Remove old valve: Unscrew mounting bracket bolts (usually two 1/4" hex head screws), gently twist valve counterclockwise to break seal, and lift straight out—avoid bending thermocouple tube.
- Install new valve: Slide thermocouple into correct port (marked "TP"), align gas inlet with supply line, tighten mounting screws to 18 in-lbs (use torque screwdriver), then reconnect labeled wires precisely.
When to Call a Pro
Stop immediately and call a licensed plumber or HVAC technician if any of these apply:
- You smell rotten eggs (mercaptan) near the heater—even faintly—after turning off gas
- The gas line uses black iron pipe with soldered joints (not flexible CSST or flare fittings)
- Your unit is under 1-year-old warranty—DIY voids coverage on most Rheem, Bradford White, or AO Smith models
- You measure less than 22V AC at the valve terminals—points to transformer or circuit board failure, not valve
- You’re using propane (LP) and don’t have the correct LP-rated valve conversion kit installed
Prevention Tips
Extend gas valve life with routine care:
- Clean the pilot orifice and burner ports annually with a wire brush and compressed air—mineral deposits accelerate solenoid wear
- Test thermocouple voltage every 6 months; replace if output drops below 22 mV
- Install a whole-house water softener if hardness exceeds 7 gpg—the U.S. EPA estimates hard water cuts valve lifespan by up to 40%
- Ensure proper ventilation—restricted airflow causes overheating and premature electronic component failure
Can I bypass the gas control valve to get hot water temporarily?
No—bypassing disables critical safety functions like flame sensing, overtemperature shutoff, and pilot verification. Doing so violates NFPA 54 and voids insurance coverage. According to the Insurance Institute for Business & Home Safety's 2023 report, 68% of water heater-related home fires involved unauthorized modifications to gas controls.
Why does my new valve click constantly but never ignite?
This usually means insufficient thermocouple output (under 25 mV) or reversed TH/TP wiring. Double-check polarity and test millivolts with a multimeter while holding the reset button—low voltage prevents the main gas valve from opening.
Is it safe to replace just the thermocouple instead of the whole valve?
Yes—if diagnostics confirm only the thermocouple is weak (20–24 mV) and the valve clicks reliably during reset. But if clicking is erratic or absent, the internal solenoid or circuit board is likely failed. Thermocouples cost $8–$15; replacing just that part saves money when appropriate.
How long do gas control valves typically last?
OEM valves average 8–12 years with proper maintenance. Units in high-humidity areas (like garages or basements) or those exposed to chlorine vapors (near laundry rooms) often fail earlier—
"We see 30% more premature valve failures in homes with unvented dryers or bleach-heavy laundry routines," says Master Plumber Carlos Mendez, RLA-certified inspector since 2009.
Do I need to relight the pilot after installing a new valve?
Yes—and carefully. Follow the manufacturer’s sequence: press and hold reset for 60 seconds while lighting pilot with match or igniter, then wait 2 minutes before releasing. If it won’t stay lit, check for drafts, clogged orifice, or thermocouple positioning—see our full pilot troubleshooting guide.
What’s the difference between a gas control valve and a gas regulator?
The regulator (usually upstream, near gas meter) maintains consistent inlet pressure (typically 7" WC for natural gas). The control valve sits on the heater and manages pilot ignition, temperature setpoint, and main gas flow. Replacing one doesn’t fix issues caused by the other—test both separately.
A noisy, failing gas control valve is rarely a slow-developing issue—it escalates fast. Catch it early with voltage checks and visual inspection, replace with OEM parts, and seal every joint properly. Most homeowners complete this repair in under 90 minutes—but when gas is involved, patience and precision beat speed every time.