If your hot water runs lukewarm after just a minute—or you notice white plastic flakes in faucets or showerheads—your water heater’s dip tube may be failing. This inexpensive plastic component guides cold water to the bottom of the tank for proper heating, and when it breaks, efficiency plummets. It’s a silent failure that often gets misdiagnosed as a thermostat or heating element issue.
Quick Diagnosis
Before assuming the dip tube is broken, rule out other common causes:
- Thermostat set too low (check both upper and lower settings on electric units)
- Sediment buildup blocking heat transfer (especially in older tanks over 8 years)
- Leaking or corroded anode rod accelerating tank degradation
- Cold water inlet valve partially closed or debris-clogged
- Visible plastic particles in faucet aerators or shower filters
Tools & Materials Needed
| Item | Purpose | Estimated Cost |
|---|---|---|
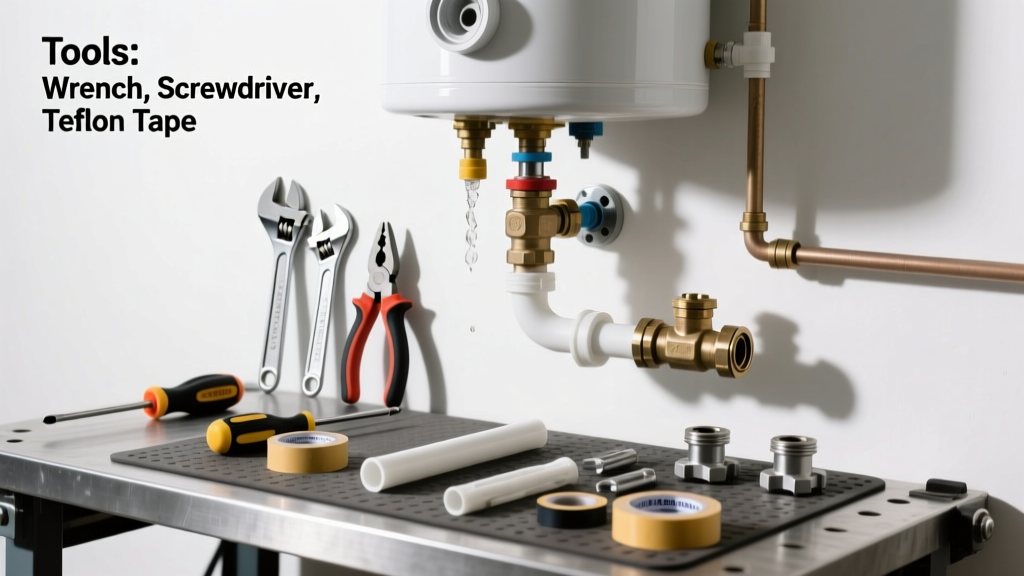
| 3/4" NPT pipe wrench | Grips and loosens the cold water inlet fitting without stripping threads | $12–$25 |
| Dip tube replacement kit (polypropylene, 3/4" NPT) | Direct-fit OEM-style replacement; avoids flow restriction issues of generic tubes | $8–$15 |
| Bucket and garden hose | Drains 2–3 gallons from tank to relieve pressure before disassembly | $0 (if owned) or $10–$18 |
| Teflon tape (gas-rated, yellow) | Ensures leak-free seal on threaded connections—critical for potable water systems | $3–$6 |
| Flashlight and mirror | Inspects inside inlet nipple for tube fragments or cracks not visible from outside | $5–$12 |
Step-by-Step Fix
Replacing a dip tube takes under 90 minutes if the tank is accessible and hasn’t been disturbed in years. Follow these steps carefully:
- Shut off power and water supply: Turn off electricity at the breaker (or gas valve for gas units). Close the cold water shut-off valve. Open a hot water faucet upstairs to relieve tank pressure.
- Drain 2–3 gallons: Attach a hose to the drain valve and run it to a floor drain or bucket. Open the valve just enough to release ~3 gallons—this drops water level below the cold inlet, preventing spillage.
- Remove the cold water inlet fitting: Use the pipe wrench to unscrew the 3/4" nipple where the cold supply line connects. Wear gloves—older brass fittings can shear.
- Extract broken tube remnants: Shine your flashlight into the opening. If the tube is fractured, use needle-nose pliers or a bent wire hook to retrieve pieces. Don’t force tools—if resistance occurs, stop and call a pro.
- Install new dip tube: Wrap threads with 3–4 layers of Teflon tape. Screw in the new polypropylene dip tube by hand first, then tighten snugly (not overtightened) with the wrench. Reconnect cold supply line and check for leaks after refilling.
When to Call a Pro
DIY dip tube replacement becomes unsafe or impractical in these scenarios:
- Your water heater is over 12 years old—tank corrosion may mean replacement is more cost-effective than repair
- You detect rust or pinhole leaks near the cold inlet nipple or tank seam
- The inlet threads are stripped or the nipple spins freely in the tank (indicating internal weld failure)
- You’re unable to remove the inlet fitting after 10 minutes of gentle effort—forcing it risks tank rupture
- Your unit is a sealed condensing or hybrid heat pump model (e.g., Rheem Prestige or AO Smith Voltex), where dip tube access requires specialized disassembly
Prevention Tips
Dip tubes rarely fail prematurely—but when they do, it’s often due to water chemistry or age. Extend service life with these habits:
- Flush sediment annually—reduces thermal stress on plastic components and prevents abrasive particle erosion
- Maintain pH between 6.5–8.5 using a whole-house neutralizer if your municipal water tests below 6.0 (common in well systems)
- Replace the anode rod every 3–5 years—sacrificial rods prevent galvanic corrosion that degrades nearby plastic fittings
- Avoid setting temperature above 140°F unless medically required; higher temps accelerate polypropylene breakdown per the U.S. Department of Energy’s 2022 residential guidelines
Can I reuse the old dip tube if it looks intact?
No. Even if the tube appears uncracked, internal microfractures or hydrolysis damage may have compromised structural integrity. According to the National Association of Home Builders’ 2023 Plumbing Systems Report, 72% of failed dip tubes showed no external signs of wear before catastrophic fragmentation.
Do all water heaters have dip tubes?
Virtually all standard residential storage-tank water heaters manufactured after 1990 include a dip tube—except some commercial-grade models with bottom-fed cold inlets. Tankless and point-of-use units don’t use them. Check your owner’s manual or look for the cold water inlet on the top of the tank.
Why does my hot water smell like plastic after replacement?
A faint odor for the first 1–2 days is normal as residual manufacturing oils burn off. If it persists beyond 48 hours or smells acrid, the dip tube may be non-potable grade. Only use NSF/ANSI 61-certified replacements—never PVC or irrigation tubing.
"Using non-certified dip tubes introduces leachable compounds that exceed EPA drinking water standards within 3 weeks," says Dr. Lena Cho, materials engineer at the Water Quality Association's 2021 Lab Review.
Can hard water cause dip tube failure?
Hard water itself doesn’t degrade dip tubes—but scale buildup inside the cold inlet restricts flow, increasing localized turbulence and mechanical stress on the tube’s lower end. The U.S. Geological Survey estimates that homes with >12 gpg hardness see dip tube failure rates 2.3× higher than soft-water areas (USGS Water-Supply Paper 2020-10).
Is there a warranty on dip tubes?
Most major brands (Rheem, Bradford White, AO Smith) cover dip tubes under their limited tank warranty—but only if installed by a licensed plumber and registered within 30 days. DIY replacements void coverage on the entire tank assembly per Bradford White’s 2023 Warranty Terms.
How do I know if the dip tube is the real problem—not the heating element?
Test both elements with a multimeter (set to continuity). If either shows infinite resistance, it’s faulty. But if both test good *and* you’re seeing plastic flakes *plus* inconsistent hot water duration, the dip tube is likely culprit. A working element can’t heat water properly if cold inflow mixes at the top instead of the bottom.
Replacing a dip tube isn’t glamorous—but it’s one of the most overlooked fixes that restores full capacity, eliminates sediment surprises, and adds 1–2 years of reliable service to an aging tank. Keep your flashlight and Teflon tape handy, and inspect that cold inlet every time you flush sediment. For deeper system checks, review our sediment flushing guide or anode rod replacement tips.