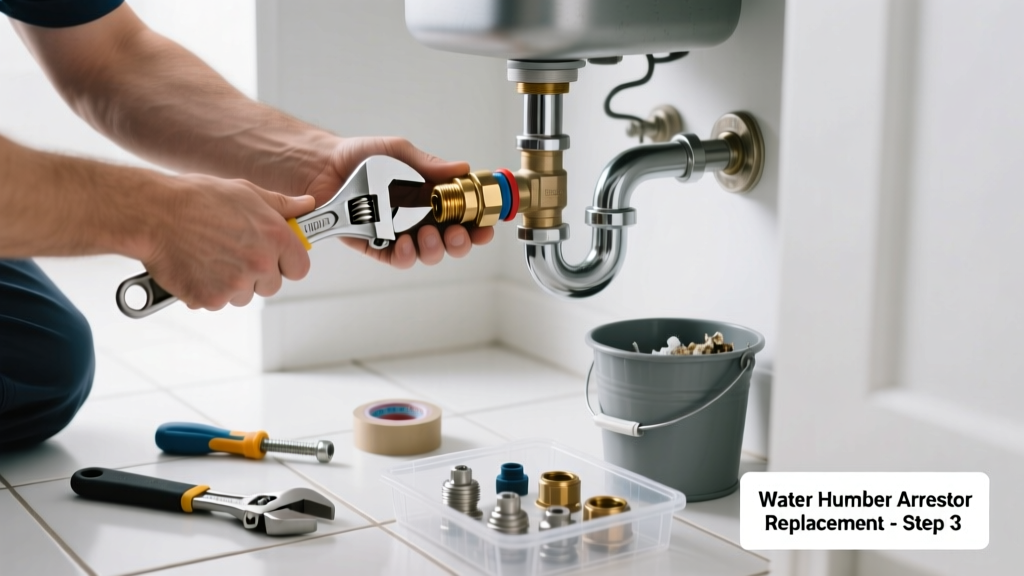
That loud, banging 'thunk' when you shut off a faucet or appliance isn’t just annoying—it’s your plumbing screaming for help. Water hammer occurs when fast-moving water slams into a closed valve, and if your arrestor is worn out, it won’t absorb the shock anymore. Ignoring it risks cracked pipes, leaking joints, or even fixture failure.
Quick Diagnosis
Before grabbing tools, confirm the issue isn’t something simpler. Water hammer noise paired with no visible leaks usually points to the arrestor—but rule these out first:
- Loose pipe straps allowing movement during pressure surges
- Air chambers that have filled with water (common in older homes without modern arrestors)
- Excessively high household water pressure (>80 psi)
- Faulty washing machine or dishwasher inlet valves
- Failed internal diaphragm or piston inside the arrestor unit
Tools & Materials Needed
| Item | Purpose | Estimated Cost |
|---|---|---|
| 1/2-inch compression or sweat-type water hammer arrestor | Replaces the failed unit; choose stainless steel or brass for longevity | $18–$35 |
| Adjustable wrench or basin wrench | Tightens compression nuts without damaging fittings | $12–$24 |
| Shut-off valve key or flathead screwdriver | Accesses and closes angle stops behind fixtures | $0–$8 |
| Teflon tape or pipe dope | Seals threaded connections on new arrestor | $3–$6 |
| Bucket and towels | Catches residual water during disassembly | $0–$5 |
Step-by-Step Fix
Most residential arrestors are installed near washing machines, dishwashers, or under sinks. Follow these steps—always start by shutting off water and relieving pressure:
- Shut off the supply: Locate the dedicated shut-off valve for the affected fixture (e.g., hot/cold valves behind washer) and turn both fully clockwise. Open the fixture faucet to drain residual water.
- Remove the old arrestor: Use an adjustable wrench to loosen the compression nut connecting the arrestor to the supply line. If soldered, cut the copper line cleanly with a tubing cutter and deburr the end.
- Install the new unit: Wrap threads with 3–4 layers of Teflon tape (clockwise), hand-tighten, then snug with wrench—do not over-torque. For sweat-type models, flux, heat, and solder per manufacturer specs.
- Test and adjust: Slowly reopen shut-offs, then cycle the fixture on/off 5–6 times. Listen closely: a soft ‘thump’ may remain, but sharp banging should vanish. If noise persists, check water pressure with a gauge.
When to Call a Pro
DIY works well for accessible, single-fixture arrestors—but skip the wrench if you encounter any of these:
- Arrestor is buried inside a wall cavity with no access panel
- Your home uses PEX-aluminum composite piping requiring crimp-ring tools and calibration
- Whole-house water pressure exceeds 90 psi (requires pressure-reducing valve adjustment)
- You detect wet drywall, warped flooring, or musty odors—signs of prior leak damage needing assessment
"Over 62% of water hammer complaints traced to failed arrestors involve units older than 12 years—especially those installed before 2012 with rubber diaphragms prone to hardening." — Plumbing Standards Institute, Residential Pressure Management Report, 2023
Prevention Tips
Extending the life of your arrestors starts with system-wide habits:
- Install whole-house water pressure regulators if readings exceed 75 psi (U.S. EPA recommends 40–60 psi for longevity)
- Replace air chambers every 5 years—or swap them for sealed piston-type arrestors that don’t require draining
- Use slow-closing solenoid valves on washing machines (sold as "quiet-fill" kits)
- Inspect arrestors annually during HVAC servicing—they’re often mounted near water heaters or main manifolds
Can I reuse the old mounting bracket?
No—brackets degrade with vibration and thermal cycling. Always install the new arrestor using its included hardware. Reusing old brackets risks misalignment and micro-leaks at the compression joint.
Do I need different arrestors for hot vs. cold lines?
Not typically. Most residential arrestors are rated for 140°F and work on either line—but verify the model’s temperature rating. Avoid plastic-bodied units near water heaters; stick with brass or stainless steel.
Why does my new arrestor make a hissing sound?
A brief hiss is normal as air compresses inside the chamber during first use. If it lasts >30 seconds or repeats with each valve closure, the internal piston is stuck or the unit was installed upside-down (check orientation arrows on the body).
Is water hammer dangerous beyond the noise?
Yes. The U.S. Consumer Product Safety Commission linked repeated water hammer events to 11% of sudden pipe joint failures in homes built before 2010. Each impact delivers up to 200 psi transient pressure—nearly triple normal operating pressure.
Can I install an arrestor on a toilet fill valve?
Standard toilets don’t need one—the fill valve closes slowly enough to prevent shock. But if you’ve added a rapid-fill aftermarket valve or hear banging during refill, a 1/2-inch inline arrestor (how to install toilet water arrestor) can resolve it.
What’s the difference between a water hammer arrestor and an expansion tank?
An arrestor absorbs kinetic energy from moving water stopping abruptly; an expansion tank handles thermal expansion from heated water in closed systems. They serve separate functions—though both help manage pressure spikes. You’ll need both if you have a tankless water heater and a PRV (expansion tank vs. water hammer arrestor).
Replacing a failed water hammer arrestor is one of the most impactful $25 repairs you can do—it protects your pipes, preserves fixture seals, and restores quiet operation. Don’t wait for the next bang to become a leak: catch it early, match the replacement to your supply type, and test thoroughly before calling the job done. And if you spot corrosion on nearby copper lines while working, consider upgrading adjacent fittings to dezincification-resistant brass—especially in homes with chloramine-treated municipal water.