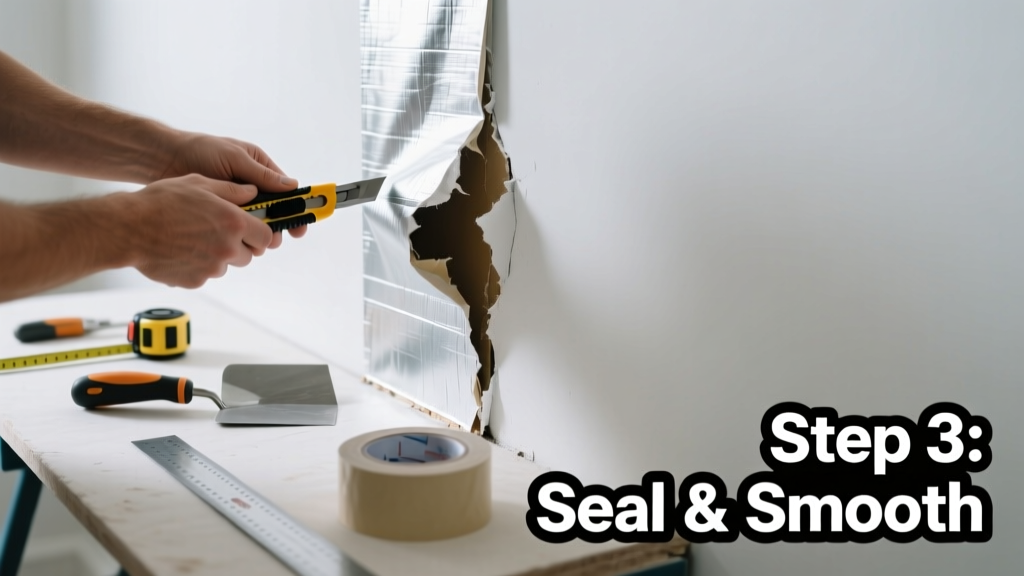
A torn vapor barrier behind drywall isn’t just an invisible flaw—it’s a silent invitation for moisture to condense inside your wall cavity, fueling mold growth and degrading insulation performance. If you’ve spotted damp spots, peeling paint, or musty odors near exterior walls, the vapor barrier may be compromised. Don’t wait until winter brings frost in the stud bay or summer brings visible mold—this fix is urgent but manageable.
Quick Diagnosis
Before grabbing tape and scissors, confirm the issue isn’t misdiagnosed. A vapor barrier isn’t always required—and when used incorrectly, it can cause more harm than good. Here are the most common root causes of failure:
- Vapor barrier installed on the wrong side (e.g., interior-side in cold climates only; reversed in hot-humid zones)
- Physical damage from electrical drilling, plumbing rough-ins, or insulation installation
- Poor seams: gaps >1/8" or unsealed overlaps at studs or top/bottom plates
- Perforations from staples driven too deep or nails used instead of cap-staples
- Delamination due to prolonged high humidity (>70% RH) or direct contact with wet insulation
Tools & Materials Needed
| Item | Purpose | Estimated Cost |
|---|---|---|
| 6-mil polyethylene sheeting (or ASTM E1745 Class A) | Replacement material meeting code for vapor retarders in your climate zone | $0.15–$0.30/sq ft |
| Acrylic-latex caulk (ASTM C920, Type S) | Seals seams and edges without off-gassing or shrinking | $4–$8/tube |
| Cap stapler + 3/8" crown staples | Secures barrier without puncturing; avoids staple-line leaks | $45–$85 (rental available) |
| Utility knife + fresh blades | Clean cuts around damaged area; prevents fraying | $3–$12 |
| Moisture meter (pin-type, 0–100% scale) | Verifies current wall cavity moisture before and after repair | $60–$140 |
Step-by-Step Fix
Repair depends on tear size, location, and wall assembly. Use these methods in order of severity:
- Small puncture (<1"): Clean area with isopropyl alcohol, apply ASTM D4348-compliant butyl tape (e.g., 3M 8067) over both sides of hole, then seal perimeter with acrylic-latex caulk.
- Linear tear (1–12"): Cut out damaged section in a rectangle extending 2" beyond tear on all sides. Overlap new 6-mil poly by 4" on each side, fold corners neatly, and seal all edges with caulk + cap-staple every 6".
- Large gap or missing section (>1 sq ft): Remove baseboard or trim, cut drywall opening (minimum 16" wide between studs), replace full barrier segment from bottom plate to top plate, and integrate with existing barrier using 6" lap + continuous caulk bead.
When to Call a Pro
Some vapor barrier failures signal deeper structural or environmental issues that exceed safe DIY scope:
- Multiple tears across adjacent walls—suggests chronic condensation or HVAC imbalance
- Mold growth >10 sq ft behind drywall (EPA recommends professional remediation above this threshold)
- Wall cavity moisture readings >20% MC (measured with pin meter) indicating active water intrusion—not just vapor diffusion
- Installation in a vented rainscreen wall or double-stud assembly where vapor control strategy differs fundamentally
According to the Insurance Institute for Business & Home Safety's 2023 report, improperly repaired vapor barriers contribute to 31% of premature wall sheathing failures in mixed-humid climates.
Prevention Tips
Long-term reliability starts with smart habits during construction and renovation:
- Always install vapor barriers after rough-in inspections—never before wiring or plumbing is finalized
- Use only cap staplers or adhesive (e.g., Tremco Acoustical Sealant) — never nails or standard staples
- Label barrier orientation (“Warm Side” or “Interior Side”) with permanent marker at top plate before drywall
- Install a smart hygrometer in the room (like the ThermoPro TP50) and maintain indoor RH between 30–50% year-round
Can I use duct tape to patch a vapor barrier?
No. Standard duct tape fails under temperature swings and humidity, loses adhesion within 6–12 months, and doesn’t meet ASTM E1745 vapor retarder standards. Use only tapes rated for vapor barrier repair—like SikaFlex Tape or 3M 8067—butyl rubber tape.
Does my climate zone determine if I even need a vapor barrier?
Yes. According to the 2021 International Residential Code (IRC R702.7), vapor retarders are required only in Climate Zones 5–8 (cold and very cold). In Zones 1–3 (hot-humid), interior vapor barriers can trap moisture and cause rot. Always consult your local building department or climate zone vapor barrier rules before installing or repairing.
How do I know if the tear caused mold behind the drywall?
Look for discoloration on drywall surfaces, musty smells near outlets or baseboards, or soft spots when gently pressing the wall. Drill a 1/8" inspection hole near the tear and insert a borescope—or use a thermal camera like the FLIR C5 to detect temperature anomalies. If you see black, green, or fuzzy growth, stop work and call a certified mold assessor per IICRC S520-2020 standards.
Can I add a vapor barrier over existing drywall?
Not safely. Adding a second vapor barrier creates a sandwich that traps moisture between layers. Instead, consider interior permeable insulation upgrades like mineral wool boards (mineral wool insulation wall repair) or smart vapor retarders (e.g., MemBrain) that adjust permeance with humidity.
What’s the difference between a vapor barrier and an air barrier?
A vapor barrier restricts moisture diffusion (measured in perms); a true air barrier stops bulk airflow (requiring continuous sealing at joints, windows, and penetrations). Many builders confuse them. The U.S. EPA estimates that 14% of household water usage is from leaks—but air leakage accounts for up to 30% of heating/cooling loss. For best results, seal air leaks first, then address vapor control per climate.
How long does a properly repaired vapor barrier last?
When installed per ASTM E1745 Class A specs and protected from UV and mechanical damage, a 6-mil poly vapor barrier lasts 25–40 years. But its effectiveness hinges on seam integrity—not just material age. Reinspect seams every 5 years using a smoke pencil test at outlets and switch boxes to verify air tightness.
A properly repaired vapor barrier restores not just physics—but peace of mind. You’ll notice drier walls, steadier indoor humidity, and lower utility bills within weeks. And if you catch future tears early—say, during a seasonal HVAC tune-up—you’ll avoid the cascade of problems that start with one small rip and end in costly reconstruction. Keep your moisture meter handy, document repairs with photos, and remember: in wall assemblies, what’s hidden matters as much as what’s seen.