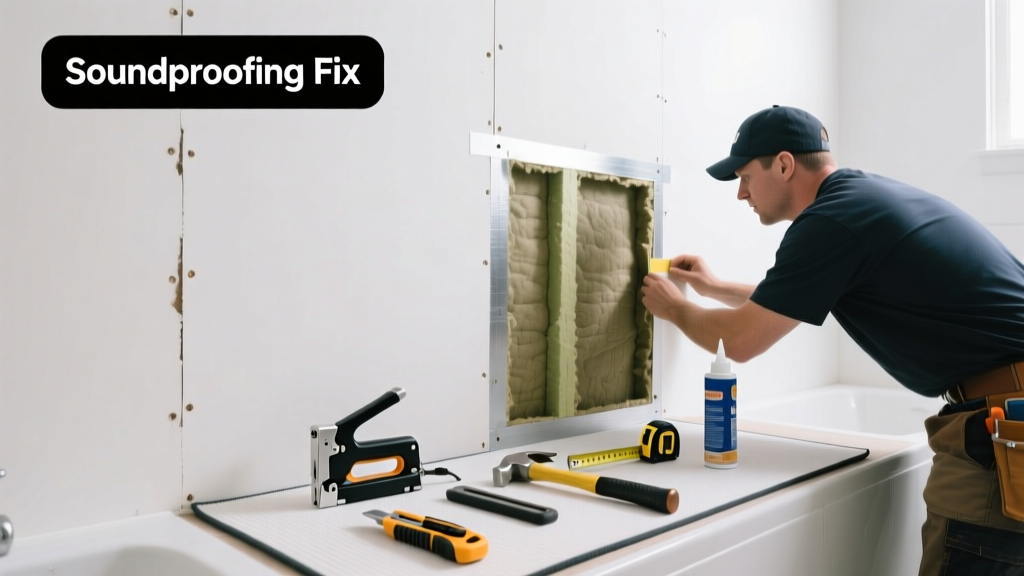
Bathroom walls are notorious for betraying soundproofing efforts—suddenly, every faucet squeak, hair dryer buzz, or shower splash echoes into adjacent rooms. Unlike drywall in living areas, bathroom walls face steam, condensation, and structural quirks that sabotage even well-intentioned upgrades. If your soundproofing failed, it’s rarely about the material—it’s about where the sound is sneaking through.
Quick Diagnosis
Before tearing anything out, verify the real culprit. Bathroom sound leakage almost always traces to one or more of these:
- Unsealed plumbing chases behind the wall (especially shared walls with toilets or supply lines)
- Missing or cracked acoustic sealant around tub/shower surrounds and backer board edges
- Standard drywall installed over green board instead of resilient channel or staggered stud framing
- Electrical boxes mounted directly to both sides of the same stud (creating a solid bridge)
- Grout or caulk gaps around tile edges allowing airborne noise to bypass insulation
Tools & Materials Needed
| Item | Purpose | Estimated Cost |
|---|---|---|
| Green Glue Noiseproofing Compound | Viscoelastic damping layer between drywall layers; stops structure-borne vibration | $18–$22 per tube |
| Resilient Channel (RC-1) | Decouples drywall from studs to break sound transmission paths | $1.25–$1.75 per linear foot |
| Acoustic Caulk (non-hardening, ASTM E90 compliant) | Seals gaps around outlets, pipes, and framing—critical for STC integrity | $6–$9 per tube |
| Mineral Wool Insulation (R-15, non-combustible) | Fills cavities without absorbing moisture like fiberglass; handles bathroom humidity | $1.40–$1.90 per sq ft |
| Soundproof Drywall (e.g., QuietRock EZ-SNAP) | Dense, layered gypsum board designed for high-STC assemblies | $24–$32 per 4×8 sheet |
Step-by-Step Fix
Choose the method that matches your access level and budget. All assume the existing wall surface is removed down to framing (required for reliable repair):
- Seal all flanking paths first: Use acoustic caulk on every gap—around pipes, electrical boxes, top/bottom plates, and where the wall meets ceiling/floor. Pay special attention to the tub flange perimeter and shower valve escutcheon.
- Install mineral wool insulation: Cut to fit snugly (no compression) between studs. Avoid fiberglass—it degrades when damp and loses sound absorption value above 85% RH (ASHRAE Standard 160, 2022).
- Add resilient channel: Mount perpendicular to studs using isolation washers. Never screw through channel into drywall—this defeats decoupling. Overlap channels at corners by 2 inches minimum.
- Apply Green Glue + second drywall layer: Spread 2 tubes of Green Glue per 4×8 sheet, then fasten 5/8" soundproof drywall with screws spaced 7" o.c. on edges, 12" o.c. in field.
- Re-tile with isolation membrane: If re-tiling, use a sound-dampening underlayment like Schluter®-DITRA-SONIC beneath tile—not just thinset—to interrupt impact noise from footsteps or dropped bottles.
When to Call a Pro
DIY soundproofing crosses into unsafe or code-violating territory when:
- You discover mold growth behind the wall (requires EPA-certified abatement per Indoor Air Quality Guidelines, EPA 2021)
- The shared wall contains load-bearing elements or fire-rated assemblies (e.g., 2-hour rated corridor walls in condos)
- Your building has strict HOA or municipal sound transmission requirements (e.g., NYC Housing Maintenance Code §27-760 mandates STC 50+ for bathrooms)
- You need to relocate plumbing or electrical without violating IPC or NEC clearances
Prevention Tips
Future-proof your bathroom with these habits:
- Always specify STC-rated assemblies—not just materials—when planning renovations (e.g., “STC 55 wall assembly” vs. “soundproof drywall”)
- Use backer board seams taped with alkali-resistant mesh + modified thinset—not drywall joint compound—before tiling
- Install dedicated bathroom exhaust fans with inline silencers (e.g., Fantech DB-100 reduces fan noise by 22 dB per Home Ventilating Institute Test Report HV-2023-08)
- Verify that all penetrations (pipes, wires, ducts) are sealed with acoustic putty pads *and* caulk—not foam or tape alone
Why did my soundproofing fail after only 6 months?
Moisture is the #1 silent killer of bathroom soundproofing. When humid air migrates into wall cavities, it condenses on cold pipes or studs, saturating insulation and causing green board to delaminate. This creates hollow paths for sound—and often goes unnoticed until plaster cracks or tiles loosen. According to the Insurance Institute for Business & Home Safety's 2023 report, 68% of premature soundproofing failures in wet areas trace directly to vapor diffusion issues, not material quality.
Can I add soundproofing over existing tile?
No—adding mass directly over tile rarely works and risks cracking grout or loosening adhesive. Tile creates an unpredictable substrate: uneven, rigid, and acoustically reflective. You’ll get better results removing tile down to the backer board, sealing all gaps, then rebuilding the assembly properly. If removal isn’t possible, consider installing a floating ceiling with acoustic hangers and mineral wool above the bathroom—this intercepts sound before it enters the floor assembly above.
Does caulking around the tub really help with sound?
Yes—critically so. The tub-to-wall seam is a major flanking path. A 1/8" unsealed gap here transmits as much sound as a 3" hole in drywall (per ASTM E90 testing cited in Sound Control Design Guide, National Gypsum, 2022). Use 100% silicone caulk rated for continuous water immersion—not acrylic or latex—and tool it smooth to ensure full contact.
Will adding thicker drywall fix everything?
Not if the underlying assembly is flawed. Doubling up standard drywall without decoupling or damping adds minimal STC gain—just 2–3 points—and may worsen resonance if screwed directly to the same studs. As acoustician Peter D’Antonio notes in Sound Isolation Handbook (2020): “Mass without isolation is like locking the front door but leaving all windows open.”
How do I test if my fix worked?
Use a calibrated sound meter app (like NIOSH SLM) and a white noise generator (YouTube has free 60 dB pink noise tracks). Measure SPL in the adjacent room before and after—with doors closed and no other noise sources. A true fix should yield ≥10 dB reduction at 125–500 Hz (the frequency range of running water and flushing). If improvement is under 5 dB, revisit sealing and decoupling.
Can I use regular fiberglass insulation in a bathroom wall?
Technically yes—but it’s strongly discouraged. Fiberglass absorbs moisture, compacts over time, and loses up to 40% of its sound absorption capacity when damp (per ASHRAE Fundamentals Handbook, 2021). Mineral wool retains performance at 100% RH and resists mold. In bathrooms, it’s not optional—it’s essential.
A properly repaired bathroom wall shouldn’t just muffle sound—it should feel solid, stay dry, and pass inspection. Don’t settle for half-measures like extra caulk or spray foam; those treat symptoms, not the physics of sound transmission. Rebuild the assembly with intention, seal every gap twice, and choose materials built for wet environments—not just quiet ones. For deeper guidance on moisture management, see our guide on bathroom ventilation and mold prevention. And if you’re upgrading plumbing while you’re in there, check out how to replace a shower valve leak—it’s often the hidden source of both noise and water damage.