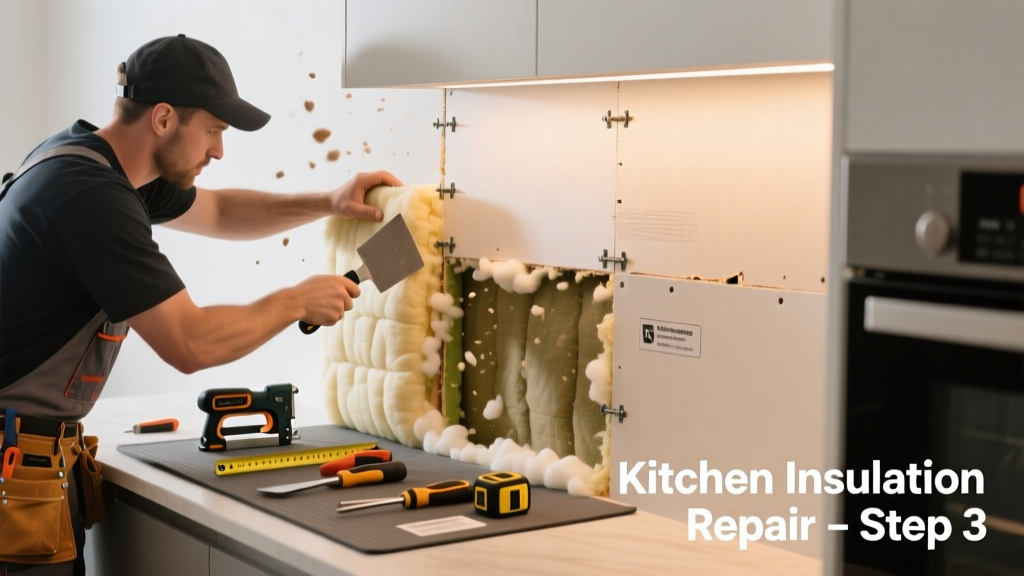
If you’ve noticed cold spots near cabinets, drafts around outlets, or higher winter energy bills—especially near your kitchen’s exterior walls—you may be dealing with settled insulation. Unlike attic or basement insulation, kitchen wall insulation is tricky: it’s hidden behind drywall, often near plumbing, electrical, and cabinetry, and subject to temperature swings that accelerate settling. Ignoring it wastes energy and invites moisture problems.
Quick Diagnosis
Settling happens when loose-fill or fiberglass batts compress or shift downward over time—leaving gaps at the top of wall cavities. In kitchens, this is especially common near:
- Exterior walls adjacent to refrigerators or dishwashers (heat cycling stresses insulation)
- Walls with recessed can lights or poorly sealed electrical boxes
- Areas where cabinets were mounted directly to studs without backing plates
- Walls built with older, non-dense-packed cellulose (pre-2010 installations)
Tools & Materials Needed
| Item | Purpose | Estimated Cost |
|---|---|---|
| Fiberglass batts (R-13, 15" wide) | Replacement for compressed or missing sections; fits standard 2x4 stud bays | $12–$18 |
| Blower machine + dense-pack cellulose | For retrofitting without removing drywall; requires professional-grade equipment | Rent: $75–$120/day |
| Stud finder with AC detection | Locates wires and pipes before drilling—critical near kitchen outlets and sinks | $25–$60 |
| Insulation support netting (e.g., InsulWeb) | Holds new insulation in place during installation; prevents future sagging | $18–$24/roll |
| Fire-rated caulk (e.g., DAP Firestop) | Seals gaps around outlets and penetrations per NEC 300.21 | $8–$12/tube |
Step-by-Step Fix
Choose one method based on access, budget, and wall condition:
- Small-gap top-of-cavity fix: Cut a 4"×6" access hole just above the top plate (use a drywall saw), vacuum out debris, then insert precut R-13 batts held in place with InsulWeb stapled across the cavity opening. Seal edges with fire-rated caulk.
- Dense-pack retrofit: Drill 2.5" holes every 16" along the top plate (avoiding wiring), blow in 3.5 lb/ft³ cellulose until cavity is full and pressure-stable. Patch holes with drywall plugs and joint compound.
- Cabinet-adjacent cavity repair: Remove base cabinet toe-kick panel, drill upward into the wall cavity from below, and inject expanding foam *only* in small, controlled bursts—never fill more than 1/3 cavity depth to avoid bowing drywall.
When to Call a Pro
DIY isn’t safe or effective in these cases:
- You detect mold, water stains, or musty odors behind the wall—this signals chronic moisture intrusion requiring structural assessment
- The wall contains knob-and-tube wiring or ungrounded circuits (common in homes built before 1950)
- You’re dealing with stucco, brick veneer, or EIFS cladding—drilling risks water infiltration and voids warranties
- Your kitchen shares a wall with a garage or utility room where combustion air or radon pathways exist
"In kitchens, insulation gaps near refrigeration units increase condensation risk by up to 40%—and that moisture can degrade drywall paper and promote mold within 72 hours." — Building Science Corporation, Moisture Management Guide for Residential Kitchens, 2022
Prevention Tips
Stop future settling before it starts:
- Install insulation support netting behind all new batts—even in interior walls—to reduce long-term compression
- Use dense-packed cellulose instead of fiberglass in exterior kitchen walls; its 3.5 lb/ft³ density resists settling better than standard R-13 fiberglass (which settles up to 25% over 10 years per DOE 2021 data)
- Seal all electrical box penetrations with fire-rated caulk—not duct tape or spray foam alone
- Avoid mounting heavy cabinets directly to single studs; use backer boards or ledger strips to distribute load
Can I use expanding foam to fill the entire cavity?
No. Full-cavity spray foam expands with high pressure and can warp drywall, crack tile backsplashes, or dislodge plumbing straps. It’s also difficult to remove if misapplied. Use only low-expansion, UL-listed foam (like Great Stuff Pro) in targeted, pea-sized bursts—and never exceed 1/3 cavity depth.
Will adding insulation lower my kitchen’s energy bill significantly?
Yes—if the wall is exterior and uninsulated or under-insulated. The U.S. Department of Energy estimates that properly insulated kitchen exterior walls reduce heating/cooling loads by 12–18%, especially in homes with slab-on-grade foundations where thermal bridging is severe.
Do I need to remove cabinets to fix this?
Not usually. Most repairs work from above (top plate access), below (toe-kick), or through small drilled holes. Only remove cabinets if you’re replacing entire wall sections or addressing rot behind them—like in cases where leaks from the sink have compromised framing.
Is cellulose insulation safe near kitchen electrical outlets?
Yes—when installed correctly. Dense-packed cellulose is treated with borate flame retardants and meets ASTM E84 Class A fire ratings. But always seal outlet boxes with fire-rated caulk first, as required by NEC 300.21. Never leave gaps between insulation and box edges.
How long does a proper repair last?
A dense-packed cellulose retrofit lasts 50+ years with minimal settling (less than 2% per decade, per the Cellulose Insulation Manufacturers Association, 2023). Fiberglass batts with netting support typically maintain R-value for 25–30 years—provided they’re not disturbed by vibration or moisture.
Can I insulate behind existing tile backsplash?
Only if you’re willing to remove and reinstall tile. Drilling through tile risks cracking, and injecting material behind it offers no reliable path for even distribution. For tile-covered walls, the safest approach is interior dense-pack through ceiling or floor access—or consider an exterior insulation upgrade like rigid mineral wool under new siding (exterior wall insulation options).
Settled insulation in the kitchen isn’t just an efficiency issue—it’s a clue that thermal, moisture, or air-sealing systems are degrading. Address it promptly with the right materials and methods, and pair the repair with simple habits like checking for gaps around outlets quarterly and tightening cabinet mounting screws annually. Over time, those small actions add up to consistent comfort, lower bills, and fewer surprises during home inspections. For related issues, see our guides on kitchen outlet drafts and cold spots on walls.