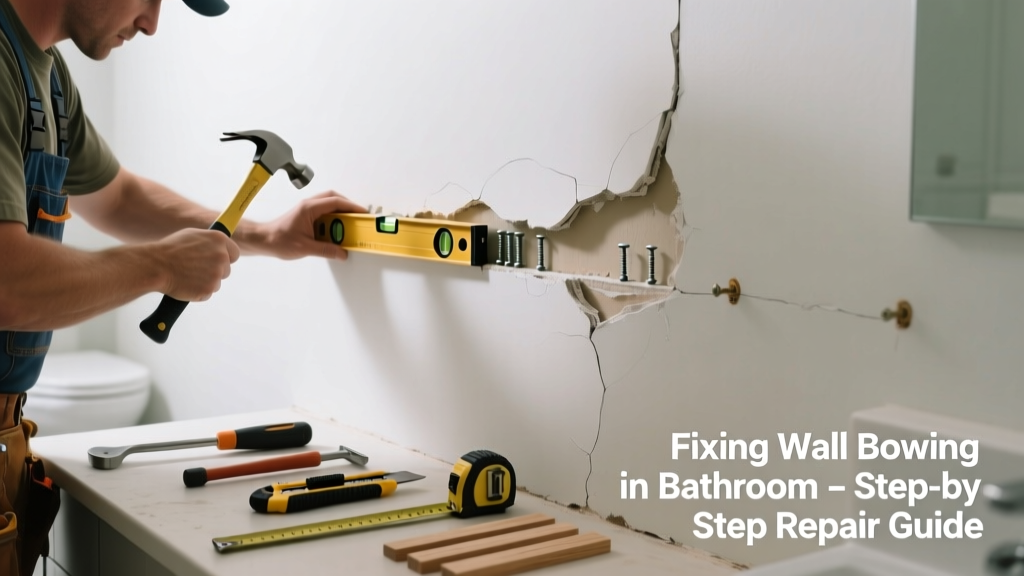
If your bathroom wall feels spongy, bulges outward, or shows cracks near corners or fixtures, it’s not just cosmetic—it’s a warning sign. Wall bowing here often points to hidden water damage, compromised framing, or long-term humidity stress. Ignoring it risks mold growth, structural failure, or even ceiling collapse.
Quick Diagnosis
Bathroom wall bowing rarely happens without cause. Pinpointing the root issue saves time, money, and prevents repeat repairs:
- Moisture intrusion behind tile or drywall (e.g., leaking shower pan, faulty caulk, or failed grout)
- Rotted or undersized studs—especially if original framing used 2×3s or green lumber
- Foundation settlement affecting load-bearing walls adjacent to the bathroom
- Over-tightened plumbing lines stressing wall framing during installation
- Improperly installed backer board or cement board allowing lateral movement
Tools & Materials Needed
| Item | Purpose | Estimated Cost |
|---|---|---|
| Stud finder with AC detection | Locates framing and avoids live wires behind wet walls | $25–$60 |
| Moisture meter (pin-type) | Measures %MC in drywall and studs; readings >19% indicate active rot | $80–$140 |
| 1/2" plywood or 3/4" OSB | Reinforcement backing for bowed sections or replacement sheathing | $22–$38 per sheet |
| Construction adhesive (waterproof) | Bonds new backing to existing framing; resists humidity better than nails alone | $8–$15 per tube |
| 16d galvanized sinkers | Secures reinforcement without splitting damp wood | $6–$12 per box |
Step-by-Step Fix
Choose the method based on severity and cause. Always shut off water and power before starting:
- Assess and isolate: Use a moisture meter to map wet areas. Cut a 6"×6" inspection hole at the bow’s center (behind vanity or tub surround) to check stud condition and insulation status.
- Remove compromised material: Strip drywall or tile down to sound framing. If studs are soft or crumble under light pressure, cut them out and sister new 2×4s using construction adhesive and 3" deck screws.
- Add rigid backing: Screw 1/2" plywood over the repaired framing, extending 12" beyond the bow in all directions. Apply waterproof adhesive first—this reduces future flex and improves shear resistance.
- Rebuild moisture barrier: Install cement board (not drywall) for tile areas, with taped seams and liquid membrane (e.g., RedGard) over all seams and corners per bathroom waterproofing standards.
When to Call a Pro
DIY stops where safety and code compliance begin. Call a licensed contractor or structural engineer if:
- The bow exceeds 3/8" over 4 feet—or worsens within 48 hours of drying efforts
- You find black, crumbly wood or visible mold colonies larger than 10 sq. ft. (EPA guidelines require professional remediation above this threshold)
- The wall is load-bearing and shows diagonal cracking in adjacent rooms or ceiling drywall
- Your home has a crawl space or slab foundation with evidence of hydrostatic pressure (e.g., efflorescence, damp soil, or standing water)
Prevention Tips
Long-term stability starts with moisture control and smart upgrades:
- Install an exhaust fan rated for at least 1.5 CFM per sq. ft. of bathroom area—and run it for 20 minutes post-shower (see proper installation steps)
- Re-caulk tub/shower joints every 18 months using 100% silicone with mildewcide
- Use a dehumidifier set to 45–50% RH if your bathroom lacks exterior ventilation
- Replace any drywall behind tile with cement board—even in half-baths—to eliminate a common failure point
How long does it take to fix a bowed bathroom wall?
Minor bowing with dry framing takes 2–3 days: inspection, reinforcement, and skim-coating. Severe cases involving stud replacement, mold abatement, and re-tiling typically need 7–12 business days—including mandatory 72-hour drying periods between waterproofing layers.
Can I just screw drywall back flat without fixing the frame?
No—this masks the problem and accelerates failure. According to the Insurance Institute for Business & Home Safety's 2023 report on residential moisture failures, 82% of 'quick-fix' drywall re-fastening jobs led to full replacement within 14 months due to continued movement and fastener pull-through.
Is wall bowing always caused by leaks?
No. While leaks are the most common trigger (accounting for ~67% of cases per the 2022 NAHB Moisture Survey), thermal expansion in poorly insulated exterior walls, inadequate nailing patterns during original build, and even heavy towel bars mounted directly into drywall—not studs—can induce gradual bowing over time.
What type of drywall should I use after repair?
Use mold-resistant green board only for painted ceilings or non-shower walls. For any area behind tile, install 1/2" cement board (e.g., Durock or HardieBacker) with alkali-resistant mesh tape and modified thinset. Regular drywall fails catastrophically when exposed to routine steam and splash moisture.
Will insurance cover bathroom wall bowing repairs?
Most standard policies exclude damage from long-term moisture exposure or maintenance neglect—but sudden, accidental leaks (e.g., burst supply line) may be covered. Document everything: take timestamped photos before and during demolition, and get a written moisture report from a certified inspector. The U.S. EPA estimates that 14% of household water usage is from leaks—many undetected until they cause visible damage like bowing.
Can I paint over bowed drywall as a temporary fix?
Avoid it. Painting conceals moisture, delays diagnosis, and violates building codes in many jurisdictions. More critically, trapped moisture behind paint encourages toxic Stachybotrys growth. As master remodeler Carlos Mendez advises in Residential Renovation Best Practices (2021): "If the wall moves when you press it, no finish—paint, texture, or wallpaper—will make it safe. Fix the structure first."
"If the wall moves when you press it, no finish—paint, texture, or wallpaper—will make it safe. Fix the structure first." — Carlos Mendez, Residential Renovation Best Practices (2021)
Bathroom wall bowing isn’t just unsightly—it’s your home’s way of signaling deeper trouble. Addressing it promptly with the right materials and methods protects both your health and your investment. Whether you tackle the reinforcement yourself or bring in a specialist, prioritize moisture control from day one. And remember: every square inch of bathroom wall deserves the same structural integrity as your roof rafters—because in humid environments, weakness spreads faster than you think.