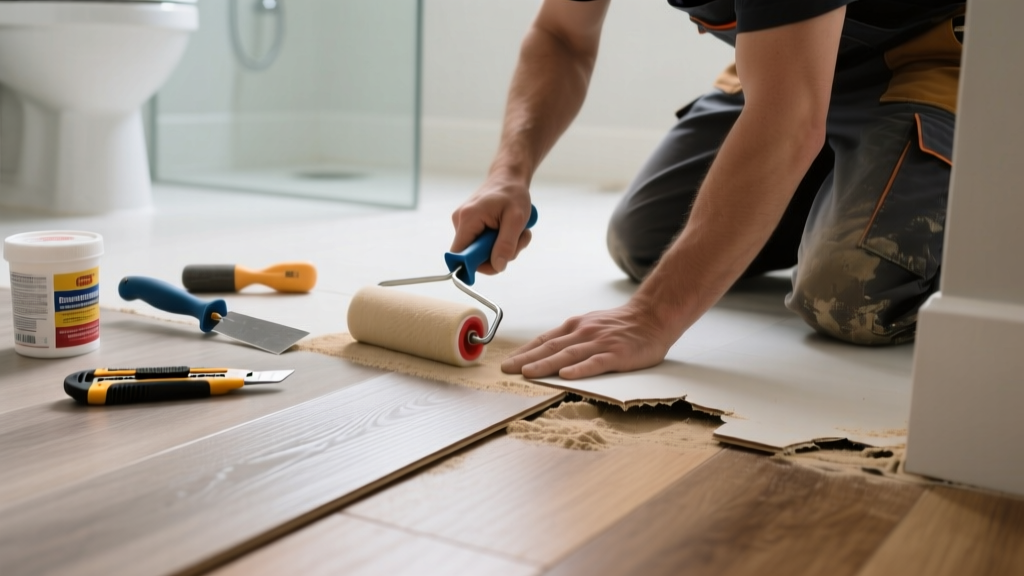
That jagged tear near your shower base isn’t just ugly—it’s a moisture trap waiting to rot subflooring underneath. Vinyl tears in bathrooms almost always point to underlying issues like water intrusion, poor adhesion, or incompatible underlayment—not just wear and tear.
Quick Diagnosis
Before grabbing glue or a patch kit, identify the root cause. Most bathroom vinyl tears stem from one (or more) of these:
- Moisture seeping under the floor from leaking fixtures or grout gaps
- Subfloor swelling due to chronic dampness (especially particleboard or OSB)
- Improper installation—no expansion gap, wrong adhesive, or vinyl laid over uneven surfaces
- Heavy foot traffic near tub/shower thresholds where flexing is constant
- Chemical damage from harsh cleaners (e.g., acetone-based removers or undiluted bleach)
Tools & Materials Needed
| Item | Purpose | Estimated Cost |
|---|---|---|
| Vinyl floor repair kit (with seam sealer & patch film) | Provides color-matched adhesive and flexible patch material designed for wet areas | $12–$24 |
| Utility knife with fresh blades | Clean, precise cuts without fraying edges—critical on thin luxury vinyl planks (LVP) | $5–$15 |
| Heat gun or hair dryer | Softens vinyl for repositioning; avoids brittle cracking during patching | $20–$60 |
| Isopropyl alcohol (91%) | Removes wax, oils, and old adhesive residue without degrading vinyl | $4–$8 |
| Weighted objects (e.g., books wrapped in towels) | Holds patch flat while adhesive cures—prevents bubbling in high-humidity zones | $0–$10 |
Step-by-Step Fix
Choose the method based on tear size and location. All steps assume you’ve confirmed the subfloor is dry and solid (test with a moisture meter—readings above 15% indicate replacement is needed).
- Small tear (<2 inches) with intact backing: Clean area with isopropyl alcohol. Apply seam sealer under both flaps, press together firmly, then weight for 24 hours.
- Medium tear (2–6 inches) with lifted edge: Trim frayed edges cleanly. Heat vinyl with heat gun until pliable (~120°F), stretch gently to close gap, then seal with seam sealer and weight.
- Large tear or missing section: Cut out damaged area with straight edges. Trace and cut matching patch from scrap vinyl (or use kit film). Apply vinyl-specific adhesive (e.g., Roberts 2057), press patch in place, roll with J-roller, and weight for 48 hours.
When to Call a Pro
DIY fails fast when structural or moisture problems hide beneath the surface. Call a licensed flooring contractor if:
- You detect spongy spots, musty odors, or visible mold under the tear
- The tear extends under baseboards or into adjacent rooms—indicating widespread subfloor failure
- Your home was built before 1980 and the vinyl may contain asbestos (never sand or scrape suspected material)
- You’re installing over concrete with no vapor barrier—this requires professional moisture mitigation
"Over 60% of premature vinyl floor failures in bathrooms trace back to undetected subfloor moisture—not poor product quality." — National Wood Flooring Association (NWFA) Installation Guidelines, 2022
Prevention Tips
Extend your repair’s lifespan by addressing what caused the tear in the first place:
- Install a bathroom exhaust fan rated for at least 1 CFM per square foot—and run it for 20 minutes after every shower
- Seal all perimeter gaps around tubs, showers, and toilets with 100% silicone caulk (not acrylic)
- Replace worn door sweeps on bathroom entry doors to limit steam migration
- Use only pH-neutral cleaners (like SafeChoice Neutral Cleaner)—avoid vinegar, ammonia, or abrasive powders
- Inspect under-sink supply lines and shutoff valves every 6 months for slow drips
Can I use bleach on this?
No. Bleach breaks down vinyl’s plasticizers, causing embrittlement and micro-cracking within weeks. Even diluted bleach accelerates aging—especially in warm, humid environments. Stick to vinyl-safe disinfectants like hydrogen peroxide-based sprays.
Will super glue work instead of seam sealer?
Never. Cyanoacrylate (super glue) creates a rigid bond that cracks under bathroom floor flexing and temperature swings. It also yellows visibly and can’t withstand humidity. Use only solvent-based or acrylic seam sealers formulated for resilient flooring.
How long does the patch last?
A properly executed patch on dry, stable subfloor lasts 5–7 years—often the remainder of the floor’s service life. But if moisture remains unaddressed, expect repeat tearing within 6–12 months. The U.S. EPA estimates that 14% of household water usage is from leaks—many hidden under floors.
Do I need to replace the whole floor?
Not unless the tear is part of a larger pattern: multiple random splits, buckling across seams, or lifting at every joint. Those signal systemic failure—likely due to vapor drive from unsealed concrete or incompatible underlayment. In that case, see vinyl floor replacement cost breakdown.
Can I patch luxury vinyl plank (LVP)?
Yes—but only if it’s glue-down LVP. Click-lock LVP cannot be patched without removing and reinstalling the entire plank. For click systems, replacement is faster and more reliable than trying to conceal a patch seam.
What if the tear is right under the toilet?
Shut off water, disconnect supply line, and carefully lift the toilet using a helper. Place folded towels under the base to protect the floor while you repair. Re-caulk the toilet base with 100% silicone after reseating—never use plumber’s putty, which dries out and cracks.
A well-executed vinyl floor repair in the bathroom buys time—but only if moisture control comes first. Patching without fixing the leak, ventilation, or subfloor condition is like bandaging a wound while ignoring infection. Take the extra hour to check behind the wall tiles and under the vanity. That small effort often prevents a $2,000 subfloor rebuild down the road.