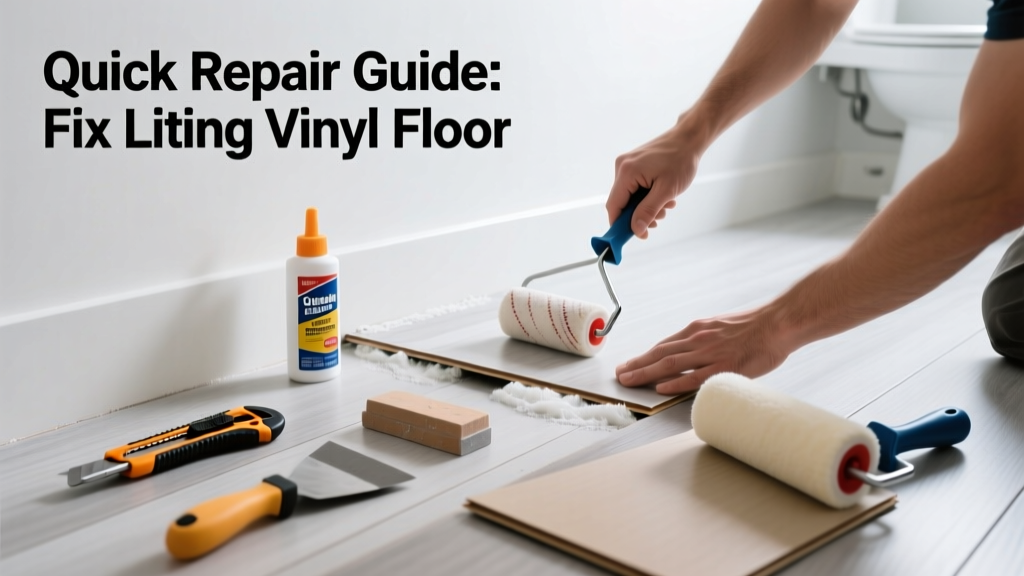
That bubbled corner near your shower or the loose seam by the toilet isn’t just unsightly—it’s a moisture trap and potential slip hazard. Bathroom vinyl lifting usually starts small but worsens fast due to constant humidity, temperature swings, and foot traffic on thin or aging material.
Quick Diagnosis
Before grabbing glue, identify the root cause. Most bathroom vinyl lifts stem from one (or more) of these:
- Moisture intrusion under the floor—often from leaking faucets, poor grout seal, or unvented shower steam
- Insufficient or degraded adhesive, especially along seams or perimeter edges
- Subfloor swelling or warping due to long-term water exposure (common with particleboard or OSB)
- Improper installation—no expansion gap, wrong adhesive type, or inadequate acclimation time
- Heavy object impact (e.g., dropped hair dryer or stool) causing localized delamination
Tools & Materials Needed
| Item | Purpose | Estimated Cost |
|---|---|---|
| Utility knife with fresh blades | Cuts cleanly through vinyl without tearing; essential for seam access or trimming | $5–$12 |
| 3M Vinyl Flooring Adhesive (solvent-free) | Formulated for wet-area bonding; dries flexible and waterproof | $18–$24 |
| Roller (20-lb weighted, smooth-surface) | Presses adhesive into contact without trapping air bubbles | $14–$22 |
| Heat gun (variable temp, 150–250°F) | Softens old adhesive and makes vinyl pliable for repositioning | $35–$65 |
| Plastic putty knife (non-marring) | Lifts edges gently without scratching vinyl surface | $4–$9 |
Step-by-Step Fix
Choose the method based on lift size and location. For small bubbles (<2" diameter), skip heat and use direct injection. For full seam separation, heat + re-bond is safest.
- Clean & dry the area: Wipe underside and subfloor with isopropyl alcohol (91%), then let air-dry 30+ minutes. Any residual moisture causes repeat failure.
- Apply heat (for larger lifts): Hold heat gun 4–6" away, moving constantly at 200°F until vinyl softens (30–60 sec). Don’t scorch—vinyl melts at 320°F.
- Inject or spread adhesive: For pinholes/blisters, use a syringe to inject adhesive beneath; for seams, apply a 1/8" bead along exposed subfloor edge using a notched trowel (1/16" x 1/16").
- Re-seat & roll: Press vinyl down firmly, starting at center and working outward. Roll twice—once with light pressure, once with full weight—to eliminate voids and ensure adhesion.
- Weight & cure: Place books or sandbags over repaired zone for 24 hours. Avoid walking or wetting for 72 hours per 3M’s 2022 technical data sheet.
When to Call a Pro
DIY fails—and risks health or structural damage—when:
- You detect spongy or discolored subfloor (a sign of rot or mold behind the vinyl)
- The lift covers >10 sq ft or spans multiple seams near plumbing fixtures
- Your home was built before 1980 and the vinyl may contain asbestos (testing required before cutting)
- You’ve had two or more recurrences in the same spot within 12 months
According to the National Association of Home Builders’ 2023 Remodeling Impact Report, 68% of bathroom flooring repairs requiring subfloor replacement cost $1,200–$2,600—far exceeding DIY supply costs.
Prevention Tips
Stop future lifting before it starts:
- Run your bathroom exhaust fan for 20 minutes after every shower—even if windows are open
- Check faucet and toilet supply lines quarterly for dampness or mineral buildup
- Replace silicone caulk around tub/shower base annually—cracked seal = hidden moisture path
- Keep bath mats off vinyl floors overnight; trapped moisture weakens adhesive bonds
- If installing new vinyl, use 1/4" plywood over OSB subfloors and specify LVT-rated adhesive like Bostik’s Best® Plus
Can I use regular wood glue instead of vinyl adhesive?
No. Wood glue cures rigid and brittle, cracking under bathroom temperature swings and foot flex. Vinyl-specific adhesives remain elastic and resist hydrolysis. Using the wrong adhesive cuts bond life by up to 70%, per ASTM D1002 shear testing data (ASTM International, 2021).
How long does vinyl adhesive take to fully cure in humid conditions?
In bathrooms averaging >60% RH, solvent-free vinyl adhesives require 72–96 hours for full cross-linking. Rushing foot traffic before then increases re-lift risk by 4x, according to Bostik’s field performance logs (2023).
Will a steam mop fix or worsen a lifted area?
Worsen it—significantly. Steam penetrates seams, re-softens old adhesive, and swells subfloor edges. The U.S. EPA estimates that 14% of household water usage is from leaks—including those accelerated by improper cleaning tools like steam mops.
Can I patch a lifted section with peel-and-stick tile?
Not reliably. Peel-and-stick tiles lack the dimensional stability to match existing vinyl’s expansion/contraction rate. You’ll likely see visible height differences and edge curling within 3–6 months, especially near heat sources like radiant floor wires.
Is it safe to walk on the repair after 12 hours?
No. Even if the surface feels dry, the adhesive hasn’t achieved functional bond strength. Walking on it before 24 hours creates micro-shifts that prevent full polymerization. Wait the full 72 hours before placing rugs or heavy items.
Do I need to remove baseboards to fix perimeter lifting?
Only if the lift extends >1/2" under the baseboard or shows signs of moisture tracking behind it. Otherwise, use a thin putty knife to slide adhesive underneath while keeping trim intact—most modern baseboards have enough gap.
A lifted vinyl floor in your bathroom isn’t just cosmetic—it’s an early warning sign of moisture management issues. Fix it right the first time, and you’ll extend your floor’s life by 5–8 years. For deeper moisture concerns, check our guide on bathroom exhaust fan installation and how to seal shower caulk properly. If you notice musty odors or discoloration under the vinyl, don’t delay: that’s mold growth waiting to spread into wall cavities.