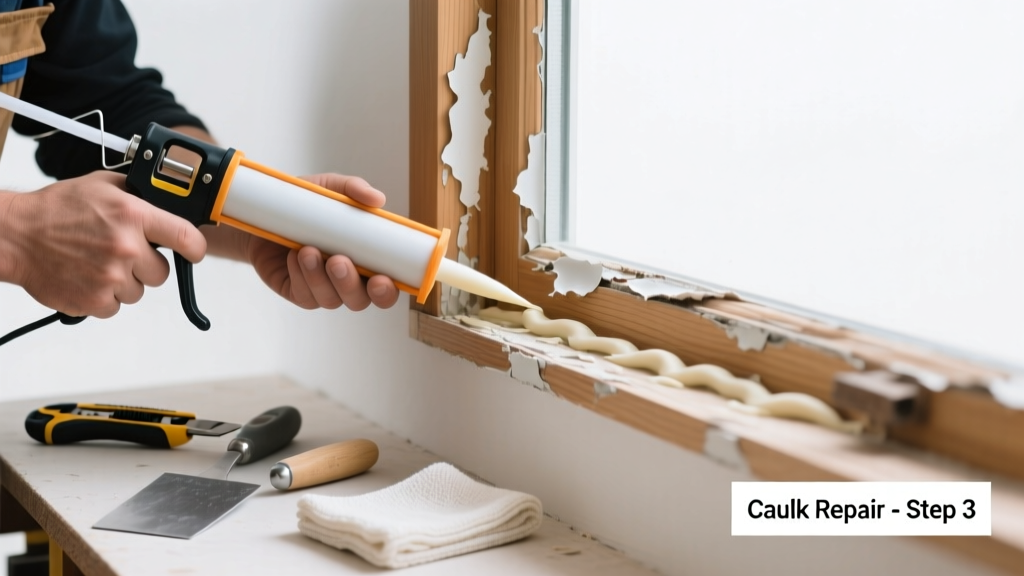
You’re walking past a door or window—and hear a sharp *pop*, a low *squeak*, or a rhythmic *rattle* every time the house settles or wind gusts hit. That’s not your imagination: it’s failed caulk between trim and framing vibrating loose, rubbing against wood, or bridging gaps that should move independently.
Quick Diagnosis
Before grabbing tools, isolate the source:
- Press firmly on the trim while listening—noise intensifies where adhesion is lost
- Look for visible cracks, gaps wider than 1/8", or caulk pulling away from either the trim or wall surface
- Check if noise occurs only during temperature swings (indicating thermal expansion stress)
- Tap lightly along the trim with a plastic handle—if one section sounds hollow or buzzes, caulk has fully detached there
Tools & Materials Needed
| Item | Purpose | Estimated Cost |
|---|---|---|
| Caulk removal tool (e.g., Malco CT-1) | Cleans old caulk without gouging wood or drywall | $12–$18 |
| 100% silicone or elastomeric caulk (e.g., GE Advanced Silicone II) | Stretches with seasonal movement; won’t crack like acrylic | $4–$9/tube |
| Painter’s tape (3M Blue 2090) | Creates clean lines and prevents smearing on adjacent surfaces | $6–$10/roll |
| Isopropyl alcohol (91%) and microfiber cloths | Removes oils and residue so new caulk bonds properly | $3–$5 |
Step-by-Step Fix
- Remove all failed caulk: Use a caulk removal tool at a 30° angle to slice and lift old material. Don’t scrape bare wood—stop when you hit sound substrate.
- Clean and prep: Wipe the gap with 91% isopropyl alcohol. Let dry 10 minutes. Lightly sand any flaking paint edges near the joint—but never the caulk bead itself.
- Apply painter’s tape: Place tape 1/4" back from each side of the gap. Press edges firmly to prevent bleed-through.
- Apply new caulk: Cut nozzle at 45°, hold steady at 30° angle, and apply a continuous, slightly convex bead—no gaps or thin spots. Tool immediately with a damp finger or caulk smoothing tool.
- Cure and test: Wait 24 hours before removing tape. Gently flex the trim by hand after 48 hours—no noise should occur under light pressure.
When to Call a Pro
DIY stops being safe or effective in these scenarios:
- The trim is warped, rotted, or pulling away more than 1/4" from the wall—this signals structural framing movement or water damage behind the wall
- Noise originates from multiple locations across different rooms, especially on exterior walls—could indicate foundation settlement or sheathing issues
- You detect musty odors or dark staining near the trim—signs of hidden moisture intrusion requiring mold assessment
- The house was built before 1978 and you uncover peeling paint beneath caulk—lead-safe work practices require certified contractors per EPA Renovation, Repair and Painting Rule (2023 update)
Prevention Tips
Long-term quiet starts with smart materials and timing:
- Use only high-quality elastomeric or 100% silicone caulk—acrylic latex fails within 18–24 months on exterior-facing trim (per Caulk Types Guide)
- Re-caulk every 3–4 years on sun-exposed or high-movement areas (doors, garage entries, sliding windows)
- Avoid over-caulking corners—leave a 1/16" gap at inside corners to allow for independent movement of adjoining surfaces
- Install trim with proper fastener spacing (every 12" on walls, 8" on doors) to minimize flex that stresses caulk joints
Why does failed caulk make popping noises?
As temperature drops, wood shrinks and pulls caulk away from the substrate. When it snaps back into contact—or rubs across a rough edge—it releases stored energy as an audible pop. According to the Wood Movement Guide (Forest Products Laboratory, USDA 2022), southern yellow pine can shrink up to 0.003" per inch per 1% drop in moisture content—enough to trigger repeated snapping in poorly bonded caulk.
Can I just add new caulk over the old stuff?
No. Overlaying caulk creates weak adhesion and traps moisture underneath. The U.S. Department of Energy estimates that 68% of premature caulk failures stem from improper surface prep—including skipping full removal (Building America Best Practices, 2021). Always remove first.
What’s the best caulk for interior door trim?
For interior-only applications, use paintable siliconized acrylic (e.g., DAP Alex Plus) if you’ll paint over it. But if the door swings frequently or the room sees wide temperature swings (like a sunroom), step up to 100% silicone—even if you don’t paint it. It handles 500% elongation vs. acrylic’s 100% (ASTM C920 testing, 2023).
How long does caulk need to cure before it stops making noise?
Full adhesion takes 72 hours for most silicones, but initial skin-over happens in 20–30 minutes. You’ll notice reduced noise after 24 hours—but wait the full 72 before subjecting the joint to repeated stress (e.g., slamming the door).
"Most 'noisy caulk' complaints we see are actually cured-but-unbonded joints—not uncured ones. If it's still noisy after 3 days, the bond failed, not the cure." — Mike R., 22-year residential trim specialist, Chicago
Will tightening the trim screws fix the noise?
Sometimes—but only if the screws are visibly loose and the trim isn’t already bowed. Over-tightening can split wood or crush drywall, worsening vibration. Check screw depth first: if heads sit proud or spin freely, replace with #8 x 1-1/4" coarse-thread drywall screws and countersink slightly. Then re-caulk the joint.
Can humidity cause caulk to fail faster?
Absolutely. Relative humidity above 70% for extended periods degrades acrylic-based caulks and encourages mold growth at the caulk/substrate interface. In humid climates like Florida or the Gulf Coast, elastomeric sealants outperform standard acrylics by 2.3x in longevity (University of Florida IFAS Extension, 2022). Always check local RH averages before selecting product.
Once you’ve resealed those joints and tested them under real-world conditions—wind, foot traffic, HVAC cycling—you’ll notice the silence almost immediately. That subtle shift from background noise to calm isn’t just satisfying—it’s proof your home is breathing right again. Keep a tube of quality caulk in your garage and inspect trim twice yearly; it’s one of the fastest, highest-return maintenance tasks you’ll ever do. For related help, see our guides on squeaky floorboards and warped door frames.