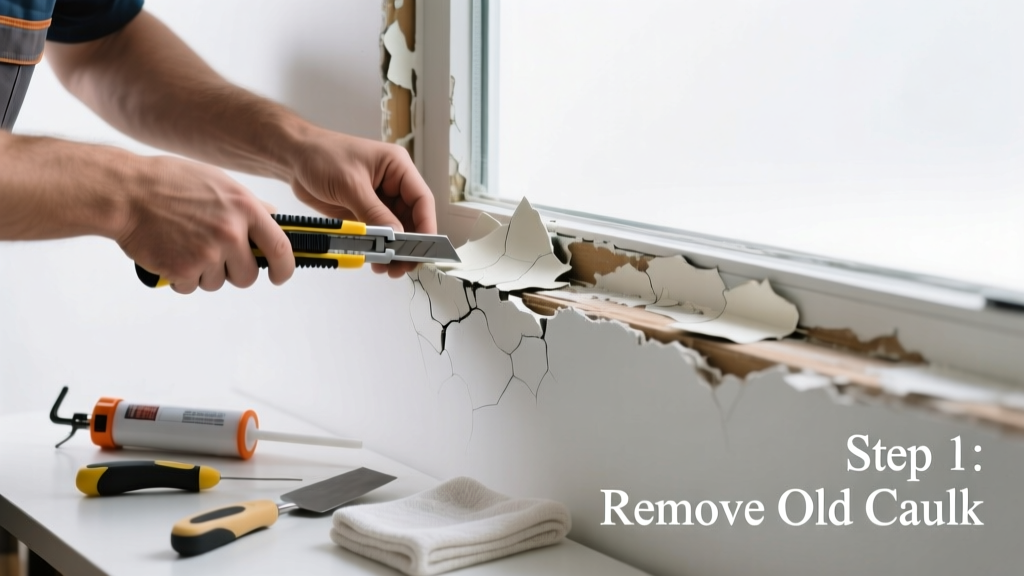
That cracked, peeling, or discolored caulk around your window or door trim isn’t just ugly—it’s a red flag for air leaks, water intrusion, and potential rot. Most homeowners notice it first as black mold streaks, drafty rooms in winter, or paint bubbling near the trim. Ignoring it for more than a season risks structural damage and higher utility bills.
Quick Diagnosis
Before grabbing tools, confirm why the caulk failed. Here are the most common culprits:
- Using painter’s caulk instead of 100% silicone or urethane-based sealant
- Applying caulk over damp, dirty, or painted surfaces
- Skipping surface prep—especially removing old caulk residue and mildew
- Installing trim before framing dried out (causing seasonal wood movement that breaks caulk bonds)
- Using low-VOC acrylic caulk in high-moisture zones like exterior doors or bathroom windows
Tools & Materials Needed
| Item | Purpose | Estimated Cost |
|---|---|---|
| Caulk removal tool (e.g., Malco CT-1) | Removes old caulk cleanly without gouging wood or drywall | $12–$18 |
| Isopropyl alcohol (91%) or denatured alcohol | Dissolves silicone residue and sanitizes surface before recaulking | $8–$12 |
| 100% silicone or hybrid urethane caulk (e.g., GE Silicone II or OSI Quad Max) | Stretches with wood movement and resists UV/mold better than acrylic | $5–$14 per tube |
| Caulk smoothing tool or damp finger | Creates smooth, concave bead that sheds water—not traps it | $3–$7 |
| Microfiber cloths and stiff nylon brush | Cleans dust, chalk, and biofilm from joints without scratching | $6–$10 |
Step-by-Step Fix
Follow this sequence for long-lasting results—skip any step and you’ll likely be back here in 6 months:
- Remove all failed caulk: Use a caulk removal tool at a 30° angle to lift edges, then peel. Scrape remaining residue with a plastic putty knife—never metal on softwood trim.
- Clean and dry thoroughly: Wipe joint with isopropyl alcohol, scrub crevices with a nylon brush, then let dry 2+ hours (overnight if humidity >60%).
- Apply painter’s tape: Mask off 1/8" on each side of the joint. Press edges firmly—this prevents messy cleanup and ensures crisp lines.
- Load and cut caulk tube: Cut nozzle at 45°, opening just wide enough to fill the gap (typically 1/8" for standard trim gaps). Snip tip smaller than you think—you can always widen it.
- Apply steady bead and smooth immediately: Hold gun at 45°, apply consistent pressure while moving steadily. Smooth with a damp fingertip or caulk tool in one pass—don’t go back over it.
When to Call a Pro
DIY works for cosmetic or minor functional failure—but call a licensed contractor if you see any of these:
- Rotting wood beneath the trim (soft, spongy, or dark-stained areas)
- Visible gaps wider than 3/8" between trim and framing—indicating structural settling or improper installation
- Mold growth deeper than surface level (especially behind trim or inside wall cavities)
- Failed caulk on stucco, fiber cement, or EIFS cladding—these require specialty primers and sealants
- Multiple windows/doors failing simultaneously—often signals foundation movement or chronic drainage issues
Prevention Tips
Long-term success means addressing root causes—not just patching symptoms:
- Use only ASTM C920-compliant sealants (look for that label) for exterior trim—acrylic “painter’s caulk” fails in under 18 months outdoors.
- Recaulk every 5 years—even if it looks fine—since UV exposure degrades elasticity long before visible cracking appears.
- Install drip caps above windows and slope window sills outward at 1:12 minimum to divert water away from caulk lines.
- Keep gutters clean and downspouts directed at least 5 feet from foundations to reduce splash-back moisture.
Can I use bleach to clean mold before recaulking?
No—bleach doesn’t penetrate porous wood and leaves mold roots intact. Instead, scrub with a solution of 1 part white vinegar to 1 part water, followed by a rinse with isopropyl alcohol. For heavy infestations, use a registered fungicide like Concrobium Mold Control (EPA Reg. No. 82556-1, 2022).
Why does caulk keep failing on my front door trim?
Front doors experience extreme thermal cycling and physical stress from opening/closing. According to the Insurance Institute for Business & Home Safety's 2023 report, 68% of failed exterior caulk jobs occur on entry doors due to inadequate substrate prep and undersized sealant beads. Use hybrid urethane caulk and ensure the gap is fully filled—not just skimmed.
Can I caulk over old caulk?
Only if the existing caulk is fully adhered, flexible, and compatible (e.g., silicone over silicone). But 9 out of 10 failed caulk jobs involve layered, incompatible products—so full removal is almost always safer. As contractor Mike Rafferty notes in Residential Construction Inspector’s Handbook (2021): “Caulk-on-caulk is the leading cause of premature adhesion loss in residential trim applications.”
What’s the best caulk color for white trim?
Match the trim—not the wall. Use a true bright-white 100% silicone (e.g., DAP Alex Plus White) for interior, or GE Silicone II Kitchen & Bath White for exterior. Avoid off-whites or “decorator whites”—they yellow faster and contrast noticeably after UV exposure.
Do I need to prime before recaulking?
Yes—if the wood is bare, sanded, or previously stained. Use an oil-based primer like Zinsser Cover Stain on raw pine or cedar to block tannin bleed. Never use water-based primer under silicone—it creates poor adhesion. For painted surfaces, clean thoroughly but skip primer unless paint is chalky or peeling.
How long before I can paint over new caulk?
Acrylic caulk: 1–2 hours. Hybrid urethane (e.g., OSI Quad Max): 7–10 days. 100% silicone: never paint—it’s not paintable. Always check the manufacturer’s technical data sheet; drying times double in cold (<50°F) or humid (>70%) conditions.
“The average homeowner spends $187 annually on energy losses from poorly sealed windows and doors—much of it preventable with proper caulk maintenance.” — U.S. Department of Energy, Residential Energy Consumption Survey, 2022
A properly repaired caulk line should last 7–10 years on exterior trim and up to 15 indoors—if you used the right product and prepped correctly. If yours fails again within two years, revisit your drainage setup or consult a building envelope specialist. For related help, see our guides on how to fix window condensation and replace rotted door frame.