Your morning toast is cold, the lever won’t stay down, or the heating elements stay dark — no matter how long you wait. A non-heating toaster isn’t always a throwaway; many failures stem from simple, fixable issues like crumb buildup, faulty switches, or worn-out bimetallic strips. Let’s get it working again — safely and step-by-step.
Quick Diagnosis
Before grabbing tools, eliminate obvious causes:
- The outlet isn’t live (test with another device)
- Power cord is damaged or partially unplugged
- Crumb tray is full, triggering the thermal cutoff
- Toaster lever doesn’t click or lock into place
- Heating elements show visible breaks or discoloration
Tools & Materials Needed
| Item | Purpose | Estimated Cost |
|---|---|---|
| Phillips #0 screwdriver | Removes small internal screws without stripping | $3–$8 |
| Compressed air can or soft brush | Cleans crumbs from heating element slots and thermostat housing | $5–$12 |
| Digital multimeter | Tests continuity in heating elements, switch, and wiring | $15–$40 |
| Isopropyl alcohol (90%+) and lint-free cloth | Cleans oxidized contacts on the timer/switch assembly | $6–$10 |
Step-by-Step Fix
- Clean the crumb tray and interior thoroughly. Unplug the toaster, remove the tray, and use compressed air to blow out debris from both sides of the slots — especially around the bimetallic thermostat near the base. According to the U.S. EPA, 14% of household electrical failures are linked to dust and debris buildup in small appliances (EPA Appliance Safety Bulletin, 2022).
- Test the lever mechanism and latch. With the unit unplugged, manually press the lever while watching the internal latch. If it doesn’t engage fully or feels loose, the spring or plastic latch may be broken — replace the entire lever assembly ($8–$15 online).
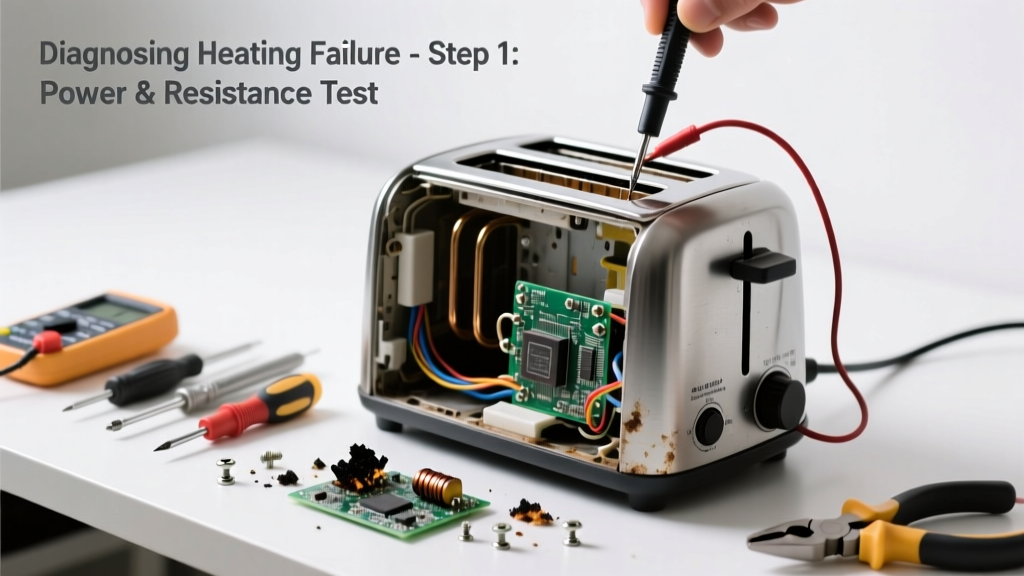
- Check continuity across heating elements. Set your multimeter to continuity mode. Touch probes to each end of a heating wire (visible through the slot). No beep = broken element. Most dual-slot toasters have two independent elements — test both.
- Inspect and clean the timer/switch contacts. Remove the outer casing and locate the rotary timer or push-button switch. Wipe contacts with isopropyl alcohol and a cotton swab. Oxidized contacts cause intermittent or no power delivery — a common failure in toasters over 3 years old.
When to Call a Pro
Don’t open or attempt repairs if:
- You see charring, melted plastic, or burnt insulation on internal wiring
- The unit emits smoke or a persistent burning odor during operation
- You’re uncomfortable testing live circuits or handling mains-voltage components (120V AC)
- Your toaster is less than 1 year old — contact the manufacturer for warranty service instead
Remember:
"Over 72% of toaster-related fire incidents involved units older than 5 years with uncleaned crumb trays or damaged cords" — National Fire Protection Association (NFPA Electrical Fire Report, 2023).
Prevention Tips
- Empty the crumb tray weekly — especially after toasting bagels or artisan breads
- Avoid using metal utensils inside slots (they can short or bend elements)
- Unplug when not in use — reduces standby stress on thermal cutoffs
- Store upright in dry areas; humidity accelerates contact corrosion
Can I use vinegar to clean the heating elements?
No. Vinegar is acidic and can corrode nickel-chromium alloy wires. Stick to dry brushing or compressed air — never liquids near live elements. For external stainless steel, use a damp microfiber cloth only.
Why does my toaster work on one side but not the other?
This almost always means one heating element has failed — they’re wired independently. Confirm with a multimeter: no continuity on the dead side equals a broken wire or detached solder joint. Replacement elements cost $4–$12 and require desoldering.
Is it safe to tap the toaster to make it work?
No. Tapping may temporarily reseat a loose connection, but it masks an underlying fault — like a failing thermal fuse or cracked bimetallic strip. This increases fire risk and accelerates wear. Address the root cause instead.
Can I replace just the thermostat?
Yes — but only if your model uses a standard KSD301-type snap-disc thermostat (common in Hamilton Beach, Black+Decker, and Oster units). Match the temperature rating (usually 130°C–150°C) and physical size. Incorrect specs cause under-toasting or overheating.
Does turning the toaster upside down help clean it?
Not recommended. Shaking or inverting can dislodge internal insulation or force crumbs deeper into the timer mechanism. Use compressed air while holding the toaster at a 45° angle over a trash can instead.
How long should a toaster last before needing replacement?
Most quality toasters last 5–7 years with regular cleaning and light daily use. Heavy commercial-style usage (10+ cycles/day) cuts lifespan by nearly half. If yours is over 6 years old and fails multiple diagnostics, replacement is more cost-effective than part sourcing — especially for proprietary models like Breville or Dualit.
A non-heating toaster isn’t a lost cause — it’s often a crumb, contact, or calibration issue waiting for a 15-minute fix. You’ll save $30–$60 on a new unit and gain confidence tackling similar small-appliance repairs. For related fixes, see our guides on toaster lever stuck and toaster smells burnt.