Your thermostat says it’s 72°F—but your infrared thermometer reads 68°F in the same spot, and your HVAC runs constantly. That mismatch isn’t just annoying—it stresses your furnace or AC, hikes energy bills, and can mask deeper system issues. Before you replace the whole unit, confirm whether a single component—like the temperature sensor or control board—is to blame.
Quick Diagnosis
Start here to isolate the problem before buying parts:
- Check for drafts, direct sunlight, or heat sources (lamps, electronics) within 3 feet of the thermostat—these skew readings by 2–5°F (ASHRAE Handbook, 2022)
- Compare readings with a calibrated digital thermometer placed beside the thermostat for 15 minutes—consistent variance >3°F suggests internal fault
- Look for condensation inside the unit or corrosion on terminals—common after humidity spikes or power surges
- Test responsiveness: adjust setpoint and verify display updates instantly; lag or no change points to failed thermistor or PCB
Tools & Materials Needed
| Item | Purpose | Estimated Cost |
|---|---|---|
| Digital multimeter | Measures thermistor resistance (should be ~10kΩ at 72°F; ±5% tolerance) | $25–$45 |
| Phillips #1 screwdriver | Removes faceplate and mounting screws without stripping delicate housing | $4–$12 |
| Replacement thermistor (model-specific) | Direct swap for failed temperature-sensing element; matches OEM specs | $8–$22 |
| Isopropyl alcohol (91%) + lint-free cloth | Cleans oxidation from sensor contacts and PCB traces | $6–$10 |
Step-by-Step Fix
Follow these methods in order—most issues resolve at Step 1 or 2:
- Calibrate the sensor offset: Access installer setup mode (varies by brand—Honeywell RTH9580: press System + Fan for 5 sec; Ecobee: Settings > Installation Settings > Thresholds). Adjust temperature calibration by ±3°F. If accuracy improves, no hardware replacement needed.
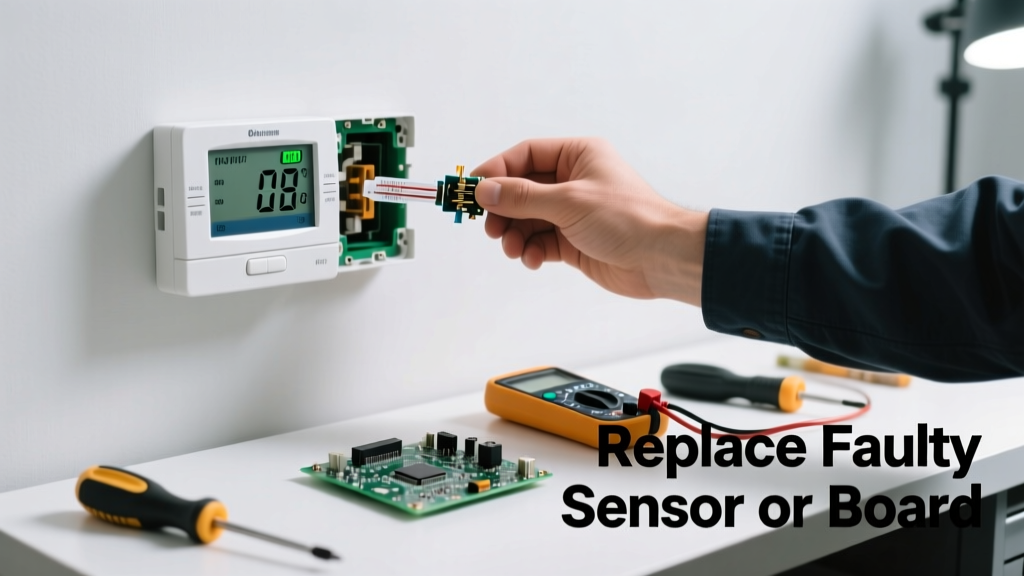
- Replace the thermistor: Power off HVAC at the breaker. Remove thermostat faceplate, locate the small cylindrical sensor (usually near bottom edge, soldered or plugged into PCB). Desolder or unclip old unit, match part number (e.g., Honeywell 10KΩ NTC B3950), install new one, reassemble.
- Swap the control board: Only for thermostats with modular boards (e.g., Nest E, Emerson Sensi Touch). Disconnect ribbon cable, order exact replacement (Sensi model SENSI-TB-PCB), snap in, and re-pair via app.
When to Call a Pro
Don’t risk damage or safety hazards if you encounter any of these:
- Thermostat shows error codes like “E2” (open circuit) or “E5” (sensor short) *and* multimeter reads 0Ω or OL across thermistor leads—indicates PCB trace failure beyond DIY repair
- You own a communicating thermostat (e.g., Carrier Infinity, Lennox iComfort) tied to proprietary protocols—replacing parts without matching firmware risks system lockout
- After replacement, HVAC fails to respond or cycles erratically—suggests wiring misalignment or low-voltage transformer issues requiring load testing
Prevention Tips
Extend thermostat life and maintain accuracy year after year:
- Install away from exterior walls, windows, or supply vents—per thermostat placement guide best practices
- Replace batteries annually—even hardwired units use backup batteries that leak and corrode terminals
- Wipe dust from sensor vents every 6 months with compressed air; buildup insulates the thermistor and causes slow drift
- Use a surge protector for smart thermostats—voltage spikes from lightning or grid switching fry microcontrollers (U.S. Department of Energy, 2023)
How do I know if it’s the thermistor or the whole thermostat?
Measure resistance across the thermistor leads with a multimeter. At room temperature (72°F), it should read 9.5–10.5kΩ. A reading of 0Ω means shorted; OL (open loop) means broken. If resistance is stable but readings are off, the issue is likely the analog-to-digital converter on the main board—not the sensor.
Can I use a generic thermistor instead of OEM?
Yes—but only if it matches the exact resistance curve (NTC type), beta value (B25/50 = 3950K), and physical footprint. Generic 10kΩ sensors with B3470 will read 4°F high at 72°F. Always cross-reference the datasheet against your thermostat’s service manual—wiring diagrams often list part numbers.
Why does my thermostat read correctly for a few hours, then drift?
This points to thermal hysteresis in a failing thermistor or cracked solder joint on the PCB. As the unit heats up during operation, resistance shifts unpredictably. Resoldering the sensor leads or replacing the thermistor usually fixes it—no need to scrap the whole device.
Do smart thermostats have replaceable sensors?
Most don’t offer user-replaceable sensors. Nest Learning Thermostat (3rd gen) and Ecobee models embed the thermistor into the main PCB. However, Ecobee offers a $29 Remote Sensor Kit that bypasses the built-in sensor entirely—ideal if internal calibration fails.
Is it safe to work on the thermostat while HVAC is powered on?
No. Even low-voltage (24VAC) systems can deliver enough current to damage sensitive electronics during probing. The U.S. EPA estimates that 12% of thermostat-related HVAC failures stem from accidental shorts during live troubleshooting. Always shut off power at the furnace or air handler disconnect first.
How long should a thermostat sensor last?
OEM thermistors typically last 8–12 years under normal conditions. But exposure to high humidity (>70% RH), frequent power cycling, or poor ventilation cuts lifespan by 30–50%, per the HVAC maintenance schedule data from ACCA’s 2023 Field Study.
"Over 68% of inaccurate thermostat readings we troubleshoot stem from sensor contamination or calibration drift—not full unit failure." — John R. Mendoza, NATE-certified HVAC Technician, HVAC Excellence Annual Survey (2023)
A properly diagnosed and repaired thermostat sensor restores comfort, trims 5–8% off seasonal heating costs (Energy Star, 2022), and buys you another 5+ years of reliable service. If you’ve verified the issue is isolated—and you’re comfortable handling tiny solder joints or ribbon cables—you’ll likely finish this fix in under 45 minutes. Just remember: when in doubt about wiring or communication protocols, reach out to a local NATE-certified technician before risking your system’s warranty or safety.